Pork Belly Roast – In a Pan

Pork Belly Roast - In a Panphoto:  Colin Gould

Today, a guest post from Colin Gould, who blogs (occasionally) at ColsRamble.

Given my inability to cook an oven roast without burning myself at least once, the last time I picked up a boneless leg of lamb I experimented with cooking it slowly in a frying pan like a giant steak and, to my surprise, got a great result.

Foolishly I posted this success on Facebook only to be challenged by Alex to do the same and end up with pork crackling… so here I am; challenge accepted and the result was, again quite surprisingly, really good.

As a cheap arse who hates using an electric oven when my solar panels could be cranking that power back into the grid, cooking a roast on my gas hob in an easy to clean frying pan makes a lot of sense and is dead easy (despite the wordy description that follows).

You’ll need ~700g pork belly, a heavy base frying pan with fitting lid – large enough to accommodate the pork belly, a couple of seasonal apples (I used Fujis), some fresh sage, salt and pepper.

Cooking the meat and rendering the fat

I took the pork belly, scored the skin with a sharp knife and then scorched it with a jug of boiling water. I don’t know if the scorching bit is really necessary, I’ve just always done it when doing normal roast pork.

The belly is then patted dry with paper towel and rubbed with olive oil. The skin side is then well salted.

To cook the meat, heat the frying pan over a medium heat with a little more olive oil until hot, but not smoking, then place the pork belly in skin side down. It should sizzle.

Now you can season the exposed flesh side of the belly in the pan with more salt and some ground black pepper, and pile on a good handful of fresh sage leaves.

Once done, place the lid on the pan and turn the heat down to low, then go and find something else to do for an hour or so*. The meat is essentially being part roasted and part steamed in its own juices so avoid removing the lid. You’ll know if the pan is at about the right temperature if a) there is a gorgeous smell of sage and pork filling the house with no hint of burning, and b) the lid is too hot to touch.

Apple and Sage medley

Remove the cooked meat from the pan and set aside. The pan should have a healthy layer of rendered pork fat and juices in it. Turn the heat up again to a medium/high and throw in some diced apple and the chopped sage leaves from the meat. Cook until the apple softens – there should be enough seasoning in the pan juices but add more if you think it’s needed. A splash of apple cider vinegar might go well at this point.

Remove the cooked apple and sage, avoiding as much of the oil as possible, and set aside for serving.

Crackling

Drain any remaining oil/juice in the pan and, like a giant slab of bacon, stick the pork belly back in the hot pan skin side down and let it sizzle. It should only take a few minutes to develop a nice even crackling. If it’s spitting and popping then it’s probably too hot. A better result is achieved with a lower heat over a longer time.

Once an even crackling is achieved, flip the belly over with tongs and sear quickly on the other sides so they also get a little colour.

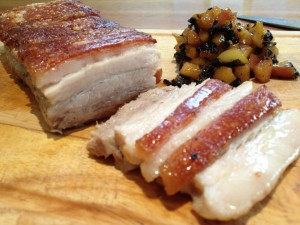
That’s it. Slice the pork belly along the scoring lines, or remove the crackling to cut the flesh and break it up separately. Then serve on warm plates with the apple and what ever else floats your boat. The night I cooked this I served it with a quick cannellini bean mash and some (microwave) steamed carrots. If you’re looking for an accompanying drink on a warm spring evening, then we’ve just been trying Oxenberry White Grapple Cider from McLaren Vale, which, although a little sweet for my taste, might just fit the bill.

Enjoy!

*I think I cooked for about 1 hour and 15 minutes, but only really know that I ignored the 45 minute timer. The good thing about this meat is it’s got a high fat content and using this method keeps moisture in the pan so chances of overcooking and drying out are pretty slim.

Pork Fillet with Fennel and Apple Salad

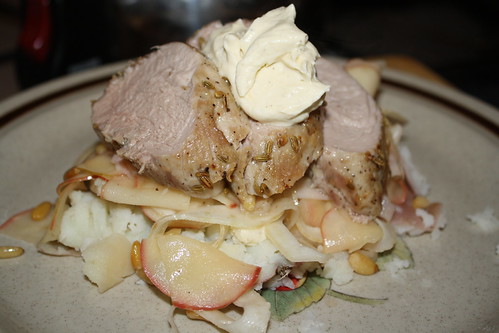
Pork Fillet with Apples, Fennel & Creamed Feta

My previously blogged easy pork fillet recipe has been a popular page over the last month so let’s revisit this excellent cut of meat but cook it in a slightly different way.

This is another recipe I’ve had on my to do list for a couple of years, and it comes from the website of the UK version of Delicious. The choice was actually driven by the fact that I’d picked up a bulb of fennel for just 99c and so I was looking for a way to use it.

I love fennel when it’s handled as little as possible so the light warm salad that accompanies the pork fillet in this dish is a perfect way to showcase the vegetable. This was very much a recipe where the finished product is much greater than the sum of its parts, and it’s also a lot more sophisticated (in both appearance and taste) than it is work to put together.

We had a piece of pork fillet that was about 400g (yes, the original recipe says that will serve 4 – this served 2 + a toddler – perhaps our toddler eats a lot …). Leave the meat in one piece but trim off any sinew. In a bowl mix a small amount of olive oil with one fat, finely chopped clove of garlic and 2 tsp of fennel seeds. Season and add the pork fillet. Ensure the pork is well coated in the mix. I see no reason why you couldn’t do this in advance, but there’s no need to leave the meat marinating.

Heat a little oil in a frying pan and sear the pork on all sides (remember – the pan should be good and hot and no prodding and poking of the meat – it will come away from the pan, even if it’s not a non stick pan, when it’s good and ready). Transfer the pork to a small roasting dish and cook in an oven preheated to 200°C fan. I cooked the pork for 20 minutes, followed by 10 minutes resting time and it was almost spot on (if anything it was a touch over).

While the pork is cooking in the oven, wipe out the frying pan and prepare the salad. Using a mandolin (or slice finely) slice half a medium sized bulb of fennel, and then finely slice a small red apple (you want the red skin so it looks pretty!).

Toast a handful of pine nuts in a separate pan and mix them with the apple and fennel.  Drizzle over some olive oil and lemon juice and add the mix to the pan you used for the pork.  Warm over a gentle heat.

Finally make some creamed feta.  Use 100g of feta (buy Australian!) and begin with 2 tbsp of cream.  Because I used thick pure cream I actually had to add more.  Season and whizzy up in a small food processor or using a stab mixer.  Ideally you want it to be quite loose so you may want to add some milk if your cream is too thick.

To serve, I boiled some potatoes, crushed them on warm plates, spooned over some creamed feta, topped with the apple and fennel mix and finish with the pork, with a bit more creamed feta.

This was absolutely delicious.  The fennel seeds on the pork complemented the fennel in the salad and there was a good balance of flavours and textures (from a texture point of view it’s very important not to overdo the salad – you want it softened and warm but still with a bit of bite).

Definitely a recipe we’ll be using again and again.

Apple Crumble

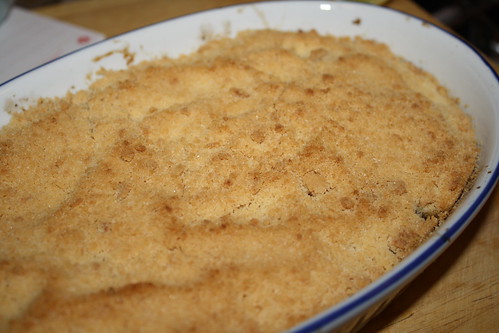
Apple Crumble & Custard

While Spring is technically just around the corner here in Adelaide it’s still really cold. After a pleasant couple of days early this week Thursday and Friday are still looking chilly so it’s not too late to think about making an apple crumble.

This is the easiest of desserts to make. For the two of us, and using a small pie dish, I peeled and quite coarsely sliced 2 Granny Smith apples – let’s say I cut them into eighths. I put them in a pan on low heat, with a splash of water, a scant tablespoon of caster sugar and half a cinnamon stick. I then walked away and ended up doing a pile of other things and when I remembered that I had apples on the stove they were almost at puree stage. Oops! Perhaps don’t cook yours quite so long. Really you just want to soften them a bit but have them retaining their shape.

I put my puree in the pie dish, no greasing required, and topped it with a layer of finely sliced Granny Smith (to ensure the finished product had some texture).

For the crumble I used 100g plain flour, 25g caster sugar and 50g of unsalted butter. You have no choice with crumble but to make it by hand as you do not want it too fine and you also don’t want it too homogenous: a few chunks here and there are a good thing. So work the crumble mixture by hand until the butter is mostly all incorporated – a few small bits here and there is fine. Overall, the mixture should resemble coarse sand.

Spread the crumble over the apples. Don’t press it down to form a hard crust (that’s called pastry and you’ve done it wrongly!). Bake in an oven preheated to 200°C (conv) for 40 minutes or until the crumble starts to turn golden.

Serve hot or warm, with cream, ice cream or custard.