I like to think that we eat very healthily and while it’s true that we eat very little processed food, in many ways our diet leaves a lot to be desired. The other week, for example, I made a really delicious kale and chorizo pasta sauce. And finished it off with great dollops of cream. Unprocessed – apart from the chorizo, yes. Healthy – well, yes, because KALE and also tomato and onion … but how many of those brownie points would have been taken away by the chorizo and cream? And you know what – I put bacon in it too! It tasted really good!
After that, I figured I should probably put a bit more effort into ensuring some balance in our diet. I told Andy this and the look of horror he gave me suggested he thought we were about to start eating celery (I love it, he hates it) and lettuce.
I’m not guaranteeing that this is going to last but in a burst of initial enthusiasm I had a look around for ‘healthy’ recipes. There are tons of them – and let’s face it, while fat does indeed mean flavour, I also have an obscenely well stacked spice drawer so there are other ways of making food fun.
Andy loves things in wraps – tacos, tortillas, quesadillas, yiros, all that kind of stuff. Weirdly, because I am a carbohydrate junkie, I am not so bothered about this style of eating so when he suggests it I usually pull a face and try to convince him that something else would be good.
So when I found this pork tacos recipe, a light bulb went off. I can produce something healthy that he will like, with very little effort. Naturally, I had to play around with this. Not least of all the fact that the original recipe uses only kidney beans for the salsa. Despite my love of legumes, kidney beans I am not a fan of. Fortunately, four bean mix to the rescue. Kidney, cannellini, chickpea and butter beans.
With tinned beans ALWAYS rinse them before use. While you can buy ones that are low salt, tipping the beans into a sieve and giving them a rinse in some running water washes off the horrible ‘tinned’ smell, and gets rid of the often quite thick (and salty) water that they’re in.
We’ll be having this again (although I will remember to buy fresh coriander next time!) because it was super quick and delicious. Never mind healthy – even I enjoyed it and enthused about it! With our four small pork schnitzels we had plenty for dinner, with left overs for Andy’s lunch and some left over bean salsa for me. The quantities in the original recipe might just stretch to 4 people but you would probably want some extra salad or not be particularly hungry.
Also, this can be a very easy prepare ahead dinner as the salsa can be made in advance and the pork can sit in the fridge in its marinade. By using pork schnitzels (rather than the original recipe’s choice of pork steaks) you really reduce the cooking time too!
Ingredients
- 4 smallish pork schnitzels - about 400g of meat all up
- olive oil
- 2 tsp ground cumin
- 1 tsp ground coriander
- 1 tsp chilli powder (or to taste)
- 2 cloves of garlic, crushed and chopped
- juice of one lime
- 1 tin of four bean mix, rinsed and drained
- ½ ripe avocodo, chopped
- ½ red onion, finely chopped
- 2 medium ripe tomatoes, chopped
- ½ red chilli, finely chopped (seeds removed)
- juice of one lime
- fresh coriander - roughly torn or cut
- salt - to taste
- 1 packet (6) of small tortillas
Instructions
- Place the pork schnitzels in a bowl with the oil, cumin, coriander, chilli powder, garlic and lime juice. Mix well and set aside while you make the salsa and heat a pan.
- To make the salsa - mix all the ingredients together and season to taste.
- Heat a non stick pan with a little oil and cook the pork schnitzels. Allow them to rest before slicing them.
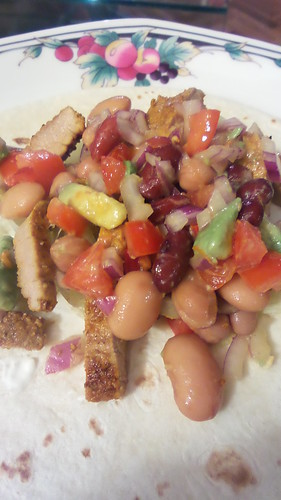
- To serve, place the meat and salsa on a wrap and eat!
- I added a smear of sour cream to mine, Andy added sriracha sauce and we both added some sliced lettuce.