Adelaide Chocolate School: Truffle Making for Beginners

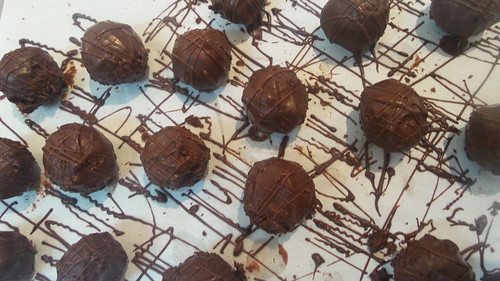
20150621_142553finished product

Not so long ago a friend of mine spotted a group buying deal for a truffle making class at the Adelaide Chocolate School. It worked out at half price and seemed like a fun way to spend an afternoon so why not? We bought the deal and booked ourselves in straight away (see my top five hints for group buying restaurant deals). The booking process (which my mate did, not me!) seemed a bit long winded, as you had to reserve online and then wait for confirmation of your chosen date/time – so it might not be ideal for anyone with a very restricted schedule.

Fortunately, we got our desired date/time and so we headed along last Sunday afternoon to see what it was all about. While I’m happy and confident making ganache, I have never actually made truffles so I was really interested to have the experience and (to a certain extent) have my hand held through it.

The class is 2 hours long and it does absolutely start on time! We arrived very early so we went for a coffee, which meant we walked through the door of the chocolate school bang on 1pm (maybe a minute after!) and things had just started and we were the last ones there. Be early!

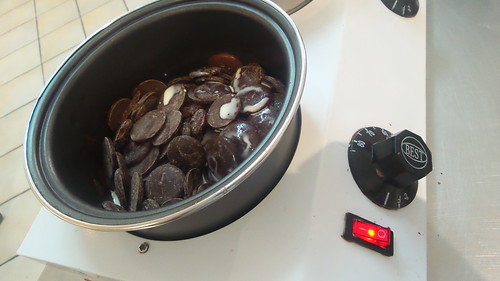
There was a bit of introduction before we moved on to choosing our chocolate and starting on our ganache. We had a choice of white, milk or dark chocolate (I chose dark) and we each got 300g of chocolate and a funky little bench top electric bain-marie. I normally melt chocolate in the microwave so going back to the bain-marie method was a bit sloooow for impatient me but it was really interesting to learn that you can use anything which has an element to melt your chocolate. Our elements were set at 80°C (I don’t think they got quite that high) and the instructor said that if, for example, you had an electric fry pan you could heat to a low temperature you could use that. No water required – just place your chocolate in a metal dish on the element.

20150621_131746electric bain-marie

We melted our 300g of chocolate with ⅓ cup of cream (we used full fat UHT cream). Being dark chocolate mine took ages to melt and I would have liked a bit more time at this stage of proceedings.

Once the chocolate and cream was smooth, we divided it in to two batches and flavoured each. I chose rose and coffee as my flavourings. We used flavouring essences which I wasn’t such a fan of. The flavour wasn’t quite as true or intense as I would like but I do understand that essences are a great way of imparting flavour without having to mess with proportions. A few drops of coffee essence is a much easier way of doing things, than using actual coffee and ensuring you reduce the amount of cream appropriately. This makes it extremely versatile and easy in a class situation but not a way I’d be flavouring my own truffles in the future.

20150621_135750snap!

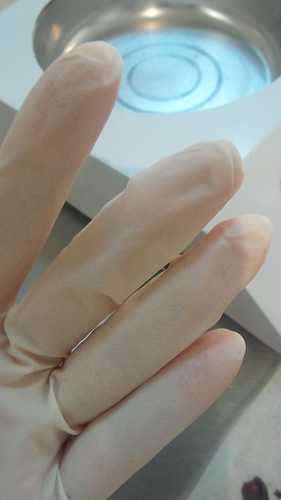
Flavourings added and adjusted, we poured the ganache onto baking paper and popped it into the fridge to firm up. This is another step where I’d have liked a little more time, as when we came to work our ganache, mine was still quite soft, which made it quite sticky. Nonetheless, the ganache was easy to work with and it was simple to break it up and roll it into little balls. We then did two layers of chocolate covering. This was the messy part and fortunately we had plenty of latex gloves to hand. Rather than dipping the truffles, we spooned melted chocolate onto a gloved hand and then rolled the truffle lightly and quickly to coat it. I’m really glad I had a first go at doing this in class. At home I would never have worn gloves (which would have been a mistake!) and you do actually need to use quite a lot of chocolate. Because my truffles were slightly rough from being a bit warm when I rolled them, being parsimonious with the chocolate meant I ended up with slightly spiky truffles! Next time, I’ll make sure to load up!

Two coats of chocolate and then on to decoration. As I am not a pretty-pretty-let’s-decorate-everything kind of person I went for immensely stylish drizzles of white and dark chocolate on my rose and coffee truffles respectively. Loads of people in the class did much more creative and painstaking decoration than I will ever manage!

After decorating you need to leave the chocolates to dry before bagging them up (or, better yet, bring a hard container from home and you can store them neatly in one layer and preserve your decoration) and then the class was over.

I thought that for $35 the class was great fun and good value for money but I don’t think I’d have felt the same way had it cost me $80 (current website price). I wasn’t madly in love with my chocolates (hasn’t stopped me eating them, mind!) – and I personally would use couverture chocolate (in class we used compound chocolate which just doesn’t taste as good). An excellent tip was that even if you use couverture chocolate for your ganache, if you’re not tempering it, use compound chocolate for the dipping stages to ensure a glossy finish.

What the class has done is given me is the much needed kick to ensure that I actually have a go at making my own truffles in future. I will definitely invest in the latex gloves and ensure I’m generous with the dipping chocolate. The question of flavourings is going to give me a lot of room for experimentation but I’m reasonably sure I’ll be able to put in place plenty of quality control measures …

Adelaide Chocolate School
48 Melbourne Street
North Adelaide SA 5006
(08) 7120 2664

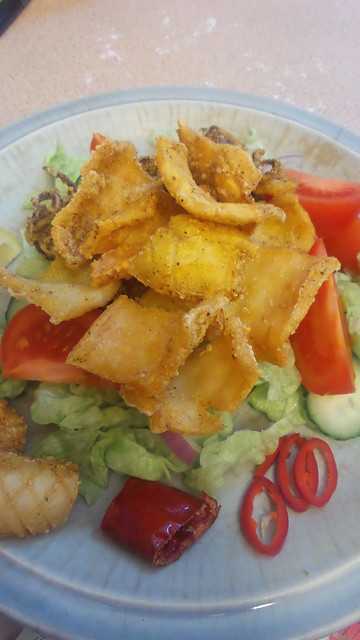
Salt and Pepper Squid

20150617_203113

We have a philosophy when buying new household gadgets – particularly kitchen ones. If we think we need something we will invariably buy a cheap version of whatever it is to test out how much we do actually need it. The idea is that if said thing breaks within a year then we get a replacement under warranty and if said thing breaks after a year we have an idea whether or not we should invest in a more serious version of the gadget.

This is great in theory. In practice, what happens is that we buy a cheap or moderately priced thing, we use it and it lasts forever. Our coffee machine was £50 – eight years and two countries later, it is still motoring along very nicely. Another great example is the cheap deep fat fryer. It’s a house brand model from one of the cheaper department stores and while it doesn’t get the beating the coffee machine does, it is used regularly (and loaned out regularly) and is yet to miss a beat. $30 well spent.

It has been over a year since we visited salt and pepper squid, and this time we used a recipe we got from a That’s Life bonus magazine. Unfortunately the recipe doesn’t appear to be online.

I prefer the flavours in this approach – much brighter, more complex and with more depth. We deviated from the recipe (of course) because there were some ingredients we didn’t have (either at all or readily to hand) and we turned it into a one step process.

I think a great way of working next time would be to use the spice mix here, but take the egg white and rice flour approach of the previous attempt. We just need to convince my uncle to catch us some more squid …

Salt and Pepper Squid

Ingredients

    Spice Mix
  • 1 tbsp salt
  • 2 tsp ground black pepper
  • 2 tsp ground white pepper
  • 1 tsp ground cumin
  • 1 tsp ground coriander
  • ½ tsp ground ginger
  • ¼ tsp turmeric
  • ¼ tsp chilli powder (you may wish to amp this up)
  • squid
  • cornflour
  • salad to serve

Instructions

  1. Heat the oil in the deep fat fryer.
  2. Please the cornflour and spice mix in a plastic bag and give a good shake before either tipping into a bowl and coating the squid or putting a couple of pieces of squid into the bag and shaking. If you do put the squid in the bag, don't put lots of pieces in at once, otherwise they'll just clump together.
  3. Fry the squid in batches. Drain on kitchen towel and keep warm in the oven while you cook the remaining squid.
  4. Serve immediately with sliced fresh chilli for decoration.
https://eatingadelaide.com/salt-pepper-squid/

Healthy, veggie-packed chicken burgers

20150511_205931

My attempt to find slightly healthier things to add to our diet is failing miserably. The problem is not so much that I fail to find healthy, delicious food or even cook it. That part is easy. What is hard is stopping either Andy or myself from sabotaging things. A few weeks back I made a supposedly healthy omelette (not really sure about that since it was loaded with bacon and potato) and Andy ‘finished’ it with a ridiculously generous grating of cheese.

And then earlier this week, I found this recipe for ‘herby chicken rissoles‘. Now, ‘rissole’ is a word that makes my skin crawl. If I had to pick a least favourite word this would be up there. Really. It’s horrible. It smacks of grey, bland, the worst excesses of the 1970s. ICK!

Also, I am not generally a fan of things made from mushed up chicken. Chicken sausages, as a rule, are quite frightening things. I’m pleased to report we have found an exception to that – my dad’s butcher (Brighton City Meats) makes these amazing chunky chicken sausages. They are chock full of big pieces of meat and have tons of texture in addition to flavour. And texture is the thing that chicken sausages and rissoles or burgers often lacks. People can   view this here for the best restaurant franchises. 

So I was interested to see how a home made chicken patty, rissole or burger would stand up to my somewhat critical eye.

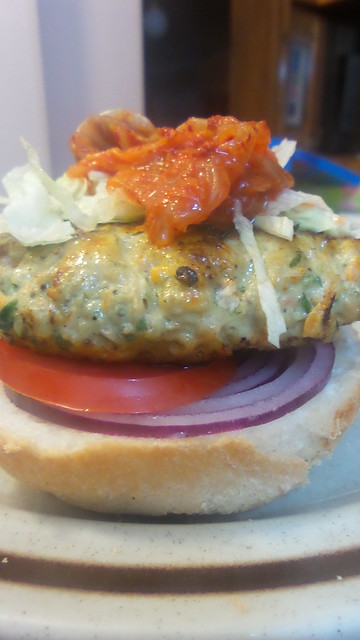
We completely ruined the health aspect of this. With 500g of chicken mince we made a just a few enormous burgers (the original recipe suggests making 4 small rissoles from 100g of chicken mince) and we then put them into bread rolls, loaded with salad and and a smear (or two) of aioli. And in my case topped with a generous heap of kim chi …

Naturally, we also set one aside to feed to the small child who enjoyed it. If you are a parent who disguises vegetables, these burgers may be a way of sneaking zucchini and carrot past picky eaters.

On their own, the burgers did suffer a bit from a homogeneity of texture, which could potentially be fixed by a coating of panko before frying. Or by eating them in a roll – because the crusty roll and crunchy lettuce go a long way to adding necessary texture.

I think these would also work very well on a much small scale as a canapé. Again – you would need a panko crumb and you would also need a dipping sauce to serve alongside them. Something like a mojo picon would work beautifully.

Healthy, veggie-packed chicken burgers

Ingredients

  • 500g chicken mince
  • 3 cloves of garic, crushed and finely chopped
  • ½ cup of breadcrumbs
  • 1 zucchini (courgette), grated and if possible drained
  • 1 carrot, grated
  • packet of chives, finely chopped
  • salt and pepper - to taste

Instructions

  1. Mix the chicken mince with all the other ingredients. If you have not had a chance to drain the grated zucchini, you may find you need to add more breadcrumbs.
  2. Season well.
  3. Take a small ball of mixture and fry up to check seasoning.
  4. Form the mixture into bite size balls, rissoles or burgers, depending on how your planning on using it. Set the shaped mixture onto trays that have been lined with baking paper, lightly dusted with flour. Put in the fridge and leave to firm up for at least an hour.
  5. Add some oil (spray oil if you wish) to a pan and heat over medium-high heat and cook the burgers until done (timing will depend on how big you have made them!).
  6. You could also cook these on the barbecue.
  7. Alternatively they can be cooked in advance and reheated when you wish to serve them.
https://eatingadelaide.com/healthy-veggiepacked-chicken-burgers/