Pork Fillet with a Maple Balsamic Glaze

Untitled

The same weekend Andy announced he fancied quesadillas, he also decided he fancied some “glazed pork”. Hmmm, what cut of pork and what type of glaze?

These were questions to which he did not have answers. So I started trawling the internet for glazed pork recipes. Naturally, there are many variations on the honey and soy type glaze which I didn’t really feel like but when I came across a recipe for fillet (tenderloin for US & some UK readers) with a maple syrup and balsamic vinegar glaze I figured I’d give it a go.

I posted my recipe for baked ham on Eating Leeds (sorry, the images have all gone as I let my real hosting lapse) and this also makes use of balsamic vinegar and maple syrup so I knew this very scary sounding combination was going to work.

While I did mess around with most of the recipe (of course!) I kept the glaze as written. One big difference was that I kept my piece of pork fillet whole – I was concerned that cutting it into medallions and finishing the cooking in the oven was going to result in some seriously dry pork.

Because I like doing as much as possible ahead of time, I actually seared the seasoned pork fillet in the afternoon and set it aside.

The glaze is just 2 tbsp of olive oil, ⅓ cup of balsamic vinegar, ¼ cup of maple syrup, 2 cloves of garlic (crushed/finely chopped) and some finely chopped rosemary. You could also make this in advance and I think that would probably be preferable. I didn’t actually get time though.

When it came to cooking time, I sliced some onions and very gently fried them in the pan I’d seared the pork before adding the pork, spooning over some of the glaze and putting it into a hot (200°C) oven. While it’s cooking, pull it out every now and then, turn it over and spoon over some more glaze.

Cook until the pork is done to your liking (I think our piece took about 30 minutes to cook) – and if you’re not impatient, allowing it to rest (covered in tin foil) is always a good thing.

We served with mashed potatoes and lightly steamed asparagus. The glaze and onions from the pan makes a wonderful sauce/dressing.

This glaze would also work brilliantly with other cuts of pork – particularly pork chops.

Plant 13 Bowden

IMG_2822

date of visit: Sunday 2 December 2012

Another venture out Thebarton way saw me looking for another place to eat. For a part of Adelaide that, on the surface, looks decidedly industrial and unloved, there’s a surprising number of eateries. Since our September visit to The Loose Caboose, another new place has popped up: Plant 13.

After sitting in Stereosonic traffic on Port Road, I was pretty pleased that we were able to park easily and have a nice, quiet sit down (yes, grandma-mode was well and truly on!). Plant 13 is a former pub, in a lovely Federation building – so right away it’s pleasing to see that the building has been loved rather than ripped down.

The Plant 13 philosophy is a holistic one: meat is sourced from happy animals, many ingredients are grown on site and they make as much as possible on site. Personally, this is the type of thing which makes me happy: low food miles, ethically raised meat and good, hard work in the kitchen.

Menu wise, the dishes have a strong American slant: things like buttermilk biscuits (which I think is really scones for the rest of us!), pancakes with bacon and maple syrup, and Philly cheese steak all feature on the menu. For drinks Plant 13 produces all kinds of interesting combinations (mostly served in jars, from what we could see) – so if coffee isn’t your thing, you can have iced tea, an apple pie smoothie or a citrus blitz (which is what was recommended to us, but you’re going to struggle to get me to drink a mix of blood orange, lemon, lime, mint and sugar syrup – especially when coffee is in the offing).

IMG_2812

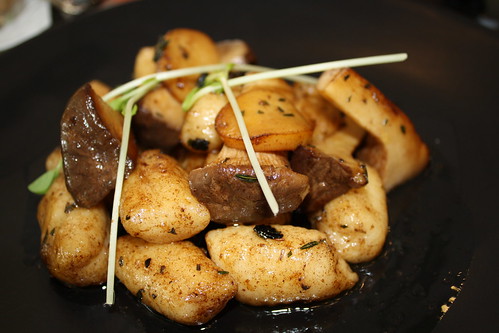
We arrived in time for what could be called a ‘late lunch’ (around 2pm I think) and Plant 13 was busy but not so packed we couldn’t be seated. I had already sussed out the menu online (and Plant 13 is to be commended for keeping the online menu absolutely up to date – as I write this it’s the December menu, dated 5 December) so I knew I was going to be ordering the gnocchi with brown mushrooms, black garlic (I bet that’s one of next year’s trend ingredients …) and brown butter. Andy ordered the pulled BBQ pork bun with coleslaw. Plant 13 does also provide a short children’s menu but after some umming and aahing we asked if we could just order a single sausage for the toddler (he had already had lunch).

IMG_2813

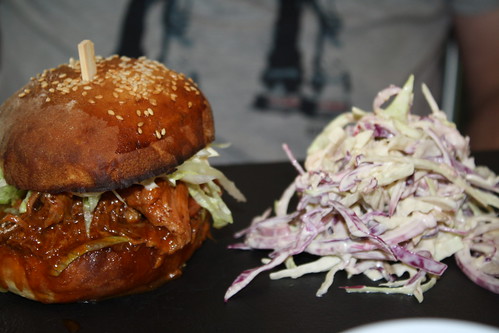
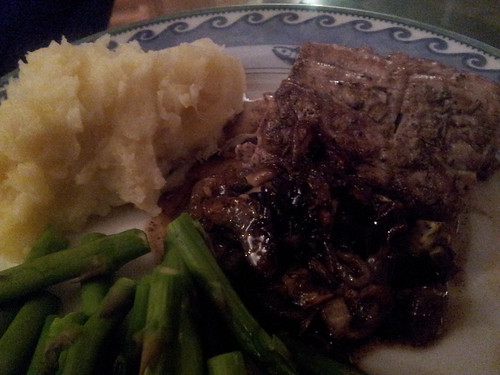
We both really enjoyed our food. Andy rated his pulled pork as superior to that at The Loose Caboose, and while the toddler turned his nose up at the pork part of Andy’s dish, he did like the white cabbage from the coleslaw very much indeed. The gnocchi was really good too: obviously housemade which is always a plus, it was very light (though it did have a slight bounce to it) and the simple sauce of mushrooms, garlic and butter worked really well. The sauce also had some kind of vinegar through it (I’d guess balsamic) and that little line of acidity worked really well to cut through the butter and keep the dish tasting fresh right through to the last mouthful.

The sausage was also housemade and duly demolished.

So, while portion sizes aren’t massive, food wise, Plant 13 gets a big tick from us.

But even better than the food was the fabulous service. Our waitress (Phoebe) was really lovely – she made sure we were all settled, suggested drinks to go with our food, offered us a high chair (we had a booster seat in tow but it was looking for a while like I was going to fail to operate it!) and absolutely nothing was too much trouble. Cole, who is described on the website and ‘chef and host’ was very affable too – making sure that everyone was happy and chatting away to us about the toddler. Nothing tells you how much a venue knows about service more than how they treat parents with a small child.

Our overall view was that we preferred Plant 13 to The Loose Caboose. It was marginally cheaper ($40.40 was the final bill) but that wasn’t the clincher. It was the much more personal and sincere service, the tasty food and the fact that it’s a menu planned with a conscience.  I’d love to see more venues like this in Adelaide – and preferably closer to home.

And best of all? When we left, the construction site next to the carpark contained a DIGGER. It took us 20 minutes to get the toddler into the car …

Plant 13 Bowden on Urbanspoon

Sunbeam Snack Heroes Cake Pop Maker

IMG_2835

Disclaimer: Sunbeam sent me the cake pop maker to trial.

Sunbeam has recently rereleased the Snack Heroes range. For not very much money at all (they’re all under the $40 mark) you can choose from an icecream maker, an egg cooker, a chocolate fountain, a popcorn maker or a cake pop maker.

It’s an interesting mix of products because some are definitely ‘novelty’ whereas others are pieces of kitchen kit serious cooks are likely to pick up – particularly the ice cream maker. The cake pop maker, which I tried out, falls somewhere between the two.

As you may have noticed, I’m a reasonably keen baker but one thing I’ve never tried to make is a cake pop. I daresay you need to buy some special tin for them or something. And, of course, you need to decorate them and I think we all know how lacking my decorating skills are …

Luckily for me, the cake pop maker comes with some pretty detailed instructions and helpful tips. For example, dipping the stick into a little melted chocolate before pushing into the cake pop to make it more secure, and chilling the cake pops for 15-20 minutes before decorating to make them more stable. Really obvious things, but ones I wouldn’t have thought of.

There’s also a selection of recipes which is incredibly useful because they’re all in cake pop friendly quantities and they give you a good idea about the different types of cooking times you need. I tried the plain vanilla recipe. As a trusty helper, I had one very interested toddler.

I melted 75g of unsalted butter in the microwave and mixed in ½ cup caster sugar, 1 egg, ¾ cup of self raising flour, ¼ cup of plain flour, 1 tsp vanilla essence and ⅓ cup of milk. For a change, I did all of this by hand! Give the mixture a good beating – and depending on your enthusiasm for beating it may be worth your time to sift the flours.

With the cake pop maker preheated, I gave it a quick spray with a neutrally flavoured oil. I then spooned 2 tsp (yes, that’s right!) of batter into each hole (there are 6) and cooked for 4 minutes.

The timing given in the recipe is spot on and the cake itself was nice (always a good start). I found myself to be pretty incompetent when it came to those 2 teaspoons of batter … I think this is one of those things where practice makes perfect. Some of my cake pops were perfect and others kind of did a bit of exploring and came out looking like odd shaped flying saucers. Tidying them up is easily done: I just trimmed off excess cake when they were cool and you’d have never known how wonky they were initially!

One thing I did notice was that the external surfaces of the maker got very hot. You do end up having it on for quite a while (most of the recipes make ~ 30 cake pops, so you’re doing to be doing 4 or 5 batches) and it started to get uncomfortable to open it. To be fair, the very first page of the manual notes “The temperature of surfaces may be high when the appliance is operating”. That is very accurate! It’s also a bit of a shame because this is very much the type of thing people are going to want to use with their kids (in fact, the first thing that Andy said was “oooh, that will be a great thing to do with the toddler”) and older children are going to want to be involved in the opening and shutting. So just make sure you read the instructions and exercise some commonsense!

Cake pops tidied up, cooled and refrigerated, I set about decorating. This wasn’t actually as painful as I expected. I used toothpicks (NOT recommended if you’re going to be serving these to children!), balanced my cake pops in a strawberry container that had holes in the lid (! I think egg cartons would do well here too) and made a very simple chocolate icing (butter, icing sugar, cocoa and hot water).

You need to make your icing pretty thick and I experimented with dipping the cake pops into the icing, but I found that spooning it around them worked a lot better. I wasn’t going for full coverage – just enough to top them and cover up the seams (and any less than awesome trimming).

For decoration, again I found that dipping wasn’t ideal. I put the iced cake pops back into the strawberry container and sprinkled on the decoration. Chocolate sprinkles, dessicated coconut and some silver cachous. Of course, if you’re less lazy than me, you could do fancy things like pipe over a different coloured icing or do faces on them … For me, sprinkling was good enough and also meant that decorating them was a lot quicker than I expected!

So overall, the Sunbeam cake pop maker gets a thumbs up. It is easy to use, does the job and the recipes (or at least the one I tried!) work. It’s also quick. The only drawback I see is how hot it gets.

However, I think the best recommendation is that when I posted on my personal Facebook page that it had arrived one of my relatives immediately posted: “I have one and it is very good. All even in size and no hot spots like one may have in an oven.”

I guess now I just need to learn to decorate!