Very Easy Vanilla Ice Cream

Vanilla ice cream (crop)

Here in Adelaide we sweltered through much of summer. As much as many of us might have complained about the above 40°C days, people were similarly disappointed that we didn’t crack our all time record temperature. I was pretty grateful that that was a record we missed – 46°C is plenty hot enough, thank you very much.

And while temperatures have dropped, and we’re enjoying some almost wintery days, we still have some moderately warm weather ahead of us – and, of course, our friends in the northern hemisphere are all looking forward to summer proper.

So all of that is justification for just now posting a super simple vanilla ice cream recipe. I first made this back in February to take along to a 4 year old’s birthday party. Funnily enough – there weren’t a great many photo opportunities at that event and, despite making a second batch, I’ve done a really rubbish job of attempting to photograph it. However, I’m willing to bet that pretty much everyone and anyone reading this page knows what vanilla ice cream looks like and doesn’t need eighteen perfectly shot images to remind them!

The great thing about this ice cream is that it is egg free which means that it’s custard free. This means that it is zero hassle to make and anyone who avoids eggs can eat it.

The original recipe comes from the Cuisinart manual that came with my mum’s ice cream maker. This recipe suggests that you will need to whisk the milk and sugar for just a couple of minutes. This is complete nonsense. You really need to whisk the milk and sugar until the sugar has completely dissolved (otherwise you’ll have gritty ice cream – yuck!) and in my experience that probably takes a good 10-15 minutes.

As always with ice cream, making it on a stinking hot day is never a good idea – especially if your ice cream maker relies on a frozen insert.

This is one of the easiest ice cream recipes I’ve come across and, being vanilla, is an absolute crowd pleaser.

Very Easy Vanilla Ice Cream

Ingredients

  • 1 cup (250mL) full cream milk, cold
  • ¾ caster sugar
  • 2 cups (500mL) cream (pure cream is best but thickened cream will do), cold
  • 1-2 tsp vanilla paste to taste

Instructions

  1. Beat the milk and sugar until the sugar is dissolved.
  2. Thoroughly mix through the cream and vanilla paste. If you choose to use a stand mixer, keep the speed on low so that you don't heat the mixture.
  3. Churn in your ice cream maker according to instructions then place in container in freezer for at least a couple of hours.
  4. Makes about a litre.
https://eatingadelaide.com/easy-vanilla-ice-cream/

Beef and Stout Pie

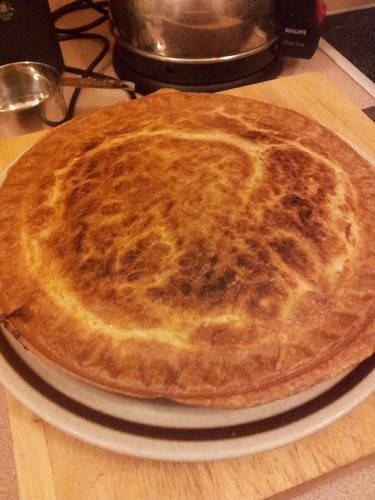
Untitled

Friday was Pi Day. The humour in this is limited – if you write dates in the American format it was 3/14, and pi (the mathematical constant) approximates to 3.14 (if you’re dealing with 2 decimal places). The connection between all of this and pies is tenuous at best.

But we’ve also had a burst of relatively cool weather in Adelaide so for starters I’m more than happy to consider switching on things that generate substantial heat. And I’m also happy to consider eating pie. A hot, home made pie for dinner is definitely cold weather food.

I found this pie recipe on the MiNDFOOD website and tweaked it a little, not least of all because pies have pastry on both the bottom and the top!

Green peppercorns are a great ingredient to cook with: they add bursts of pepperiness along with a hint of sharpness. Just make sure you rinse them first (they will come in brine). You do need to factor in plenty of time for both cooking and cooling the pie filling. You can’t rush the beef being tender and, especially if you are doing a pie properly, you need the filling to be cool because if you hit the pastry with hot pie filling you’ll end up with the dreaded soggy bottom!

We used our piemaker for this and bought pastry (both shortcrust and puff – yes, sometimes dinner just has to happen!) so once the pie filling was complete the actual pie could be be assembled and on the table in about half an hour (20 minutes of that was cooking time). If I were serving this to others, I would bother to at least make my own shortcrust, use individual pie dishes and cook them in the oven. At least … that’s what I tell myself!

Beef and Stout Pie

Beef and Stout Pie

Ingredients

  • ~ 800 g diced blade steak (or any other cut of beef which works for long slow cooks)
  • 2 onions, very roughly chopped
  • 2 cloves of garlic, finely minced
  • 2 tbsp plain flour
  • 250 mL stout
  • 375 mL beef stock
  • a few sprigs of fresh thyme
  • 125 mL cream
  • 1 (generous) tbsp green peppercorns, drained and rinsed
  • pastry (for a piemaker)
  • 1 sheet of shortcrust pastry, defrosted
  • 1 sheet of puff pastry, defrosted

Instructions

  1. Preheat oven to 140°C (fan, or 160°C conv).
  2. Heat some olive oil in an ovenproof casserole dish and brown the beef in batches.
  3. Set the beef aside and turn down the heat. Add the onion and garlic and soften. Stir often.
  4. Return the beef to the pan and sprinkle over the flour, mixing well. Allow this to cook for a minute or two, before adding the stout, stock and thyme.
  5. Bring to the boil and then take off the heat and put, covered, in the preheated oven. Cook for about an hour and a half until the beef is meltingly tender.
  6. If the gravy is still a little thin, return to the stove and remove the lid - but keep a close eye on it and don't over thicken. It should be no more than the consistency of a thin cream.
  7. Allow to cool a little before adding the cream and pepper corns and set aside to cool fully. The cooling and the addition of the cream will thicken the gravy further.
  8. If using a pie maker, preheat and cut the base (shortcrust) pastry. Line the pie maker, fill (take care not to over fill!) and top with the puff pastry. Cook for the recommended time (in our case 20 minutes) and serve immediately.
https://eatingadelaide.com/beef-stout-pie/

Zucchini and Feta Fritters

Untitled

Ages and ages ago (probably, almost literally, years ago) a friend told me that her son was an enthusiastic eater of zucchini and haloumi fritters. At the time I thought “oh, that sounds nice, I must make those” and then never got around to it.

We typically don’t eat a huge number of zucchini (I tend to call them courgettes): I love them but Andy is somewhat ho-hum about them. So when it comes to shopping, they always run a very poor second to broccoli (universally loved in our household).

However, recently we’ve had something of a glut of zucchini forced upon us. Mum grew them (in the right conditions they grow like weeds) and there were also a few in my Keane’s vege box.

So the time was well and truly nigh for breaking into zucchini fritter territory.

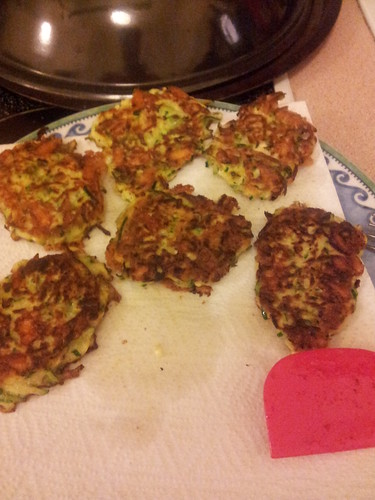
I had a quick google and cobbled together my own recipe based on what seemed to be very standard kind of territory. These were very quick to make – although you do need to allow a little time for grating and salting the zucchini. Herb-wise you can mess around – I used mint, but dill would definitely work just as well, and some recipes use just parsley. My advice would definitely be to use FRESH herbs rather than dried. And if you happen to have a lemon hanging around, grate the rind of half of it into your mixture.

As always, be generous with your seasoning. It is best to fry one off and adjust the seasoning before committing yourself to the whole batch!

Serve the fritters hot, with salads.

Andy and I loved these. And while these are perfect toddler food, our toddler was not bothered either way.

And if you don’t want to print, download a pdf of the recipe!

Zucchini and Feta Fritters

Ingredients

  • 3 zucchini, coarsley grated
  • 4 spring onions, finely sliced
  • 100g Australian feta, finely chopped
  • ~ 1 tbsp fresh mint, finely chopped
  • 2 eggs
  • 1 tbsp verjuice (or lemon juice)
  • ~ 4 tbsp plain flour

Instructions

  1. Coarsely grate the zucchini and, in a large bowl, mix through a generous pinch of salt. Set aside at room temperature for approximately half an hour.
  2. Squeeze the moisture out of the zucchini - by hand is fine - and place it in a clean,dry bowl.
  3. Stir through the spring onions, feta and mint and then add the eggs one at a time. Mix through the verjuice and then stir in the flour, one tablespoon at a time.
  4. You may not need all the flour - you want to bring the mixture together but you don't want the mixture to become dry. The more flour you use the greater the risk you'll taste raw flour in the finished product. You're much better off to have a slightly too loose mixture - you can always add more flour once you've fried your test fritter!
  5. Season.
  6. Heat some olive oil in a non stick pan. Add the fritter mix to the hot pan by the tablespoon, taking a moment to spread each fritter out a little. In my 20cm pan, I was able to cook about 4 fritters at a time.
  7. Flip the fritters when the base in browned. They're easy to flip when they're ready. If the fritters have been spread out, they'll be ready when brown on both sides.
  8. Drain on kitchen paper and serve hot.

https://eatingadelaide.com/zucchini-fetafritters/