Pork Fillet with a Maple Balsamic Glaze

Untitled

The same weekend Andy announced he fancied quesadillas, he also decided he fancied some “glazed pork”. Hmmm, what cut of pork and what type of glaze?

These were questions to which he did not have answers. So I started trawling the internet for glazed pork recipes. Naturally, there are many variations on the honey and soy type glaze which I didn’t really feel like but when I came across a recipe for fillet (tenderloin for US & some UK readers) with a maple syrup and balsamic vinegar glaze I figured I’d give it a go.

I posted my recipe for baked ham on Eating Leeds (sorry, the images have all gone as I let my real hosting lapse) and this also makes use of balsamic vinegar and maple syrup so I knew this very scary sounding combination was going to work.

While I did mess around with most of the recipe (of course!) I kept the glaze as written. One big difference was that I kept my piece of pork fillet whole – I was concerned that cutting it into medallions and finishing the cooking in the oven was going to result in some seriously dry pork.

Because I like doing as much as possible ahead of time, I actually seared the seasoned pork fillet in the afternoon and set it aside.

The glaze is just 2 tbsp of olive oil, ⅓ cup of balsamic vinegar, ¼ cup of maple syrup, 2 cloves of garlic (crushed/finely chopped) and some finely chopped rosemary. You could also make this in advance and I think that would probably be preferable. I didn’t actually get time though.

When it came to cooking time, I sliced some onions and very gently fried them in the pan I’d seared the pork before adding the pork, spooning over some of the glaze and putting it into a hot (200°C) oven. While it’s cooking, pull it out every now and then, turn it over and spoon over some more glaze.

Cook until the pork is done to your liking (I think our piece took about 30 minutes to cook) – and if you’re not impatient, allowing it to rest (covered in tin foil) is always a good thing.

We served with mashed potatoes and lightly steamed asparagus. The glaze and onions from the pan makes a wonderful sauce/dressing.

This glaze would also work brilliantly with other cuts of pork – particularly pork chops.

Pork Belly Roast – In a Pan

Pork Belly Roast - In a Panphoto:  Colin Gould

Today, a guest post from Colin Gould, who blogs (occasionally) at ColsRamble.

Given my inability to cook an oven roast without burning myself at least once, the last time I picked up a boneless leg of lamb I experimented with cooking it slowly in a frying pan like a giant steak and, to my surprise, got a great result.

Foolishly I posted this success on Facebook only to be challenged by Alex to do the same and end up with pork crackling… so here I am; challenge accepted and the result was, again quite surprisingly, really good.

As a cheap arse who hates using an electric oven when my solar panels could be cranking that power back into the grid, cooking a roast on my gas hob in an easy to clean frying pan makes a lot of sense and is dead easy (despite the wordy description that follows).

You’ll need ~700g pork belly, a heavy base frying pan with fitting lid – large enough to accommodate the pork belly, a couple of seasonal apples (I used Fujis), some fresh sage, salt and pepper.

Cooking the meat and rendering the fat

I took the pork belly, scored the skin with a sharp knife and then scorched it with a jug of boiling water. I don’t know if the scorching bit is really necessary, I’ve just always done it when doing normal roast pork.

The belly is then patted dry with paper towel and rubbed with olive oil. The skin side is then well salted.

To cook the meat, heat the frying pan over a medium heat with a little more olive oil until hot, but not smoking, then place the pork belly in skin side down. It should sizzle.

Now you can season the exposed flesh side of the belly in the pan with more salt and some ground black pepper, and pile on a good handful of fresh sage leaves.

Once done, place the lid on the pan and turn the heat down to low, then go and find something else to do for an hour or so*. The meat is essentially being part roasted and part steamed in its own juices so avoid removing the lid. You’ll know if the pan is at about the right temperature if a) there is a gorgeous smell of sage and pork filling the house with no hint of burning, and b) the lid is too hot to touch.

Apple and Sage medley

Remove the cooked meat from the pan and set aside. The pan should have a healthy layer of rendered pork fat and juices in it. Turn the heat up again to a medium/high and throw in some diced apple and the chopped sage leaves from the meat. Cook until the apple softens – there should be enough seasoning in the pan juices but add more if you think it’s needed. A splash of apple cider vinegar might go well at this point.

Remove the cooked apple and sage, avoiding as much of the oil as possible, and set aside for serving.

Crackling

Drain any remaining oil/juice in the pan and, like a giant slab of bacon, stick the pork belly back in the hot pan skin side down and let it sizzle. It should only take a few minutes to develop a nice even crackling. If it’s spitting and popping then it’s probably too hot. A better result is achieved with a lower heat over a longer time.

Once an even crackling is achieved, flip the belly over with tongs and sear quickly on the other sides so they also get a little colour.

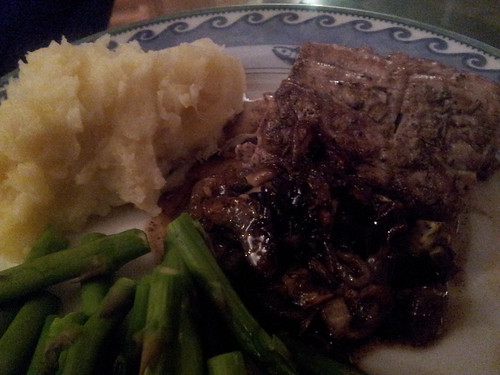
That’s it. Slice the pork belly along the scoring lines, or remove the crackling to cut the flesh and break it up separately. Then serve on warm plates with the apple and what ever else floats your boat. The night I cooked this I served it with a quick cannellini bean mash and some (microwave) steamed carrots. If you’re looking for an accompanying drink on a warm spring evening, then we’ve just been trying Oxenberry White Grapple Cider from McLaren Vale, which, although a little sweet for my taste, might just fit the bill.

Enjoy!

*I think I cooked for about 1 hour and 15 minutes, but only really know that I ignored the 45 minute timer. The good thing about this meat is it’s got a high fat content and using this method keeps moisture in the pan so chances of overcooking and drying out are pretty slim.

Chicken Quesadilla Recipe

Quesadillas

I watch a lot of cooking tv. I’m not a huge fan of the ‘reality’ programs but pretty much anything else I’ll watch – no matter how old school the production values (the really quite awful Four Burners and a Grill) or how much the chef irritates me (er, no names, because that would be just mean).

The other morning we were watching Good Chef Bad Chef. This is one show that irritates me because it kind of ‘works’ under the assumption that the chef using the meat, cream, butter and salt is the ‘bad’ chef, while the nutritionist, whose food is predominantly vegetarian (she uses a lot of seafood) and who uses dairy alternatives, is the ‘good’ chef. Andy always grumpily points out that Adrian usually looks a lot healthier than Janella …

Philosophical issues aside, lots of the food that Adrian Richardson cooks on this show looks really good. On Saturday morning he cooked quesadillas with a prawn filling. Show over, Andy says “we should have quesadillas for dinner”. Wow, I thought, that is going to be one serious pain in the butt to put together.

As we have prawns coming for Christmas, we didn’t want to do seafood so we opted for chicken. I found a recipe on taste which we used as a rough guide.

We began with one onion, finely chopped and sautéed in the wok. We added just one clove of garlic and then half a red capsicum finely chopped.

I finely (super super finely) sliced one chicken breast and the meat was tossed with some ground cumin and ground coriander. The meat was added to the wok and quickly fried.

While the meat was cooking I made a variation on the avocado cream in the taste recipe: half an avocado mashed, mixed with a couple of tablespoons of natural yoghurt and then seasoned.

I also made a quick salsa: one tomato, quartered, deseeded and finely diced (deseeding, while wasteful, does make it a LOT easier to dice the flesh), a quarter of a red onion finely chopped, some chopped coriander, and a good squeeze of lime juice. The following evening I made some more salsa, which I jazzed up with some finely sliced jalapeño peppers and some finely chopped red capsicum. If you use the juice from the peppers you don’t need the lime juice.

To wrap up the quesadillas, we heated a non stick pan, gave it a very light spray with some oil and popped in a wrap. Andy topped half the wrap with some of the chicken mix and a good handful of grated cheddar. Fold the wrap in half and you can add a second wrap to the pan. When the wraps start to become golden, flip them over (not as hard as it sounds if you’re careful). Just pay attention to the heat of the pan as you want the cheese to melt but not at the expense of burning the wrap.

Quesadillas

Serve piping hot with the avocado cream and salsa.

With two of us on the case, this meal took less than 30 minutes to put together. With just the one chicken breast used it’s very economical and it’s also pretty healthy (look at all those vegetables!). Without a doubt it’s something we’ll be making again … especially as we reckon we could manage it on the BBQ during summer!