The Sweet Swap: Honeycomb Recipe

20140904_122403

Last year my participation in the Sweet Swap was chaotic and disorganised. At the time, I had a super sick toddler so that was, in some ways, justified.

This year, I have no such justification. None at all. Sure, I had the flu and spent a couple of days in bed gobbling pain killers … but if I’d been organised and on top of things that wouldn’t have made a difference. So the date for ‘latest dispatch’ of the sweets came and went and I was still feeling poorly and still hadn’t made up my mind what to make …

My initial plan was to make florentines and I actually got my act into gear and made them. They tasted amazing so I will post the recipe anon … but they were so fragile there was no way they would survive the post. And then I realised that they contained butter and one of my swappees was lactose intolerant …

Good grief. I’d got to the point where I had one afternoon in which to make something and take it to the post office and put it in an express post bag in the hope that it would arrive on Friday.

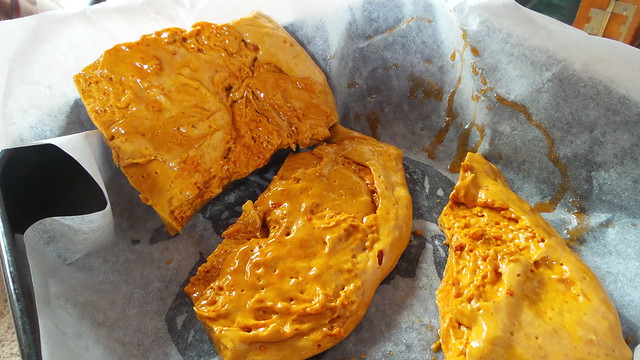
And therein lies the great challenge of the Sweet Swap. It’s not making the sweets but it’s creating something and then packaging it so that it comes out the other end looking and tasting OK. I settled on making honeycomb (or cinder toffee, which is what I’ve got into the very un Australian habit of calling it!) because it’s quick and I love it but I’m not convinced it would have travelled well. It sets super hard but after a little bit of exposure to air it starts to get sticky. Which is lovely when you’re stuffing your face with it at home but it might not be so good when you open a package of it …

Andy helpfully suggested that this could have been solved by dipping it in chocolate. Well, yes it could.

And while cinder toffee is perfectly good to eat as a snack on its own, it’s also a sweet that works perfectly with other things. Crumble it through ice cream, across the top of chocolate cake or chocolate mousse. Or yes, dip it in chocolate and just scoff it.

There are several subtly different approaches to making cinder toffee. Do you add water? Well, I don’t but this is apparently a good way of ensuring that the sugars don’t heat up too quickly. The temperature to which you heat the sugar before adding the bicarb will determine how hard or chewy the finished product is (if you’re familiar with a sugar thermometer that shouldn’t come as a surprise). If you’re interested in the science of cinder toffee, then read this article in the Guardian. I was going to use a James Martin recipe but it required runny honey and we had none in the house, so I used this recipe, from Sweets Made Simple, a fun (and recipe heavy) programme hosted by confectioners Kitty Hope and Mark Greenwood.

Making this has reminded me how much I enjoy cooking with sugar. Of course, any time you start to cook with sugar you need to remember that it gets HOT. Don’t stick your finger in to the toffee mixture, no matter how appealing it looks because you’ll get burnt. Leave things to cool for at least an hour and always approach with caution. Your life will be easier if you have a sugar thermometer.


Honeycomb (Cinder Toffee) Recipe

Ingredients

  • 75g caster sugar
  • 100g liquid glucose
  • 25g golden syrup
  • 15g bicarbonate of soda

Instructions

  1. Gently heat the caster sugar, liquid glucose and golden syrup until the sugar is dissolved. Then increase the temperature and heat the mixture to 150°C. Use a sugar thermometer - and be patient.
  2. When the mixture hits 150°C remove from the heat and either whisk through the bicarb or stir it through vigorously. The mixture will froth up. As soon as the bicarb is mixed through, pour the toffee on to a baking sheet or tin lined with baking paper.
  3. Set aside to cool.
  4. When cool, break into chunks and ... eat. And make an appointment with your dentist!
https://eatingadelaide.com/sweet-swap-honeycomb-recipe/

Marshmallow

Just sitting down to write about #marshmallow ...

Without thinking about it too much, earlier this year I signed up for The Sweet Swap. This is a fund raising blogging event, where bloggers make something sweet and send it off to mystery matches, Kris Kringle style.

And then I did think about it and I realised that I never really make anything that I might be able to send through the post.

Panic!

So I’ve been thinking about sweets more than normal and the rejects (from the point of view of The Sweet Swap) may appear here as posts over the next couple of weeks. I start with marshmallow: I actually asked Andy if he would prefer marshmallow or sweet x and he chose marshmallow. I hate marshmallow so I was really cooking blind here.

I knew there was a recipe in James Martin’s Desserts so I dug it out, had a read, and realised it shouldn’t be too hard.

The big thing with marshmallow is that you need to be careful with the sugar temperature when you add the gelatine. Apparently gelatine loses its setting properties above 130°C, so you need to make sure the sugar is below that (naturally, you also don’t want the sugar to be taking on any colour).

The little bit of faff with a thermometer aside, this was super easy* to put together. And as the small eating machine that is our toddler grows bigger, I’m sure having sweets like this in my repertoire won’t be time wasted!

Andy rated the marshmallow very highly – but you’ll have to take his word for it, because I still hate the stuff!!!

* Super easy if you have some experience in the kitchen. If you genuinely consider yourself a novice, perhaps don’t start here!

Marshmallow

Ingredients

  • 227g caster sugar
  • ½ tbsp liquid glucose
  • 100 mL water
  • 4½ sheets gelatine (platinum strength)
  • 70mL cold water
  • 1 egg white
  • splash of vanilla extract
  • red food colouring (optional)
  • corn flour & icing sugar for dusting
  • a sugar thermometer is essential

Instructions

  1. Begin by putting the sugar, liquid glucose and water in a saucepan. Choose a reasonably heavy bottomed one because you need to have some control over the heat. Bring to the boil and cook until it reaches 127°C.
  2. I found that I hit the 110°C mark quite quickly but it took a while after that to hit the 127, so you do have a little time on your hands.
  3. While the sugar mix is boiling: soak the gelatine in the cold water and beat the egg white until stiff.
  4. When the syrup comes to temperature, remove from the heat and slide in the gelatine and its water. Take care as it may spit and obviously it's very hot! Gently stir to dissolve the gelatine.
  5. Start beating the egg white again and slowly pour in the hot syrup and gelatine mix.
  6. The mixture will thicken quickly and will be like super glossy, super thick meringue. Add the vanilla extract (and food colouring, if using) and continue beating for a good 5+ minutes. You're waiting for the mixture to both cool and become extremely thick.
  7. It's ready when it clings to the whisk, holds its shape and is really almost the texture and consistency of foam.
  8. Using a hot sugar mix like this (the process is not dissimilar to Italian meringue) means that the marshmallow is extremely stable so you don't have to rush to get things done.
  9. Lightly grease (using a flavourless oil!) a baking tray or dish. I used a ~ 20 x 27 cm baking dish. Dust the base with a mixture of sifted cornflour and icing sugar.
  10. Spoon in the marshmallow: this should be hard work because the mixture is so stiff. Spread it evenly throughout the dish as best you can and level with a palette knife (wet and/or hot may help).
  11. Put in the fridge for a minimum of one hour to set.
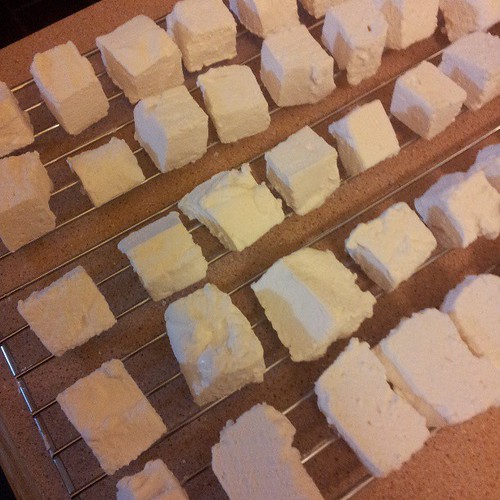
  12. Dust your work surface with sifted icing sugar and cornflour. Tip the marshmallow out and cut into bit size pieces. Roll each piece in the icing sugar/cornflour mix and set on a rack to dry out.
  13. Store in an airtight box.
https://eatingadelaide.com/marshmallow-recipe/