A Classic Australian Meat Pie

Classic Australian meat pie

Master 10 has recently upped his pastry game. The ‘game’ being the eating of pastry, not the making of it. After years of solid allegiance to the sausage roll he is branching out … thanks to a trip to the pool and a Mrs Mac’s Famous Meat Pie. This then triggered a request for a classic meat pie for dinner so we borrowed some pie tins from my parents and I searched the web for a recipe. For his first birthday party I’d actually made party pies but didn’t save the recipe and also recalled them being a little dry, so it was useful to take the opportunity to revisit.

I based my recipe on this one from bestrecipes but baulked at the idea of adding tomato sauce so substituted in tomato paste.

Classic Meat Pie Recipe

Ingredients:

  • 1 onion, finely chopped
  • 500g mince (beef, obviously!)
  • 1 cup (ish) of beef stock – substitute stock cube & water if you prefer
  • 2 tbsp tomato paste
  • 2 tsp Worcestershire sauce
  • salt & pepper
  • corn flour
  • pastry – I used puff on both top & bottom

Method:

  1. Heat some oil in a pan and sweat down the onion.
  2. Ensure the pan is hot and add the mince. Break it up and ensure you brown it.
  3. Add stock, tomato paste and Worcestershire sauce, stir well and then bring to the boil.
  4. Cook well – keeping an eye on the liquid level. Taste and season with salt & pepper.
  5. Create a slurry of the corn flour & some water and stir in to the meat – this will thicken the gravy.
  6. Allow filling to cool. 
  7. When ready to assemble the pie, preheat your oven to fan 180C and beat an egg to use as the glaze. Line your prepped pie tins, fill and top. Glaze with egg & decorative pastry. Cook for about 20 minutes or until pastry is golden.

For a different take on a pie using beef, check out the beef & stout pie.

Beef and Stout Pie

Untitled

Friday was Pi Day. The humour in this is limited – if you write dates in the American format it was 3/14, and pi (the mathematical constant) approximates to 3.14 (if you’re dealing with 2 decimal places). The connection between all of this and pies is tenuous at best.

But we’ve also had a burst of relatively cool weather in Adelaide so for starters I’m more than happy to consider switching on things that generate substantial heat. And I’m also happy to consider eating pie. A hot, home made pie for dinner is definitely cold weather food.

I found this pie recipe on the MiNDFOOD website and tweaked it a little, not least of all because pies have pastry on both the bottom and the top!

Green peppercorns are a great ingredient to cook with: they add bursts of pepperiness along with a hint of sharpness. Just make sure you rinse them first (they will come in brine). You do need to factor in plenty of time for both cooking and cooling the pie filling. You can’t rush the beef being tender and, especially if you are doing a pie properly, you need the filling to be cool because if you hit the pastry with hot pie filling you’ll end up with the dreaded soggy bottom!

We used our piemaker for this and bought pastry (both shortcrust and puff – yes, sometimes dinner just has to happen!) so once the pie filling was complete the actual pie could be be assembled and on the table in about half an hour (20 minutes of that was cooking time). If I were serving this to others, I would bother to at least make my own shortcrust, use individual pie dishes and cook them in the oven. At least … that’s what I tell myself!

Beef and Stout Pie

Beef and Stout Pie

Ingredients

  • ~ 800 g diced blade steak (or any other cut of beef which works for long slow cooks)
  • 2 onions, very roughly chopped
  • 2 cloves of garlic, finely minced
  • 2 tbsp plain flour
  • 250 mL stout
  • 375 mL beef stock
  • a few sprigs of fresh thyme
  • 125 mL cream
  • 1 (generous) tbsp green peppercorns, drained and rinsed
  • pastry (for a piemaker)
  • 1 sheet of shortcrust pastry, defrosted
  • 1 sheet of puff pastry, defrosted

Instructions

  1. Preheat oven to 140°C (fan, or 160°C conv).
  2. Heat some olive oil in an ovenproof casserole dish and brown the beef in batches.
  3. Set the beef aside and turn down the heat. Add the onion and garlic and soften. Stir often.
  4. Return the beef to the pan and sprinkle over the flour, mixing well. Allow this to cook for a minute or two, before adding the stout, stock and thyme.
  5. Bring to the boil and then take off the heat and put, covered, in the preheated oven. Cook for about an hour and a half until the beef is meltingly tender.
  6. If the gravy is still a little thin, return to the stove and remove the lid - but keep a close eye on it and don't over thicken. It should be no more than the consistency of a thin cream.
  7. Allow to cool a little before adding the cream and pepper corns and set aside to cool fully. The cooling and the addition of the cream will thicken the gravy further.
  8. If using a pie maker, preheat and cut the base (shortcrust) pastry. Line the pie maker, fill (take care not to over fill!) and top with the puff pastry. Cook for the recommended time (in our case 20 minutes) and serve immediately.
https://eatingadelaide.com/beef-stout-pie/

Sunbeam Pie Magic Pie Maker

IMG_2326

Disclaimer: Sunbeam sent me a Pie Magic Family pie maker to test out.

Like all good northern men, Andy is really into pies. He holds very strong opinions about pies too – mostly around how much pastry has to be involved (bottom and top). So when Sunbeam asked me if I’d like to try one of their new additions to the Pie Magic range, I figured that domestic harmony demanded the answer be yes.

Now – once upon a time, I worked as a sales assistant in the electrical department of a major department store. I started in “small electrical” (before graduating to hi-fi) so I have seen (and quite possibly owned) every kitchen gadget under the sun. At the age of 20 (ish) you see a pie maker and think “who the hell needs that?”. That was actually also the response I got when I posted a photo of my newly arrived Pie Magic to Twitter/Instagram.

I know you can buy pie tin(s) and make pies in your oven. And we do that relatively often. My main complaint with this process is the time and energy that it takes. You have to preheat the oven and we find the pie spends a good 40 minutes minimum cooking. And even then, I confess, often the pastry on the bottom is a little soggy. When I read that the Pie Magic was going to deliver me pie in 15-20 minutes that was when I thought we might be on to something.

The Pie Magic Family makes a single, family size pie. It’s a bit bigger than your average toastie machine, so it doesn’t take up too much space. Naturally, there’s a cord tidy, so it’s also easy to store. It comes with a big spatula for getting your pie out and also a pastry cutter. The pastry cutter is one of those simple things that probably took a fair bit of thought to get right. One side cuts the pastry for the base, including slits so that it fits nicely. And the other side cuts the top. Which way round is marked.

IMG_2324
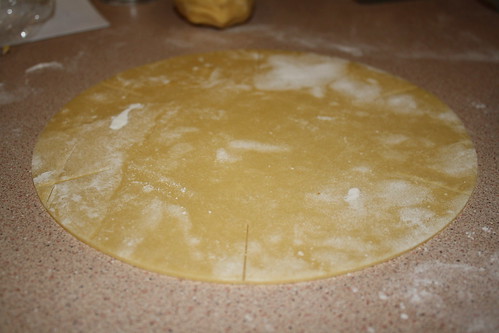
base – perfectly sized, with slits to ensure it fits the pie maker snugly

Being non stick everything, there’s no need to grease the Pie Magic. You do, however, need to get it heated up before you start putting your pastry in. Carefully line the base, fill with cooled pie filling, and put on the lid. Not required: water to create the seal, egg wash, hand crimping. Just shut the Pie Magic and wait 15 to 18 minutes.

Andy was a bit sceptical at this point – the lid didn’t look like it was going to be big enough to create a decent seal. He was also complaining about the lack of egg wash – would the pie be golden?

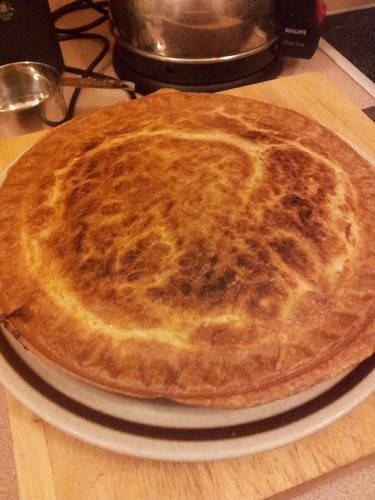
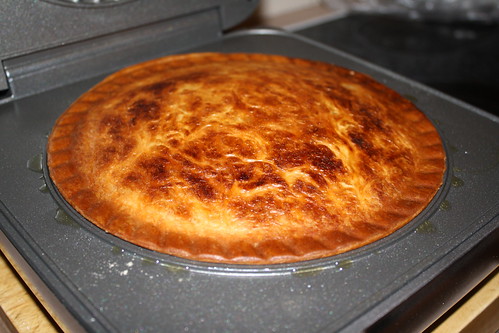
We actually waited 20 minutes, because our pie mixture had come straight from the fridge, and because of concerns about the colour of the top. As you can see – no problems with colour at all. The pastry was all cooked and the filling was piping hot. Everyone was happy.

When it came to getting the pie out Andy was worried that the lid would come off (see, I said he took pies seriously) but the broad spatula and a bit of patience meant that the pie slid out and on to a plate easily and in one piece.

We used home made shortcrust pastry on the bottom and bought puff pastry on top. However, because the Pie Magic closes on the pie you won’t get a puffed up top like you do in the oven – so next time we use it I’m going to try to convince Andy to use shortcrust for the top too.

IMG_2329
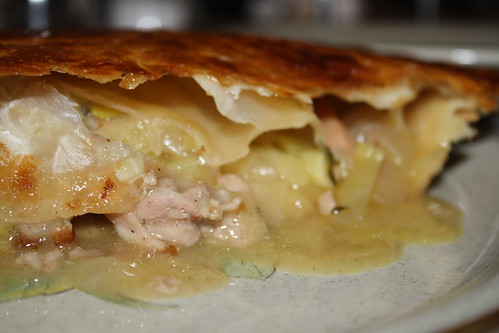
finished product ready to be devoured

Obviously you can use the Pie Magic for both savoury and sweet pies, and you can also use it for reheating pies. The instruction manual also contains a good selection of recipes most of which are extremely easy.

This is definitely one kitchen toy which is going to get a hammering in our household. It cut down pie making time and hassle by a noticeable amount.

So who needs a pie maker? Actually, it turns out, pretty much anyone who likes eating pie!

Top tip: clean the Pie Magic while it’s still warm. All it will need is a wipe down with a hot soapy cloth.