Cherry Ice Cream Recipe

IMG_2905If you’re in a part of Australia which is currently sweltering (so, pretty much anywhere in Australia, judging by the amount of red on the weather map this morning …) the last thing you’re thinking about is eating, let alone cooking.

But if you are inclined to head to the kitchen, let me suggest this recipe for cherry ice cream. Cherries are in season here in South Australia and, with the run up to Christmas looking warm, I was after something low heat to make for dessert for Christmas day.  I had a look around for cherry ice cream recipes and discovered a few that used the same technique but weren’t based on a custard. In fact, the most complicated thing I was going to have to do was melt some sugar in some cream. On a hot day, even I can manage that. In the end I went with a recipe from Just One Cookbook, because I thought the finished product looked prettier.

Begin by ensuring your ice cream maker is ready to go. If you have one with a built in compressor then lucky you, otherwise make sure your churning bowl has been in the freezer for the right amount of time.

Begin by melting 1 cup of pure cream (for some reason about 99% of cream sold in Australia has thickener in it, avoid that stuff and look for ones marked ‘pure cream’ and even then, double check the list of ingredients!) with 150g caster sugar, a pinch of salt and the seeds and pod of half a vanilla bean. When the sugar has fully dissolved, remove from the heat and add 1 tsp of vanilla extract, another cup of cream and a cup of full cream milk.

Allow the mixture to cool completely. Especially if it’s a hot day, do this in the fridge, although bear in mind that if you are using really good cream, you’ll end up with a cream “crust” which will need to be whisked back into the mixture before churning.

Pit and quarter cherries so that you end up with 2 cups. I don’t have a cherry pitter but if you have really good fresh cherries, this isn’t hard work at all. If it’s not summer where you are, or fresh cherries aren’t available, use very well drained tinned cherries.

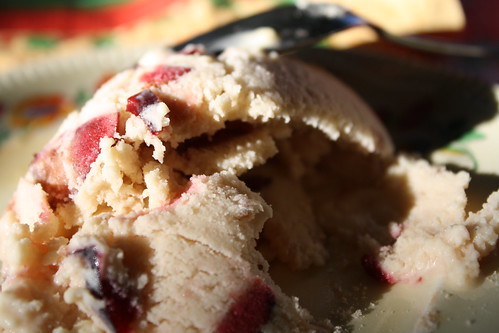
Churn in your ice cream maker, following its directions. When the ice cream is almost done, add the cherries and churn again. Don’t freak out when you add the cherries: the mixture is likely to become a lot looser than it was, but it’s not spoiled – you just need to keep on churning.

Once it has all thickened back up, put into a container, seal and put into the freezer overnight. Remove for at least half an hour before serving.

While this ice cream was insanely easy to make and both tasted and looked really good, I wasn’t a huge fan of the texture. Melting the sugar meant it wasn’t gritty but the high fat content, and the sheer volume, of the cream meant it was very grainy which didn’t really work for me. A custard based ice cream (such as the excellent coffee ice cream I made a while back) contains less fat and is much silkier to eat. However, if you’re still getting into your custard groove, or you have cream to use up, or you’re just feeling a bit lazy, this recipe works a treat.

Couscous Salad Recipe

IMG_2884

Disclaimer: I was sent the wholemeal couscous by San Remo.

As you may have gathered, I am quite keen on couscous but one thing I normally steer well clear of is wholemeal pasta. I had a very unhappy experience with it as a child (it was so horrible we ended up feeding it, uncooked, to my pet mouse, who loved it) so I was both sceptical and interested when San Remo released the new wholemeal couscous. Out for a drink, I mentioned it to a friend who got quite excited about the idea and immediately said she’d look out for it. So I’m assuming that more than reader will be interested to know a higher fibre, lower GI version of couscous exists and is produced by a South Australian company!

Anyway, new couscous meant time to try out a new recipe. Given that the Moroccans should know a thing or two about couscous, I turned to Made in Morocco and when I spotted the recipe for a couscous salad made with chickpeas and goat’s cheese I was sold.

This recipe isn’t flawless – so read on for what I did and what I will do next time!

Begin by roasting and skinning some red capsicums. Heat your oven to 200°C (conventional), cut your capsicums in half and place them skin side up on a tray (for ease of cleaning, I recommend a tray lined with baking paper). Drizzle over some olive oil and roast for ~ 30 minutes or until the skin starts to char and blister. Remove from the oven, place in a bowl and cover with cling film so that they sweat. Once they’ve cooled, you’ll be able to peel them quite easily! Slice and set aside.

In a large pan (I used a Corningware pan, so it could go straight from stove to table), heat some olive oil and lightly cook one largeish onion, finely chopped. Add two cloves of crushed garlic, 1 tsp of turmeric and ½ tsp of ground cinnamon. Quickly cook off the spices before adding 1½ cups of stock (chicken or vegetable).

Bring the stock to the boil and add 1½ cups of couscous (I used 50:50 white and wholemeal). Stir through the couscous and remove from the heat. Cover and leave for ~ 10 minutes, then fluff up the couscous and leave to cool a little.

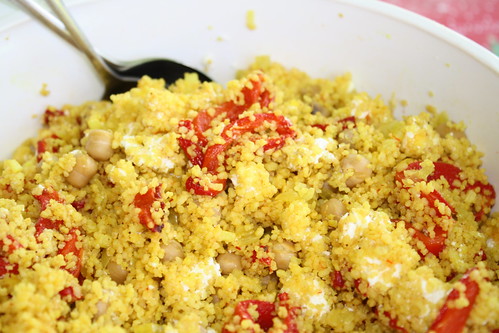
When you’re ready to serve, stir through the remaining ingredients: 1 tin of chickpeas, drained and rinsed, 150g of goat’s cheese, crumbled (I used Udder Delights’ chèvre which is widely available in supermarkets, but not particularly cheap), the juice of one lemon (I also added some grated rind) and plenty of fresh mint and parsley. While you can live without the parsley (we did) don’t skimp on the mint.

If you have it, top the salad with some finely sliced rind of preserved lemon.

This recipe is good in principle but there are a few problems. Firstly, the recipe says it serves four. Really? 1½ cups of couscous more like serves about 10. I brought this salad to our Christmas lunch of 8 adults and one child and only about a quarter of it was eaten! Secondly, I feel that the proportions are slightly out of whack. There are too many chickpeas, possibly not enough goat’s cheese and definitely not enough capsicum.

I’d definitely make a variation on this again. I’d do the onion, garlic, turmeric and cinnamon, I’d omit the chickpeas altogether and would increase the amount of roasted capsicum (or add other roasted vegetables, as I think some roast pumpkin would work really well here). Unless I was making this to take to a massive BBQ I’d also halve the quantities.

Recipe issues aside, the wholemeal couscous worked a treat. Andy didn’t even notice the difference and the next couscous salad I make (which will be on Monday, different recipe next time!) I’m going to use 100% wholemeal, not half and half.

Anjum Anand’s Punjabi Chicken Curry Recipe

Punjabi Chicken Curry

A brief spate of cool weather saw us thinking about fitting in a curry. Andy initially wanted a lamb curry but we’d had arni souvlaki earlier in the the week so we ended up opting for chicken.

I chose this recipe, from Anjum’s New Indian, mainly because we had the ingredients all in house and ready to go. I’m not sure if Anjum Anand’s shows have made it on to Australian TV, but she did some fun programs in the UK where she showed curry enthusiasts that it was just as easy to cook a curry from scratch as it is to open a jar.

While this recipe doesn’t require a lot of cooking time for the meat, it does require time and it lends itself really well to being something you prep in the morning. Try throwing it together when you get home from work and you’re tired and hungry and I doubt it will turn out as well.

Begin by making a paste of about 1 tsp of crushed ginger, 5 cloves of garlic and a little water.

Next, take 2 black cardamom pods, give them a whack and put the seeds into a mortar. Add 2 cloves and grind and then mix in about ½ tsp of ground cinnamon. The black cardamom seeds smell amazing: they have the anise notes you’d expect but also a really strong menthol character. As in, really really strong. Make this curry if you have a cold!

In a large pan (in my case, the wok) heat some peanut oil, add about 20 curry leaves (washed and dried) and 1 onion, finely chopped. Anand uses a bay leaf but we have a curry leaf plant and I love the smell of them.

Now, boring part number one. Cook unti the onion browns. This takes ages. Don’t make the mistake of whacking up the temperature, because all that does is burn the onion. You need a medium temperature and you need to hang around and stir the onion so that it browns evenly. This part of making a curry bores me to tears but it is also well worth it.

When the onions are brown, add the garlic and ginger paste and, in my case, one dried Kashmiri chilli. Anand uses fresh, whole green chillis that you prick all over. But, as with the curry leaves, we have the dried chillis coming out of our ears so that’s what got used!

Cook this for a few minutes and then add your chicken. I used chicken thigh fillets (about 400g), cut into generous mouthful sized pieces. Anand always recommends using joints. Yes, the bones do mean flavour but generally I’m pretty lazy and thighs at least have more flavour than breast fillets. They’re also less likely to dry out.

Brown the chicken and then add the spices: 2½ tsp ground coriander, 1 tsp ground cumin, a pinch of red chilli powder (to taste, really), some turmeric and about 1 tsp of garam masala. And, of course, the cardamom, clove and cinnamon mix. Also add a good pinch of salt. Stir, and add three smallish tomatoes, cut into wedges. Top up the pan with some water and bring to the boil. Reduce the heat, cover and cook for a further 15 minutes.

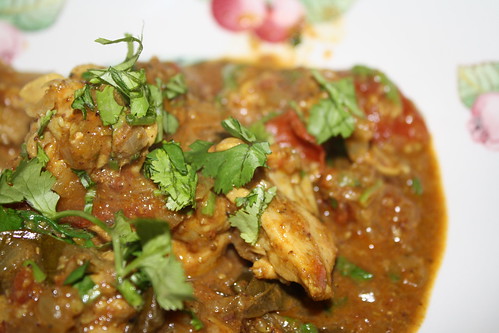
Uncover the pan and increase the heat to high to brown and reduce your sauce. This is boring bit number two, but not as bad as the first as you don’t have to hang around quite as much. But you do really need to let it cook slowly for a while with the occasional stir. Suddenly you’ll notice the sauce has thickened and darkened.

When you’re ready to serve, mix through a generous handful of chopped coriander. Instead of rice, we had homemade naan bread. Delicious, and absolutely worth the hanging around and stirring!