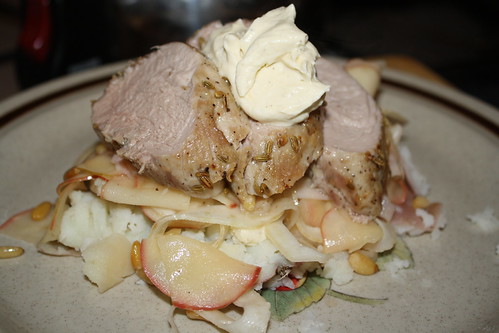
Pork Fillet with Fennel and Apple Salad

Pork Fillet with Apples, Fennel & Creamed Feta

My previously blogged easy pork fillet recipe has been a popular page over the last month so let’s revisit this excellent cut of meat but cook it in a slightly different way.

This is another recipe I’ve had on my to do list for a couple of years, and it comes from the website of the UK version of Delicious. The choice was actually driven by the fact that I’d picked up a bulb of fennel for just 99c and so I was looking for a way to use it.

I love fennel when it’s handled as little as possible so the light warm salad that accompanies the pork fillet in this dish is a perfect way to showcase the vegetable. This was very much a recipe where the finished product is much greater than the sum of its parts, and it’s also a lot more sophisticated (in both appearance and taste) than it is work to put together.

We had a piece of pork fillet that was about 400g (yes, the original recipe says that will serve 4 – this served 2 + a toddler – perhaps our toddler eats a lot …). Leave the meat in one piece but trim off any sinew. In a bowl mix a small amount of olive oil with one fat, finely chopped clove of garlic and 2 tsp of fennel seeds. Season and add the pork fillet. Ensure the pork is well coated in the mix. I see no reason why you couldn’t do this in advance, but there’s no need to leave the meat marinating.

Heat a little oil in a frying pan and sear the pork on all sides (remember – the pan should be good and hot and no prodding and poking of the meat – it will come away from the pan, even if it’s not a non stick pan, when it’s good and ready). Transfer the pork to a small roasting dish and cook in an oven preheated to 200°C fan. I cooked the pork for 20 minutes, followed by 10 minutes resting time and it was almost spot on (if anything it was a touch over).

While the pork is cooking in the oven, wipe out the frying pan and prepare the salad. Using a mandolin (or slice finely) slice half a medium sized bulb of fennel, and then finely slice a small red apple (you want the red skin so it looks pretty!).

Toast a handful of pine nuts in a separate pan and mix them with the apple and fennel.  Drizzle over some olive oil and lemon juice and add the mix to the pan you used for the pork.  Warm over a gentle heat.

Finally make some creamed feta.  Use 100g of feta (buy Australian!) and begin with 2 tbsp of cream.  Because I used thick pure cream I actually had to add more.  Season and whizzy up in a small food processor or using a stab mixer.  Ideally you want it to be quite loose so you may want to add some milk if your cream is too thick.

To serve, I boiled some potatoes, crushed them on warm plates, spooned over some creamed feta, topped with the apple and fennel mix and finish with the pork, with a bit more creamed feta.

This was absolutely delicious.  The fennel seeds on the pork complemented the fennel in the salad and there was a good balance of flavours and textures (from a texture point of view it’s very important not to overdo the salad – you want it softened and warm but still with a bit of bite).

Definitely a recipe we’ll be using again and again.

How To: Roast a Leg of Lamb

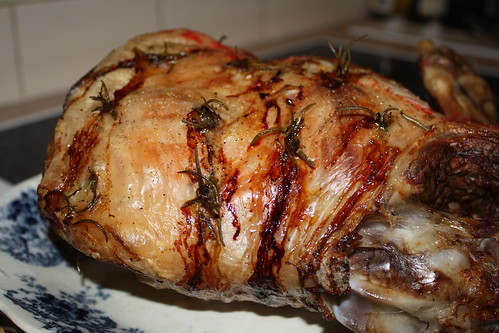
Roast Leg of Lamb

I was recently lucky enough to buy half a Dorper lamb, freshly butchered and delivered into my hot little hands from its farm on Hindmarsh Island.

We haven’t had something as simple as a roast leg of lamb for AGES so it was time to crack out the meat probe. Not too much time needed to be spent googling the right temperature. My parents have just acquired an oven with meat probe and had handily cooked a leg of lamb a couple of weeks prior. They cooked to 74°C which, by mum’s standards, was perfect. We opted to cook to 71°C as we like our meat a little pinker.

If you don’t have a meat thermometer then you should really buy one, because otherwise you have to do all sorts of complicated calculations regarding weight, oven temperature and whether or not you have a bone in the meat. I can’t help you with that!

However, what I can help you with is prepping the meat.

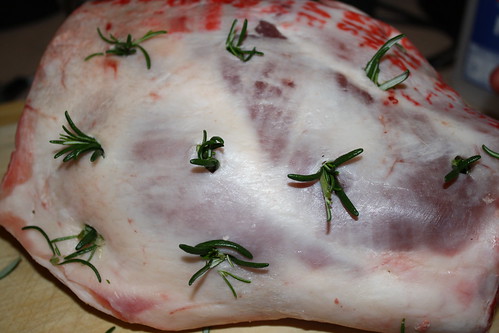
Our family tried and tested approach is to stud the meat with garlic and rosemary. If you’re inclined, you can also add anchovy to that mix, but on this occasion I went with just garlic and rosemary.

Take a small, sharp knife and plunge it into the lamb flesh to create little pockets. You can see from the photo that you want quite a few. The more you have the more the meat will be infused with the flavours of garlic and rosemary.

Now, thinly slice a clove of garlic. You need slivers of garlic so that they’ll melt into the meat as it cooks and when you eat it you’ll get the garlic flavour throughout rather than big bursts of garlic. Stuff the slivers of garlic right into the pockets – no garlic should be sticking out because if it does, it will get burnt and taste bitter.

Next stuff in little slices of anchovy (if using) and finish with small sprigs of rosemary, say a cm or two in length. The rosemary can stick out.

Do this all over the lamb (including underneath).

Then you’re ready to roast! There’s no need do anything fancy like you would do with pork (for crackling) or a fillet of beef. Just straight into the oven until done.

Make sure you rest the meat, covered – at least 20 minutes. Once the meat is out of the oven is the point at which we start doing most of the vegetables (roasted ones excepted).

Roast Leg of Lamb

Serve on hot plates, with roasted and steamed vegetables and plenty of gravy (make sure you add the juices from the rested meat to the gravy!).

Perfect for a Sunday dinner but good enough to be special occasion food.

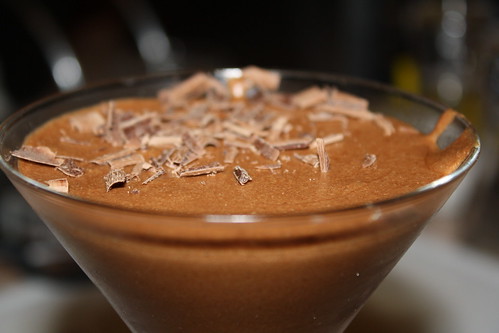
Chocolate Mousse

Chocolate Mousse

Have you noticed how many bad chocolate mousses there are around the place? Even if you order mousse in a restaurant it is invariably tough or claggy (or, if you’re really lucky, both) and tastes vaguely of artificial chocolate.

This recipe for chocolate mousse is simple AND solves all those problems – all thanks to Julia Child’s vital kitchen manual, the grandly named Mastering the Art of French Cooking. If you’re a keen cook and you don’t yet own this book, I urge you to buy it because it is a brilliant, step by step manual. Even long winded recipes are so clearly spelled out that they are not intimidating.

Child’s chocolate mousse recipe isn’t long winded (it took me under an hour to put it all together, and that was with 3 people in the kitchen, including a toddler). As usual, read the recipe a couple of times before starting and have everything ready and it will be painless. I promise.

Begin by beating 4 egg yolks with ¾ cup of caster sugar. Do this in a bowl you can set over a pan of just simmering water. Beat well – until the mixture is thick and pale and forms a ribbon which dissolves back into the mixture slowly. If you’re inclined, add a splash of your favourite spirit or liqueur (in our case, ⅛ cup Cognac, but Child suggests ¼ cup of orange liqueur).

Now set the bowl over the water and beat until the mixture is foamy and too hot to touch. Child says 3-4 minutes which I found was nowhere NEAR enough time. Then sit the bowl over cold water and beat again until the mixture is cool and forms a ribbon again. It will now be roughly the consistency of mayonnaise. Don’t fret if it’s slightly loose mayonnaise – a lot of mayo that you buy in jars is miles too stiff!

You can now relax – the tedious part of the recipe is over and done with.

Melt 6 oz (170g) of best quality dark chocolate with 4 tbsp of strong coffee and 6 oz (170g) of unsalted butter. As usual – I did this in the microwave.

Allow this to cool a little and then beat the chocolate mixture into the egg and sugar mix.

Finally, beat 4 egg whites with a pinch of salt to soft peaks. When starting to form peaks, sprinkling over 1 tbsp of caster sugar and beat until you have stiff peaks.

Stir a little of the egg whites into the chocolate mix and then fold in the rest. FOLD. You don’t want to knock out the air because the egg whites are what is going to give the mousse its super light, creamy texture.

That’s it! All done. Now you just need to tip the mousse into whatever you’re serving it in. I put a little in a martini glass (for quality control purposes, and the fact that it might take a nice photo) but poured the majority into a large serving bowl.

Refrigerate for at least a couple of hours so that the mixture can set. Overnight is perfect.

This is the type of dessert where you could be quite happy to just plant your face in it. However, if you have company, serve, passing some fresh cream. Absolutely delicious.