Custard

Apple Crumble & Custard
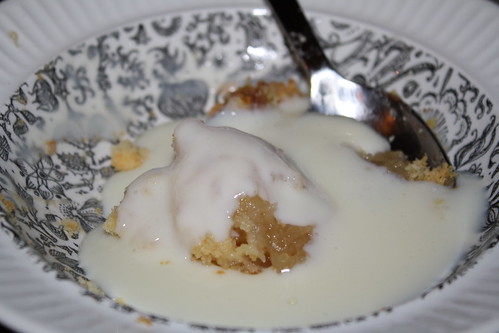
apple crumble drowned in custard

I would have been perfectly happy to have cream with our apple crumble, but Andy was not and as I had a brand new milk pan that needed trying out, custard seemed like it was on the cards.

A lot of people seem to think that custard is hard or difficult or scary. Well, it’s not though if you approach anything with that attitude, why then, yes it will be.

This recipe is a James Tanner one that I first discovered in 2006 but the original link no longer works. It is super easy – no separating of eggs or anything. All you need is a heat proof bowl, a pan and a whisk.

Begin by beating 2 eggs with 55g of caster sugar. When this is pale and creamy, heat ½ pint (that’s 285 mL) of milk (full cream, naturally) to just on boiling (this is called ‘scalding’ the milk, if you want to be technical) and then slowly pour the hot milk onto the eggs and sugar, whisking all the time. You need to keep on whisking otherwise the heat of the milk will scramble your eggs.

Return the mix to the pan, on a lower heat, and continue to beat or stir until the custard reaches the right consistency for you. I find this takes about 15 minutes. Two tips here: do make the effort to hang around doing the stirring and most certainly do NOT crank the heat up and wander away. Secondly, ensure that your stirring or whisking gets into the corners of the pan – if you don’t work your way around the pan solidly you’ll end up with lumps of cooked egg in your custard!

If you’re not planning on using your custard straight away, cut a circle of baking paper (a cartouche) and cover the custard with that. You can then gently reheat it when you’re ready.

You’ll note that homemade custard is distinctly paler in colour than anything commercial or made from a packet. Eggs, milk and cream is never going to come out bright yellow.

And, if you wish to jazz your custard up, you can infuse flavour when you scald the milk. Pop in a split vanilla bean, or a crushed cardamom pod or two, for example.

All too easy – and to be honest, not actually that unhealthy either!

Apple Crumble

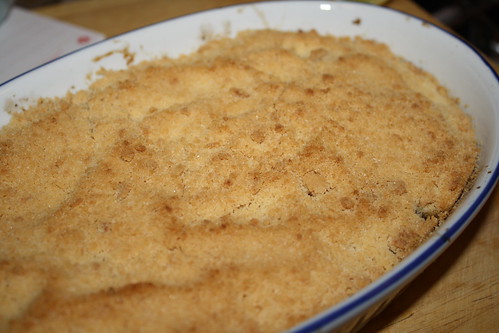
Apple Crumble & Custard

While Spring is technically just around the corner here in Adelaide it’s still really cold. After a pleasant couple of days early this week Thursday and Friday are still looking chilly so it’s not too late to think about making an apple crumble.

This is the easiest of desserts to make. For the two of us, and using a small pie dish, I peeled and quite coarsely sliced 2 Granny Smith apples – let’s say I cut them into eighths. I put them in a pan on low heat, with a splash of water, a scant tablespoon of caster sugar and half a cinnamon stick. I then walked away and ended up doing a pile of other things and when I remembered that I had apples on the stove they were almost at puree stage. Oops! Perhaps don’t cook yours quite so long. Really you just want to soften them a bit but have them retaining their shape.

I put my puree in the pie dish, no greasing required, and topped it with a layer of finely sliced Granny Smith (to ensure the finished product had some texture).

For the crumble I used 100g plain flour, 25g caster sugar and 50g of unsalted butter. You have no choice with crumble but to make it by hand as you do not want it too fine and you also don’t want it too homogenous: a few chunks here and there are a good thing. So work the crumble mixture by hand until the butter is mostly all incorporated – a few small bits here and there is fine. Overall, the mixture should resemble coarse sand.

Spread the crumble over the apples. Don’t press it down to form a hard crust (that’s called pastry and you’ve done it wrongly!). Bake in an oven preheated to 200°C (conv) for 40 minutes or until the crumble starts to turn golden.

Serve hot or warm, with cream, ice cream or custard.

How to Roast Beef

Untitled

One of the great things about having a food blog is that, no matter where I am, I can find a previously visited restaurant’s name and address or make a favourite recipe. One thing I have not yet done though is record the temperatures to which I like my meat cooked.

This means that every time we get a piece of beef to roast I have to spend about half an hour googling for internal temperatures and fretting over whether I’ve chosen the right temperature. It’s time to fix that.

57°C.

So – there’s the raw data. But what’s the process?

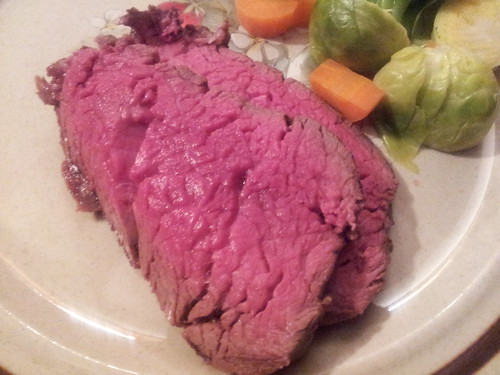
Let’s assume you have a piece of fillet – which is what is featured in the photo above*. I use an oven safe stainless steel fry pan and melt some butter and light olive oil in it. I then take my piece of beef (preferably at room temperature), season it and sear it in the pan so that it is nicely browned all over. Whatever you do, don’t do too much searing – just enough to pick up some colour. You don’t want the meat to actually start cooking.

I’m very lucky in that I have a 20 year old oven with a built in meat probe. This is brilliant because you can set the oven at whatever temperature you wish (usually 180°C conv), plug the meat probe in (to both oven and meat), set the probe temperature (57°C) and walk away. When the meat hits the temperature the oven will beep and turn itself off. If you have a normal meat thermometer you’ll just need to keep on checking …

When the meat is done, remove it from the oven, put it on a plate and cover with tin foil, allowing it to rest for at least 15 minutes. This will give you time to finish off things like vegetables and gravy and get some plates warm. If you are making gravy, be sure to make it in the same pan the meat was cooked in AND to tip in any juices from the plate the meat has rested on.

As you can see from the photo, we like our meat rare. From what I’ve been able to find of Australian food safety guidelines, for a non rolled, non stuffed piece of meat like fillet, the only risk of contamination is the exterior of the meat, so as long as that’s well cooked (that’s the searing and sitting in a hot oven part) you are fine to cook the meat to any temperature you wish. American readers should note that the USDA recommends 145°F (about 63°C) as a minimum.

And obviously, you should always cook your meat to YOUR preference!

* Sorry for the poor quality of the photo but really, if you had a piece of meat like that in front of you would you be worrying about setting up a good shot?! Normal people want to crack on and EAT!