Disclaimer: I was invited to the Adelaide trade launch of Four Pillars Gin.
For me, gin is synonymous with summer – and here in Australia more so even than a Pimms. It’s a common unifying theme amongst many of my friends and we even have our own lime tree. Really, all I need is for our local shops to sell decent tonic water and then I would be set for whatever heat waves summer could throw at me.
I’ve worked my way through a few gins over the years (does that sound bad?) – as a uni student much was at the less glamorous end of the spectrum, but as a proper grown up I’ve been able to dabble in Bombay Saphhire, Tanqueray, other people’s Tanq 10, Hendricks and even the Boudier Saffron Gin – yes, it really is radioactive orange. To me, that list looks a bit anaemic – I’ll have to fix that! And the whole ‘distill your own gin’ experience at the Plymouth Gin Distillery is very much on my to-do list.
So an invitation to the launch of Four Pillars Gin, a new but already award winning gin from Victoria’s Yarra Valley, was accepted greedily.
The launch was held at Mother Vine – somewhere I really need to head back to and investigate in serious detail. For the purposes of today … trust me that, if you drink, it’s somewhere you NEED to go.
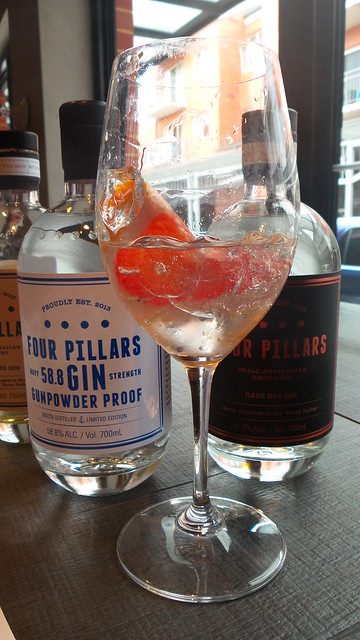
Anyway, let’s get back to the important things … and that’s the gin. We started with a gin and tonic – but they were served with either orange or ruby grapefruit. Mine (not the one in the picture) came with ruby grapefruit which worked really well. I know it’s not lime and it’s heresy but … there’s a reason for it working well.
All gin must have as its principal flavour, juniper. I suspect that most people learn to identify the taste and smell of juniper by drinking gin – I know I did. But after juniper, the distiller has free rein. This is what leads to much greater stylistic variation in gins than you will find in many other spirits. The chaps behind Four Pillars (Stuart Gregor, Cameron Mackenzie – the distiller, and Matt Jones) put in some serious research when deciding what to do with their gin. And by serious, I mean they headed to the US to sample the latest in boutique gin production and then they came home, ordered what can almost be considered a one-off German still and got experimenting. They needed to maintain the ‘gin’ character but also wanted to add their own edge. Some of that edge comes in the form of uniquely Australian ingredients, such as Tasmanian pepperberry and lemon myrtle but they also added in some orange. Rather than using dried peel they settled on boiling up whole fresh organic oranges in a ‘botanical basket’ and using this as one of the principal flavour components. So serving a Four Pillars G&T with a slice of orange (or grapefruit) makes sense and, most importantly, works well.
Next up we got to try a martini and we followed this up with a negroni (no, I wasn’t driving) while the staff at Mother Vine brought out some very tasty morsels. By far my favourite (which says something, as some crispy pork belly was on offer) was the braised mushrooms with Taleggio and dill – sadly, my photo of that is too awful even by my low standards!
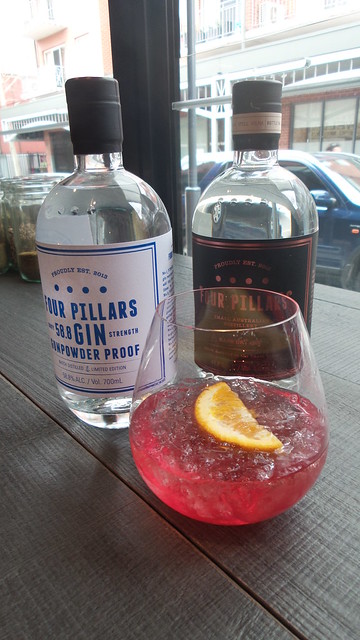
The Four Pillars range consists of three gins – the rare dry (which was used in the G&T and martini), the barrel aged (used in the negroni) and the just released Gunpowder Strength, which clocks in at a scary 58.5% abv. Apparently, fearing that it was being dudded with watered down gin, the British Navy devised a test to ensure that the gin was strong enough. If the gin could used to be wet gunpowder and the gunpowder still lit, it was deemed acceptable. In the Gunpowder Strength gin, the orange is still present but reduced to make way for finger lime. What is very impressive in this gin is that you would not know how alcoholic it is: it is super smooth. I tried some just on its own and was stunned by how pleasant and smooth it was to drink.
The Rare Dry gin has already picked up a double gold medal that this year’s San Francisco World Spirits Competition, outscoring competition such as Hendricks (which came in with a bronze).
There’s limited availability of these gins – you can buy on line through the Four Pillars site (Rare Dry is $70, Gunpowder Proof is $95) but you might also spot them at good bottle shops such as East End Cellars.