WIN! Paul Newman’s Own Aioli

Paul Newman Aioli

Disclaimer: I was sent the two new aiolis to try and Paul Newman’s Own has supplied the prizes.

I know that if you turn on a cooking programme on tv you’ll see a chef/cook/contestant whipping up mayonnaise or aioli in a matter of moments. And I’m pretty sure that most people don’t actually do that at home. We don’t do that at home. And do you know why?

Because when we want mayo or aioli we usually want such a tiny amount that the effort to make our own just never feels worth it. Plus, the whole point of having a BLT for dinner is minimal effort!

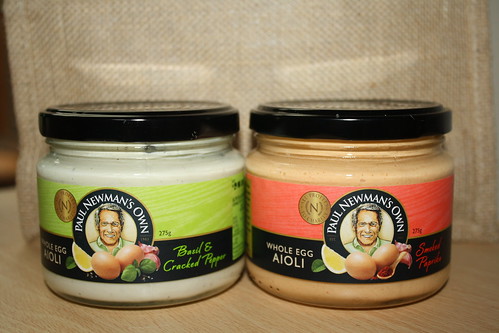
Paul Newman’s Own has just introduced two new aiolis to sit along its plain aioli: basil and black pepper and smoked paprika. The first thing I was impressed to note is that the products are made with the same things that you or I might use: oil, egg and no artificial flavourings.

Paul Newman’s Own is also a not for profit entity: all profits go to the Newman’s Own Foundation and they are then distributed to charities in the regions where the products are sold. So when you buy any of the products you can be confident that the profits will be directed back to charities in Australia, if not South Australia.

Last year, for example, the Foundation’s focus areas were children with life-limiting conditions and (fittingly, for a food company!) nutrition. South Australian charities that benefited were: Australian Cranio-Maxillo Facial Foundation, Day of Difference Foundation, Down Syndrome Society of SA and The Epilepsy Centre. (Check out the website for the full list of Australian 2012 recipients).

However, all these warm and fuzzies are just a bonus – they’re not the thing which will get you buying the products in the first place. That all comes down to taste.

I was sent jars of both the basil and black pepper and the smoked paprika aiolis to try out. The basil and black pepper aioli had an outing on the lazy Sunday night dinner: the BLT, while the smoked paprika I used to make a very quick and simple celeriac remoulade.

BLT

admittedly, this could be any random BLT … but trust me, it has aioli in it!

Of the two, I definitely preferred the smoked paprika aioli. This had a stronger flavour all round and definitely a stronger garlic flavour. The basil and black pepper was very subtle on the BLT (maybe I’m too stingy!) but tasted on its own, the fresh basil flavour does come through.

Paul Newman Aioli

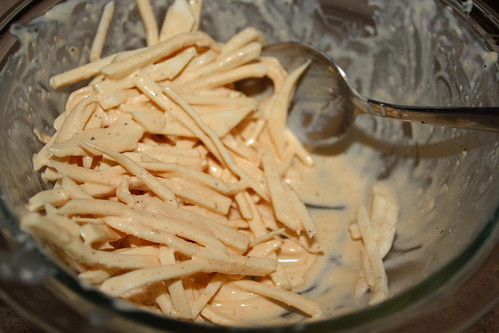
For the remoulade, I simply chopped the celeriac very finely, put it in acidulated water and, after draining it, mixed through the aioli. This is a very easy way of doing remoulade and you could complicated it by mixing through a little sour cream or crème fraîche, or some mustard – but the beauty of the smoked paprika is that you don’t need to do any of that.

I also thought that both would work really well as a dip on a plate of crudités. They’re very pretty colours and the garlic is not overpowering.

If you’re interested in trying the new aiolis, you don’t even have to head to the shops. Paul Newman’s Own has FIVE prize packs (one of each aioli in a cute bag) for Eating Adelaide readers.

Entry is easy – just use the Rafflecopter entry form below*.

a Rafflecopter giveaway

*Ts&Cs:

You must be resident in Australia (and have an Australian postal address).

The only mandatory task is liking Eating Adelaide on Facebook.

Winners will be contacted by email, and published on the Eating Adelaide Facebook page. They will need to respond within 48 hours, otherwise I will redraw.

How To: Meringue

Mini Meringues

I’m surprised but it seems as though I’ve never posted a basic meringue recipe. This is very remiss of me, because, if you’re anything like me you’ll often find yourself with a rogue egg white that needs using up. Perhaps after you’ve made pastry for a quiche lorraine, for example!

Before a ‘recipe’ (such as it is) some notes on egg whites and meringue making in general.

Fresh is best. Don’t use an ancient egg, and don’t use an egg white that has been hanging around in the fridge for a week. However, egg whites freeze really well. If you don’t think you’ll be able to use it up quickly, simply put it in a clean container and freeze. Egg whites defrost quickly and they’re as good as new.

If you can use an egg white that’s at room temperature, that’s better still.

Fat is your (meringue’s) enemy. Freezing the egg white? Use a scrupulously clean container. Cracking it into a bowl or ramekin? Scrupulously clean. The bowl you’ll be beating it in? Scrupulously clean.

I cannot emphasise that enough. NO FAT.

The recipe below scales up easily and, with just two ingredients, there’s no excuse for not giving it a try.

The real question is … should a meringue be gooey in the centre or crisp the whole way through?!

Basic Meringue Recipe

Ingredients

  • 1 egg white
  • 55g caster sugar

Instructions

  1. Preheat your oven to 100°C (conventional). If you're in a bit of a hurry about 140°C is as hot as you want to go. If you are cranking up the temperature, you'll need to keep a close eye on the meringues to make sure they're not taking on too much colour.
  2. Alternatively, cook something like a cake and turn off the oven. Leave the meringues in as the oven cools - even overnight.
  3. Beat the egg white until quite stiff. The stiffer it is, the glossier and firmer your meringue mix will be and the easier it will be to manipulate.
  4. When the egg whites are stiff, add the caster sugar slowly while you continue to beat. If this is your first time making meringue, add the sugar a tablespoon at a time. Otherwise, use your cooking wisdom to guide you.
  5. Ensure the sugar is really well beaten into the egg white. The mix should be smooth and glossy and not at all grainy.
  6. If you wish to make mini meringues (the best type for cheeky tea time treats!), scope the mixture into a piping bag fitted with a wide, fluted nozzle. Pipe the meringues on to a baking tray lined with baking paper.
  7. Of course, you can make any shape or size you want: using a teaspoon or a tablespoon works just as well, even if the finished product isn't quite as dainty.
  8. Cook in the low oven until dried out and crisp.
https://eatingadelaide.com/meringue/

Quiche Lorraine

Quiche Lorrainecheck out that shrinking pastry … don’t let your toddler drive the food processor!

One of my slightly less hip hobbies is entering competitions. I caught the bug while living in the UK and I’d say that it’s rare a day goes by when I don’t enter at least one. It goes without saying that my favourite competitions to enter (and win) are those involving food or cooking.

One of my most recent wins was Australian Women’s Weekly Country Classics, through a Kambrook competition. The Women’s Weekly cookbooks are famous throughout the world and I think everyone (or everyone’s mum or grandma) has at least one of these at home.

I was keen to try it out as soon as possible and, after having a good read through, I settled on quiche lorraine. Now, people can get a bit het up over quiche lorraine because it is one of those foods that has been well loved and well adapted. If you think this version is not quite right please feel free to tell me (and the Women’s Weekly!) what is wrong!

My toddler helped me make the pastry for this and it ended up somewhat overworked (when I came to roll it out it was elastic rather than silky …) and so we had a bit of shrinkage. I used all the bacon and onion mixture but have about 500mL of cream filling left. I’m planning on making a rather luxe omelette with it, and grating through some courgette so I feel healthy …

The pastry was good: short, crumbly and I enjoyed the hint of lemon. The filling was excellent and this is such a storecupboard kind of dish, with a bit of practice it could easily be a mid-week lifesaver.

Overall, the Country Classics cookbook is filled with solid recipes that will stand a novice cook, in particular, in good stead. Quite of the few salad and sandwich ideas I’m looking forward to appropriating and adapting in future and you never know, one day I might even make use of the “camp fire” section …

Quiche Lorraine

Ingredients

  • Pastry
  • 260g plain flour
  • 150g cold unsalted butter, cubed
  • 1 egg yolk
  • 2 tsp lemon juice
  • iced water, as required
  • Filling
  • 1 medium onion, finely chopped
  • 200g bacon, finely chopped
  • 3 eggs
  • 300mL cream
  • 125mL milk
  • 90g grated cheese (Gruyère is 'traditional' but I used standard tasty cheese)

Instructions

  1. Make the pastry by combining the butter and flour in a food processor. When crumbly, add the egg yolk and the lemon juice, and then slowly add the water until there is just enough for the mix to come together. Knead lightly, wrap in cling film and refrigerate for ~ ½ hour.
  2. To make the filling, fry the onions and bacon until the onion starts to turn golden. Drain on kitchen towel.
  3. In a bowl (or large jug, if you have one) whisk the eggs, and add the milk and cream. Stir through the grated cheese.
  4. Line a 24cm deep, loose bottomed quiche dish, with the pastry. Bake blind, with baking beans, at 180°C fan (200°C conv) for 10 mins. Remove the beans and bake for another 10 or so minutes until golden.
  5. Spread the bacon and onion mix over the base. Pour over the cream filling (if you have made the filling in a bowl it is probably worthwhile pouring it into a jug for this!). Do this slowly to give the mix time to spread around, otherwise you'll end up overfilling.
  6. Bake at 160°C fan (180°C conv) for 30-35 minutes, until golden and set. I personally prefer just set: I think it makes for a creamier end product.
  7. Stand for 5 minutes in the tin, and then remove. Serve hot or warm with either salad or steamed vegetables.
  8. Tip 1: place the quiche dish on a baking tray BEFORE blind baking. This makes it much easier to get it in and out of the oven and if your filling does overflow, you only have a tray, not an oven, to clean.
  9. Tip 2: to remove the quiche from its tin, pop it on a mug as this will allow you to remove the outer ring of the pan easily. Using a fish slice or palette knife, you can then gently manoeuvre it on to a serving plate or cutting board.
https://eatingadelaide.com/quiche-lorraine/