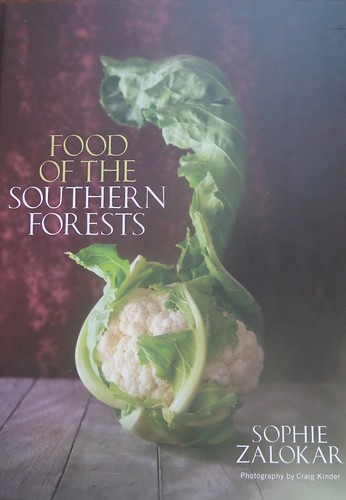
Disclaimer: I was sent a review copy of Food of the Southern Forests
So … cookbooks … something I need more of like a hole in the head but also something I can’t resist. Like wine glasses. Only I’m banned from buying wine glasses, whereas with books I feel bad because the shelves are groaning. But a review copy? Why, that’s a different thing altogether!
I did double check before accepting this book, as it is about the food of Western Australia’s Southern Forests and I was concerned that the recipes would require some foraging on the other side of the Nullarbor. Fortunately, that was not the case and this weighty, beautiful book duly arrived on my doorstep.
It turned up just before we went on holiday and so I set to picking a relatively simple recipe (despite desperately wanting to try out the semolina, almond and olive oil cake with lavender and rosemary sugar). Sadly, that diligence hasn’t actually translated into a swift review …
These days it almost goes without saying that a cookbook is beautiful and Food of the Southern Forests does not disappoint on that front. It’s a big book, with a solid cover, lovely thick pages and lots of space. Sophie Zalokar, the book’s author, is a chef based in Pemberton and has translated her passion for the region and its produce into a cookbook that champions local producers. This means that rather than being divided in sections based around courses, the book is divided by ingredients. Each chapter begins with an exploration of one or two producers of the product and I found that I learnt all sorts of interesting snippets. For example, did you know that avocado trees can require up to 150 litres of water per tree per day in summer? I am immensely grateful I decided against planting one in my own garden! The breadth of primary produce grown in the Southern Forests is also impressive. I had no idea we even grew green tea in Australia AND that we export it to Japan.
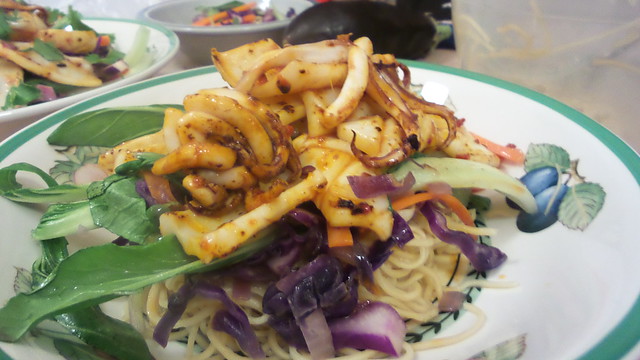
Of course, each chapter features at least one recipe which showcases the product and the photos are (predictably!) mouthwatering. Aside from the aforementioned cake, I’m also very keen to try the marron and avocado ceviche with fingerlimes and the Swiss Engadine walnut tart – and that’s just for starters …
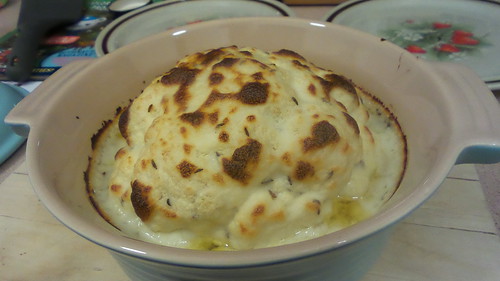
However, with time very much not on my side I opted for something relatively simple – a cauliflower cheese. However, in Zalokar’s recipe, the cheese sauce is enhanced with caraway seeds (one of my personal favourites) and the cauliflower is cooked whole, rather than broken into florets. Of course, this means you do need to ensure you have an oven proof pot or dish large enough to contain your cauliflower!
As Andy does not like cauliflower I am always on the lookout for recipes to try to convert him. Sadly, this one failed (apparently he doesn’t really like caraway either …) but I enjoyed it. If you like caraway this is a recipe definitely worth giving a go.
The book can be purchased (with free postage) from University of Western Australia Publishing, for $59.99. A little thing called Christmas is just around the corner …
Ingredients
- olive oil
- 50g unsalted butter
- 1 tbsp caraway seeds
- 4 tbsp plain flour
- 500mL milk
- 100g cheddar cheese, grated
- 1 whole cauliflower
- salt & pepper
Instructions
- Preheat oven to 220°C.
- Remove the ribs and leaves from the cauliflower and cut out the thickest part of its core, but leave it whole. Steam until a knife can cut into the thickest part of the cauliflower. This may take up to 20 minutes. I did this in the microwave but you may find it easier to do on the stove, perhaps using a bamboo steamer.
- Once steamed, place the cauliflower in a baking dish in which it fits reasonably snugly.
- To make the cheese sauce, melt the butter in saucepan, add the caraway seeds and then stir in the flour. Cook the flour out thoroughly - the butter will absorb the flour and the mix will start to appear crumbly.
- Slowly pour in the milk, stirring all the time to ensure there are no lumps. Reduce the heat to low and cook for about 10 minutes to thicken. Stir through the cheese and continue stirring until the cheese is completely melted. Adjust the seasoning.
- Pour the cheese sauce over the cauliflower and bake in the oven for 10-15 minutes, until golden and bubbling. You may want to finish off under the grill.
- Serve piping hot.