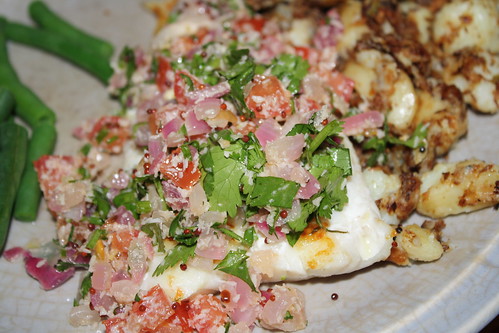
Pork Chops with Sage, Italian Style

Untitled

Despite putting together fun meal plans for Eating Adelaide, our own meal planning has been pretty shambolic of late. We are getting back on track, but a lot of our choices are being driven by how quick something will be to put on the table. The toddler seems to be in the process of dropping his nap (we’ve done well – he’s almost 3 and until the last couple of weeks has routinely been napping 2-3 hours a day!) and Andy has just started a new job.

So there’s not a lot of time for leisurely kitchen activities. Dinner needs to be of the “put in pan and serve” variety. And, of course, I have the sage plant …

A quick trawl through my delicious bookmarks threw up this simple recipe for pork chops, from The Goddess’s Kitchen, an English blog I’ve been following for ages. Maria doesn’t blog as frequently as she used to, and a lot of her posts are baking oriented (one of the reasons I started following in the first place) but this simple pork chop recipe hit the mark.

I served it with mash and a few steamed vegetables, and made a simple tweak to the sauce (I opened the cream for the mash, so I figured I might as well enrich the sauce at the same time!). It’s a great way of using some kitchen garden produce and jazzing up a very simple supper.

Pork Chops with Sage, Italian Style

Ingredients

  • 2 pork loin chops
  • fresh sage leaves, to taste, but at least 3 per chop
  • 1 clove of garlic, crushed
  • generous splash of white wine
  • 1 tbsp cream

Instructions

  1. Add some oil or butter to a pan and cook the chops.
  2. When the chops are cooked, remove from the pan and set aside. If there is a lot of fat in the pan drain.
  3. Return the pan to a gentle heat and add the garlic and sage leaves. Season. Add the white wine and reduce a little before adding the cream.
  4. Cook for a few minutes, until the raw alcohol taste is cooked out and the sauce reduces further.
  5. Serve the pork chops dressed with the sauce.
https://eatingadelaide.com/pork-chops-sage-italian-style/

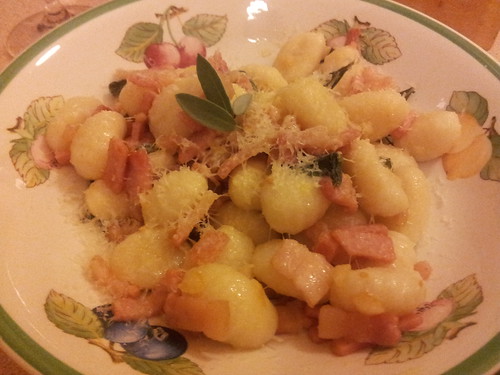
Sage and Bacon Gnocchi

Untitled

Last week, after nearly four years at the one job, Andy said goodbye to a pile of workmates. Only just back from Spain, there was no way I was going to be the life of any party (or surrender up the toddler to babysitters – or maybe that should be “be surrendered”?!) so I stayed in.

I had a pretty lazy day and only once shops were closing and the toddler was in bed did I discover that the cupboards were pretty bare. Normally I would have spaghetti, chilli, oil and garlic but there wasn’t enough plain pasta for dinner so I had to put my thinking cap back on.

Fortunately the freezer was home to a small bag of gnocchi (of indeterminate age, naturally), the fridge had some bacon and we have a big pot of sage in the back garden.

Now, I could have done something healthy because we always have tinned tomatoes to hand but … I wanted super quick. Taking inspiration from the countless variations on sage and butter that you find in Italian cooking I whipped up a tasty, but also not very healthy or very balanced supper!

Absolutely perfect for a night in for one. But a word of advice – you absolutely HAVE to use fresh sage. Dried simply will not work at all.

Sage and Bacon Gnocchi

Ingredients

  • butter
  • 2 rashers of bacon
  • fresh sage leaves, to taste
  • 1 clove of garlic, crushed and finely chopped
  • gnocchi, for one

Instructions

  1. Heat the butter in a frying pan that is big enough to fit the gnocchi in.
  2. Chop the bacon and add to the butter.
  3. Start cooking the gnocchi in boiling water.
  4. When the bacon starts to brown and crisp, add the garlic and the sage leaves.
  5. When the gnocchi is cooked (it all floats), drain and add to the frying pan with the bacon, sage and garlic.
  6. Give this a quick fry and then serve in a warm bowl, topped with grated parmesan and plenty of black pepper.
https://eatingadelaide.com/sage-bacon-gnocchi/

Chicken Biryani

IMG_3393

Usually we do a really good job of our menu planning but the last couple of months the ball has been rather dropped. However much work doing a meal plan on a Saturday afternoon is (not a lot) it’s a lot less work than getting to 4pm on a Thursday and realising that the toddler needs to be bathed and fed and some shopping needs to be done and … I have no idea what to cook for dinner.

So it’s time to get back in the routine which has kicked off this week. To help both myself and other hungry families, I’ll be publishing a meal plan each Saturday morning (in time for the Saturday shop hopefully!) – more details this Saturday when the first one appears. You’d better make sure you’re following Eating Adelaide on Facebook or subscribed to the email updates!

This week’s meal plan had to have something easy for Monday dinner because Monday’s moments of spare time would be spent cooking the pie filling for Tuesday’s dinner. Andy in particular loves biryani and so this (almost) one pot recipe hit the nail on the head.

The supermarket I went to didn’t sell any biryani paste (it did sell a jar of biryani stir through bake stuff but that all started to sound a bit too pre-made for me!) so thanks to a combination of the internet and what we had in the drawer, we made our own.

The finished product was an absolute HIT – with everyone, including the toddler. As is almost always the case with these things, we found that the cooking time was almost double what the recipe specifies … But that aside, this is a very easy recipe that is hearty and filling. Yes, you do need to have your oven on for a while – so choose a cooler day if you’re in the southern hemisphere and things are starting to heat up.

Chicken Biryani

Ingredients

    Biryani Paste
  • 3 tbsp canola oil
  • 1 tsp onion flakes
  • ½ tsp ground ginger
  • ¼ tsp turmeric
  • 1 tsp cayenne pepper
  • ½ tsp ground coriander
  • 1 tbsp tomato paste
  • ½ tsp salt
  • 1 tsp garam masala (we used my mum's spicy Sri Lankan curry powder)
  • For the Biryani
  • oil
  • 1 tbsp ghee
  • 3 large chicken thighs, skin on or off
  • 1 onion, finely sliced
  • 1 clove of garlic, crushed
  • 175g basmati or jasmine rice
  • small handful of flaked almonds
  • ~ 500mL vegetable or chicken stock
  • generous handful of green beans, cut into chunks
  • fresh coriander for garnish

Instructions

    Biryani paste
  1. To make the biryani paste, mix all the ingredients together and set aside.
  2. Biryani
  3. Preheat the oven to 180°C (160°C fan).
  4. In an oven proof dish, heat the oil and ghee and brown the chicken thighs. Remove and set aside.
  5. Add a little more oil to the pan and soften the onions and garlic.
  6. Add the biryani paste and stir though, cooking for a few minutes.
  7. Add a little more oil, and then add the rice. Stir the rice through, ensuring it is well coated with the spice mix.
  8. Add the almonds and stock. I use the little pots of jellied stock and boiling water. Return the chicken to the pan and ensure that there is enough liquid to cover the rice.
  9. Cover the pan tightly with til foil and a lid (if you have one) and place in the hot oven.
  10. After around 20 minutes, check progress. You may need to add more hot water and give it a good stir.
  11. After another 10 minutes, stir through the beans and add more liquid if required.
  12. Return to the oven until the beans and rice are cooked.
  13. Stir through some chopped coriander leaves and maybe some more almonds.
https://eatingadelaide.com/chicken-biryani/