Ras el Hanout

Untitled

I’ve commented before on how keen I am on making my own spice mixes. Our most recent batch of garam masala was bought from a spice store, in a huge quantity, and turned out to be far too rich in cinnamon for my liking. Is cinnamon even supposed to be in garam masala?

Ras el hanout is a Moroccan spice blend that you may struggle to purchase, leaving you with no option but to make it yourself. It’s ultimately a personal blend and in Morocco no two shops are likely to sell the same product under its banner.

I have based this recipe on that found in Made in Morocco but did a little tweaking because I was in a bit of a rush.

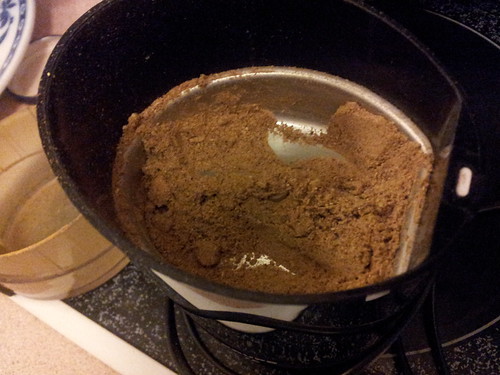
In my spice grinder, I put the following:

1 tsp fennel seeds
1 (generous) tsp cumin seeds
1 tsp coriander seeds
a good shake of turmeric
1 tsp cinnamon
2 scant tsp ground ginger
a good shake of smoky paprika
scant ½ tsp ground chillis
a good grating of nutmeg
2 cloves
½ tsp allspice
seeds from 2 cardamom pods
salt and pepper

Give it all a good whizzy up, so that it’s a uniform mix, and store in a jar. This will make about ¼ cup: with spice mixes it’s always best to make them in small quantities unless it’s something you use tons of. Also, if you’re working on finding your perfect blend, make sure you write down what you did so you can make adjustments next time.

I was pretty happy with this – I could have faffed around toasting spices (and the original recipe does mandate that) and I probably will do that in future, if I’m less pushed for time, but other than that, there aren’t any adjustments I’d look to make.

Once you have this, you’ll find plenty of uses for it … but the most simple perhaps is to mix a couple of generous teaspoons through some plain flour and use that to coat garfish fillets before quickly pan frying them. Not only does it add a subtle flavour but the turmeric adds a gorgeous golden glow to the fish.

Pavlova

IMG_2904

No arguments today about whether the pav is Australian or Kiwi but I think I can posit that it’s a quintessentially Australian summer dish, found on tables from Christmas onwards.

Another dessert contribution at our Christmas meal, I liked the idea that it was something I could prep in advance and wouldn’t require huge amounts of oven heat. Mum almost always has egg whites in the freezer (they freeze brilliantly, last for ages and work perfectly once defrosted) so she donated 5 egg whites and instructed that “well, I always use Stephanie’s recipe”.

My idea was to do my usual 1 egg white, 55g of caster sugar mix (that’s thanks to Gordon Ramsay) but mum looked a bit doubtful and went on about Stephanie Alexander (again). Had it not been for Jules writing about meringues and the key to a chewy meringue being corn flour, I might have ignored both mum and Stephanie, but she did, so I duly noted the recipe from The Cook’s Companion.

Stephanie’s recipe uses 4 egg whites and 250g caster sugar, which I think is too much per egg white. So I scaled back and for my 5 egg whites I used 275g of caster sugar. I guess if you like things sweet, use more sugar!

Begin by heating the oven to 180°C (conventional) and draw a 20 cm diameter circle on a piece of baking paper. Get a very very clean bowl (grease of any type is your enemy here – make sure whatever you use is clean and dry) and whisk your egg whites, with a pinch of salt, to soft peaks before slowly adding the caster sugar. Whisk until your meringue mix is stiff and glossy. Naturally, for this part I was using my stand mixer, and I was ably assisted by my toddler (who, I suspect, thought we should have spent all afternoon adding mounds of sugar …).

This is where I’d normally stop and consider job done. However, Stephanie’s recipe calls for sprinkling over ~ 2 tsp corn flour, 1 tsp white wine vinegar and a few drops of vanilla extract. I didn’t bother scaling these small quantities up. You then fold these into the mix (gently, gently – you don’t want to knock out air!) and then mound the meringue onto your reversed baking paper, following your traced outline. Use a few dobs of meringue to hold the baking paper to the tray.

Place in the oven (which is at 180°C) and immediately reduce the heat to 150°C and cook for about 1¼ hours. Then turn the oven off and leave the meringue in until it’s all cool.

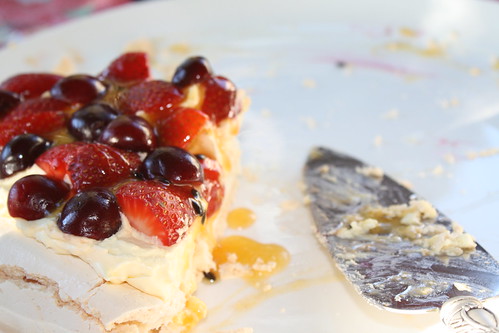
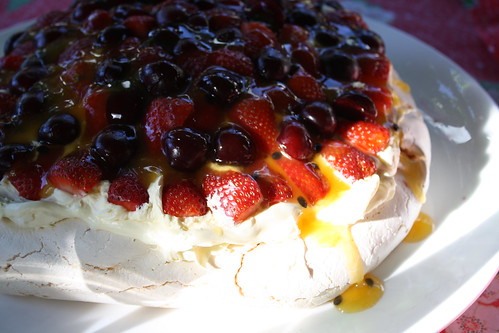
When you’re ready to serve, whisk ~ 300mL pure cream and arrange your choice of fruit on top. I used strawberries and halved cherries. I finished with some passionfruit pulp in syrup (I had to buy this last minute in a tin at the supermarket which is actually a really handy way of doing it): this adds some much needed acidity and also gives the pav and fruit a lovely glossy finish.

IMG_2900

This served 9 people easily, and there was a little bit left over too. And as pavlova has fruit on it, it’s kind of like health food …

Cherry Ice Cream Recipe

IMG_2905If you’re in a part of Australia which is currently sweltering (so, pretty much anywhere in Australia, judging by the amount of red on the weather map this morning …) the last thing you’re thinking about is eating, let alone cooking.

But if you are inclined to head to the kitchen, let me suggest this recipe for cherry ice cream. Cherries are in season here in South Australia and, with the run up to Christmas looking warm, I was after something low heat to make for dessert for Christmas day.  I had a look around for cherry ice cream recipes and discovered a few that used the same technique but weren’t based on a custard. In fact, the most complicated thing I was going to have to do was melt some sugar in some cream. On a hot day, even I can manage that. In the end I went with a recipe from Just One Cookbook, because I thought the finished product looked prettier.

Begin by ensuring your ice cream maker is ready to go. If you have one with a built in compressor then lucky you, otherwise make sure your churning bowl has been in the freezer for the right amount of time.

Begin by melting 1 cup of pure cream (for some reason about 99% of cream sold in Australia has thickener in it, avoid that stuff and look for ones marked ‘pure cream’ and even then, double check the list of ingredients!) with 150g caster sugar, a pinch of salt and the seeds and pod of half a vanilla bean. When the sugar has fully dissolved, remove from the heat and add 1 tsp of vanilla extract, another cup of cream and a cup of full cream milk.

Allow the mixture to cool completely. Especially if it’s a hot day, do this in the fridge, although bear in mind that if you are using really good cream, you’ll end up with a cream “crust” which will need to be whisked back into the mixture before churning.

Pit and quarter cherries so that you end up with 2 cups. I don’t have a cherry pitter but if you have really good fresh cherries, this isn’t hard work at all. If it’s not summer where you are, or fresh cherries aren’t available, use very well drained tinned cherries.

Churn in your ice cream maker, following its directions. When the ice cream is almost done, add the cherries and churn again. Don’t freak out when you add the cherries: the mixture is likely to become a lot looser than it was, but it’s not spoiled – you just need to keep on churning.

Once it has all thickened back up, put into a container, seal and put into the freezer overnight. Remove for at least half an hour before serving.

While this ice cream was insanely easy to make and both tasted and looked really good, I wasn’t a huge fan of the texture. Melting the sugar meant it wasn’t gritty but the high fat content, and the sheer volume, of the cream meant it was very grainy which didn’t really work for me. A custard based ice cream (such as the excellent coffee ice cream I made a while back) contains less fat and is much silkier to eat. However, if you’re still getting into your custard groove, or you have cream to use up, or you’re just feeling a bit lazy, this recipe works a treat.