Apple Crumble

Apple Crumble & Custard

While Spring is technically just around the corner here in Adelaide it’s still really cold. After a pleasant couple of days early this week Thursday and Friday are still looking chilly so it’s not too late to think about making an apple crumble.

This is the easiest of desserts to make. For the two of us, and using a small pie dish, I peeled and quite coarsely sliced 2 Granny Smith apples – let’s say I cut them into eighths. I put them in a pan on low heat, with a splash of water, a scant tablespoon of caster sugar and half a cinnamon stick. I then walked away and ended up doing a pile of other things and when I remembered that I had apples on the stove they were almost at puree stage. Oops! Perhaps don’t cook yours quite so long. Really you just want to soften them a bit but have them retaining their shape.

I put my puree in the pie dish, no greasing required, and topped it with a layer of finely sliced Granny Smith (to ensure the finished product had some texture).

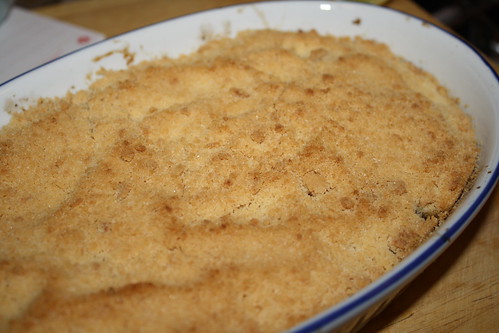
For the crumble I used 100g plain flour, 25g caster sugar and 50g of unsalted butter. You have no choice with crumble but to make it by hand as you do not want it too fine and you also don’t want it too homogenous: a few chunks here and there are a good thing. So work the crumble mixture by hand until the butter is mostly all incorporated – a few small bits here and there is fine. Overall, the mixture should resemble coarse sand.

Spread the crumble over the apples. Don’t press it down to form a hard crust (that’s called pastry and you’ve done it wrongly!). Bake in an oven preheated to 200°C (conv) for 40 minutes or until the crumble starts to turn golden.

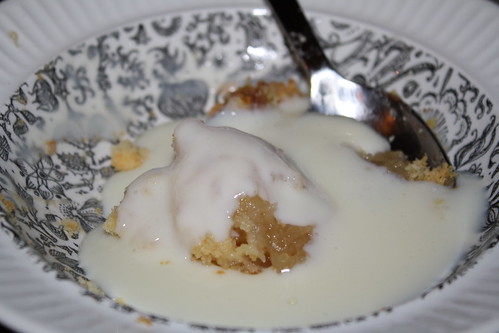
Serve hot or warm, with cream, ice cream or custard.

How to Roast Beef

Untitled

One of the great things about having a food blog is that, no matter where I am, I can find a previously visited restaurant’s name and address or make a favourite recipe. One thing I have not yet done though is record the temperatures to which I like my meat cooked.

This means that every time we get a piece of beef to roast I have to spend about half an hour googling for internal temperatures and fretting over whether I’ve chosen the right temperature. It’s time to fix that.

57°C.

So – there’s the raw data. But what’s the process?

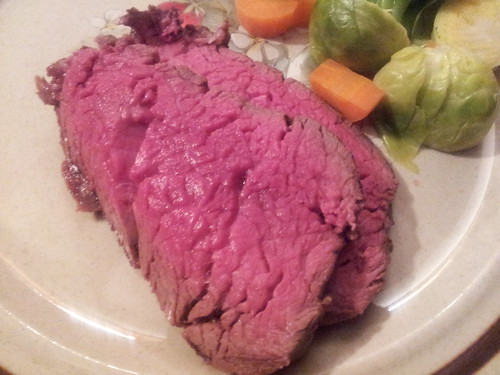
Let’s assume you have a piece of fillet – which is what is featured in the photo above*. I use an oven safe stainless steel fry pan and melt some butter and light olive oil in it. I then take my piece of beef (preferably at room temperature), season it and sear it in the pan so that it is nicely browned all over. Whatever you do, don’t do too much searing – just enough to pick up some colour. You don’t want the meat to actually start cooking.

I’m very lucky in that I have a 20 year old oven with a built in meat probe. This is brilliant because you can set the oven at whatever temperature you wish (usually 180°C conv), plug the meat probe in (to both oven and meat), set the probe temperature (57°C) and walk away. When the meat hits the temperature the oven will beep and turn itself off. If you have a normal meat thermometer you’ll just need to keep on checking …

When the meat is done, remove it from the oven, put it on a plate and cover with tin foil, allowing it to rest for at least 15 minutes. This will give you time to finish off things like vegetables and gravy and get some plates warm. If you are making gravy, be sure to make it in the same pan the meat was cooked in AND to tip in any juices from the plate the meat has rested on.

As you can see from the photo, we like our meat rare. From what I’ve been able to find of Australian food safety guidelines, for a non rolled, non stuffed piece of meat like fillet, the only risk of contamination is the exterior of the meat, so as long as that’s well cooked (that’s the searing and sitting in a hot oven part) you are fine to cook the meat to any temperature you wish. American readers should note that the USDA recommends 145°F (about 63°C) as a minimum.

And obviously, you should always cook your meat to YOUR preference!

* Sorry for the poor quality of the photo but really, if you had a piece of meat like that in front of you would you be worrying about setting up a good shot?! Normal people want to crack on and EAT!

Veal Schnitzel Bake Recipe

IMG_2157

Another cookbook that I won at some point, and which has also been sorely neglected, is The Complete Matthew Hayden Cookbook. Yes – you read that correctly, that Matthew Hayden. The one better known for his prowess with the willow than a wok.

This is a cookbook in which you’re more likely to find a recipe for bangers and mash than … um … something extremely complicated, fancy sounding and long winded. I chose my recipe by the tried and true method of opening the book on a random page and hit upon the veal schnitzel bake.

At first glance I thought “hmmm, probably not” (I always think the word “bake”, particularly when applied to savoury recipes, sounds particularly unappetising) but had a quick read of the recipe and it looked simple, quick and tasty.

When I actually came to make the dish, I found I had a small person attached to at least one leg, so there not much chance of checking the recipe, let alone following it too carefully!  However, this isn’t something that needs careful measurement or attendance and (even better) you can prepare it in advance and have it in the fridge ready to go.

First take some veal schnitzels (I used 5 smallish ones from our butcher – already flattened out but NOT crumbed) and pan fry them. The recipe says to crumb them before frying and I did this with a couple but then realised this was completely pointless. It’s just a good way to create extra dish washing! As the schnitzels are thin and will be cooked in the assembled dish you just want to get some good colour on them. A minute or two on either side should do the job (naturally, ensure your pan is good and hot so you don’t steam/poach them – you may need to do this in multiple batches).

Remove the veal from the pan and set aside. Now make your tomato sauce, in the same pan – to take advantage of the pan juices.

I guess really you could make any tomato sauce you fancied but I did roughly follow what was in the book. Heat some olive oil in a pan and then add some finely sliced onion and garlic. The book’s recipe also used chilli at this point but the only fresh chillis we had were fierce and I was planning on feeding this to the baby (who, incidentally, is far more chilli tolerant than I ever give him credit …). When the onions were soft, in went a tin of crushed tomatoes, a sprinkle of oregano and a few generous handfuls of pitted black olives (I actually used Kalamata olives – have you noticed how difficult it is to buy Australian olives of either colour in mainstream retailers?!). Let this all cook down to thicken – you do want to cook a fair bit of moisture out of it because you don’t want your bake to end up soggy!

To assemble the bake, layer the veal in a baking dish and top with the tomato sauce. If you want to prepare ahead, stop here! Don’t put the bread crumbs on in advance – they’ll soak up any moisture and potentially leave the bake a bit dry.

When you’re ready to cook, cover thickly with bread crumbs (I used panko) and top with grated cheddar cheese – be generous here! You want a good cover of cheese – not only will it taste good but it will also stop the breadcrumbs burning if you have your oven up a bit high.

Pop in an oven preheated to 180°C and bake for a good 20 minutes or so. If the top isn’t looking golden and bubbling, increase the heat or finish off under the grill.

Serve piping hot (with vegetables or salad – naturally – got to get those 5 a day!).

This was tasty, quick and perfect on a cold winter weeknight.