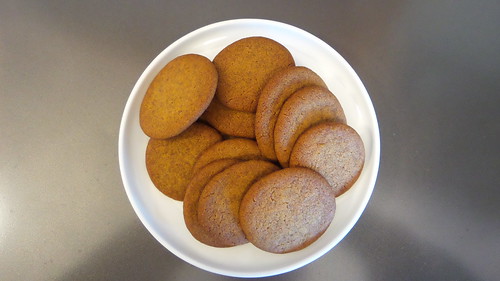
Something of an ongoing discussion in our household is whether the king of biscuits is the chocolate bourbon or the chocolate digestive. Now, obviously, all right thinking people know and understand that it is indeed the chocolate digestive. A quick vox pop on my personal Facebook page (I have plenty of English friends) even confirmed this fact.
But Andy maintains that the bourbon is king and when I saw this recipe I figured it would be worth giving them a crack. Especially as I am yet to spot the ‘real’ deal in shops here in Australia.
This is another recipe that I would definitely call store cupboard. If you’re a regular baker you’ll have everything to hand and even those who make more intermittent efforts will probably find that the only thing that it’s necessary to source is the golden syrup.
The biscuit dough is quick to make (especially if, like me, you throw everything in a food processor!) but actually cutting out the biscuits, cooking them, allowing them to cool and then sandwiching them together takes a little while. This is even more so the case if you have a three and a half year old assistant …
The dough does need to be kept cool. Even on a cold day in our cold kitchen, I found that by the time was on the last lot of biscuits the dough was becoming difficult to handle. If you’re operating in warmer conditions, definitely keep the dough you’re not using wrapped in cling film in the fridge.
Rolling out the biscuit dough between two sheets of cling film is a great idea – it makes turning the dough very easy to do and you don’t have to worry about the mess (either on the bench or on the biscuits) created by flour.
The biscuits keep well but do start to soften a bit once you fill them. If you’re making them ahead, don’t fill them until you need them. The buttercream filling can be made ahead too – you just need to remember to take it out of the fridge to soften a bit. I had quite a bit of filling left over, so obviously I was far too stingy … but it is absolutely delicious on toast!
Ingredients
- 110g unsalted butter
- 110g light brown sugar
- 200g plain flour
- 1 tsp bicarb
- 40g cocoa
- pinch of salt
- ~ 3 tbsp golden syrup
- 150g icing sugar
- 5 tsp cocoa
- 75g unsalted butter
- ½ tsp vanilla extract
- 3 tsp boiling water
Instructions
- Preheat the oven to 170°C (convention) and line a couple of baking sheets with baking paper.
- To make the biscuits, cream the butter and light brown sugar. Add the flour, cocoa, bicarb and salt. Then add 2 tbsp of the golden syrup. If the dough does not come together then add another teaspoon or so. Process well between any extra additions as you don't want to add too much. The exact amount you need will depend on weather conditions and your flour so it is likely to change every time you make the biscuits.
- Tip the dough out onto the bench and bring it together in a ball. Divide the ball into four and, if it's warm, refrigerate 3 pieces, wrapped in cling film.
- Roll each ball into a long sausage and place between two sheets of cling film and roll out until 2-3 mm thick. Cut into biscuits (apparently a bourbon is 6 cm x 3 cm so that's the size you're aiming for) and transfer onto the baking sheets. You'll probably need the help of a palette knife (or other broad bladed knife). Allow space between the biscuits.
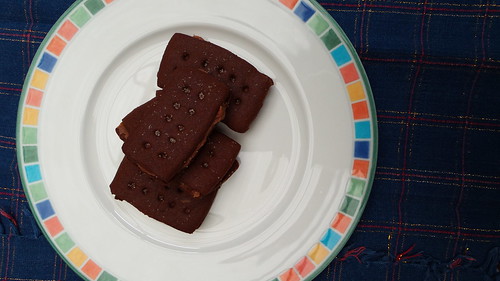
- A bourbon has 10 indents in it - use the blunt end of a bamboo skewer to create two rows of five impressions and then bake for 10-12 minutes. The biscuits will still be soft on top but will move on the baking paper.
- Sprinkle a little caster sugar on each biscuit while hot and gently press in with the back of a spoon.
- Allow the biscuits 10-15 minutes cooling on the tray before transferring to a wire rack.
- To make the buttercream filling, sieve the icing sugar and cocoa (or process well in a food processor). This is important: failure to do this will result in gritty buttercream. Even if you're using a food processor you need to process the icing sugar and cocoa really well BEFORE you add the butter.
- Add the butter, vanilla extract and water and process until you have a smooth, fluffy cream.
- Sandwich the biscuits with the cream and serve.
- They keep perfectly well filled for a couple of days. After that they do go a little soft but still taste spot on!