Hedgehog Slice

20150726_165137

Our local library invariably has a small display of books that are for sale. These are either former library books or (I am guessing) they are books that people have donated that the library has chosen not to add to its collection. That’s the only way I can explain why some have barcodes and some don’t. The books are always insanely cheap (20c for a paperback) and while the number and range available varies widely, it is always worth spending a minute or two perusing.

A month or so ago I picked up Basics to Brilliance: Slices Recipes, put together by Family Circle and published only a few years ago. For some reason, I have it in my head that now that Master 4 is at pre-school (and soon to be at school) slices should be a part of my repertoire. I don’t know why I think that – I’m not the type of parent who includes sweet treats in a lunch box and we certainly don’t have cake and friends all the time at home.

I’ve spent quite a lot of time poring over this book and even managed to induce some cookbook envy in at least one friend. Even though the book was only published in 2007 the recipes definitely have a slightly old fashioned feel to them. I’m not sure that had this book been produced in the 70s or 80s it would have been much different.

And that is a good thing – there’s a reason why classics are classics. Some things just work and taste good. And don’t need trend driven labels attached to them.

Last weekend we were heading to my cousin’s house for my aunt’s birthday celebrations and we were planning on taking a plate of charcuterie with us. However, a quick check meant my cousin requested something sweet and, on very limited time, I consulted the book and found the hedgehog slice.

Many slice recipes are a bit time consuming because you have to deal with layers. Not so the hedgehog and it has the bonus of being a refrigerator cake – no oven and perfect if you are wanting an activity to do with a small child. If you are really pushed for time then you can skip the ganache topping.

Hedgehog Slice

Ingredients

    hedgehog
  • 125g unsalted butter
  • ½ cup caster sugar
  • 125g plain, sweet biscuits (I used a plain shortbread)
  • 1 cup walnuts
  • ½ cup coca powder
  • 1 egg
  • ganache
  • 125g dark chocolate
  • 30g unsalted butter

Instructions

  1. Line a 20cm square tin with foil. If you only have a larger tin - don't worry. The hedgehog mixture is very thick and will stay in one part of the tin.
  2. In a pan, heat the butter and sugar until the butter is melted and the sugar dissolved.
  3. Lightly crush the biscuits. Put them in a freezer bag and give them a gentle beating with a rolling pin.
  4. Chop the walnuts. I did this in the food processor - you want them reasonably chunky so with a knife would be fine.
  5. Lightly beat the egg.
  6. Once the sugar has completely dissolved, reduce the heat to low and add the biscuits, cocoa and walnuts. Stir well and then remove from the heat.
  7. Allow to cool a little and then mix the egg through thoroughly.
  8. Pour into your pan and flatten off. Put in the fridge to set.
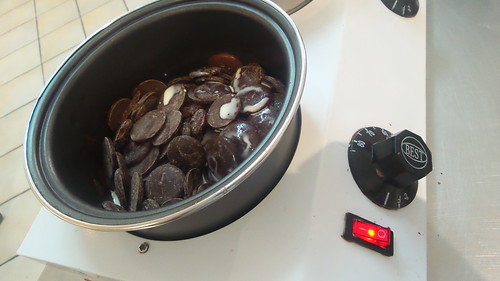
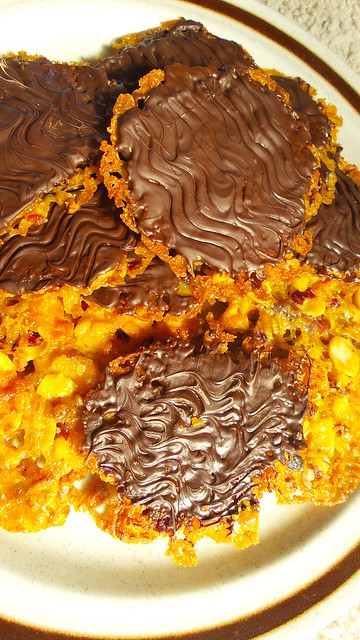
  9. Once the hedgehog is set (this will only take half an hour to an hour), make the ganache. Melt the chocolate and butter together (in the microwave for speed and ease) until smooth, allow to cool and thicken slightly and then spread over the hedgehog.
  10. Using a fork, create a wavy pattern if desired.
  11. Refrigerate again. When ready to serve, cut into squares. It should make around 16-20 pieces.
  12. Best served straight from the fridge.
https://eatingadelaide.com/hedgehog-slice/

Adelaide Chocolate School: Truffle Making for Beginners

20150621_142553finished product

Not so long ago a friend of mine spotted a group buying deal for a truffle making class at the Adelaide Chocolate School. It worked out at half price and seemed like a fun way to spend an afternoon so why not? We bought the deal and booked ourselves in straight away (see my top five hints for group buying restaurant deals). The booking process (which my mate did, not me!) seemed a bit long winded, as you had to reserve online and then wait for confirmation of your chosen date/time – so it might not be ideal for anyone with a very restricted schedule.

Fortunately, we got our desired date/time and so we headed along last Sunday afternoon to see what it was all about. While I’m happy and confident making ganache, I have never actually made truffles so I was really interested to have the experience and (to a certain extent) have my hand held through it.

The class is 2 hours long and it does absolutely start on time! We arrived very early so we went for a coffee, which meant we walked through the door of the chocolate school bang on 1pm (maybe a minute after!) and things had just started and we were the last ones there. Be early!

There was a bit of introduction before we moved on to choosing our chocolate and starting on our ganache. We had a choice of white, milk or dark chocolate (I chose dark) and we each got 300g of chocolate and a funky little bench top electric bain-marie. I normally melt chocolate in the microwave so going back to the bain-marie method was a bit sloooow for impatient me but it was really interesting to learn that you can use anything which has an element to melt your chocolate. Our elements were set at 80°C (I don’t think they got quite that high) and the instructor said that if, for example, you had an electric fry pan you could heat to a low temperature you could use that. No water required – just place your chocolate in a metal dish on the element.

20150621_131746electric bain-marie

We melted our 300g of chocolate with ⅓ cup of cream (we used full fat UHT cream). Being dark chocolate mine took ages to melt and I would have liked a bit more time at this stage of proceedings.

Once the chocolate and cream was smooth, we divided it in to two batches and flavoured each. I chose rose and coffee as my flavourings. We used flavouring essences which I wasn’t such a fan of. The flavour wasn’t quite as true or intense as I would like but I do understand that essences are a great way of imparting flavour without having to mess with proportions. A few drops of coffee essence is a much easier way of doing things, than using actual coffee and ensuring you reduce the amount of cream appropriately. This makes it extremely versatile and easy in a class situation but not a way I’d be flavouring my own truffles in the future.

20150621_135750snap!

Flavourings added and adjusted, we poured the ganache onto baking paper and popped it into the fridge to firm up. This is another step where I’d have liked a little more time, as when we came to work our ganache, mine was still quite soft, which made it quite sticky. Nonetheless, the ganache was easy to work with and it was simple to break it up and roll it into little balls. We then did two layers of chocolate covering. This was the messy part and fortunately we had plenty of latex gloves to hand. Rather than dipping the truffles, we spooned melted chocolate onto a gloved hand and then rolled the truffle lightly and quickly to coat it. I’m really glad I had a first go at doing this in class. At home I would never have worn gloves (which would have been a mistake!) and you do actually need to use quite a lot of chocolate. Because my truffles were slightly rough from being a bit warm when I rolled them, being parsimonious with the chocolate meant I ended up with slightly spiky truffles! Next time, I’ll make sure to load up!

Two coats of chocolate and then on to decoration. As I am not a pretty-pretty-let’s-decorate-everything kind of person I went for immensely stylish drizzles of white and dark chocolate on my rose and coffee truffles respectively. Loads of people in the class did much more creative and painstaking decoration than I will ever manage!

After decorating you need to leave the chocolates to dry before bagging them up (or, better yet, bring a hard container from home and you can store them neatly in one layer and preserve your decoration) and then the class was over.

I thought that for $35 the class was great fun and good value for money but I don’t think I’d have felt the same way had it cost me $80 (current website price). I wasn’t madly in love with my chocolates (hasn’t stopped me eating them, mind!) – and I personally would use couverture chocolate (in class we used compound chocolate which just doesn’t taste as good). An excellent tip was that even if you use couverture chocolate for your ganache, if you’re not tempering it, use compound chocolate for the dipping stages to ensure a glossy finish.

What the class has done is given me is the much needed kick to ensure that I actually have a go at making my own truffles in future. I will definitely invest in the latex gloves and ensure I’m generous with the dipping chocolate. The question of flavourings is going to give me a lot of room for experimentation but I’m reasonably sure I’ll be able to put in place plenty of quality control measures …

Adelaide Chocolate School
48 Melbourne Street
North Adelaide SA 5006
(08) 7120 2664

Mary Berry’s Florentine Biscuit Recipe

20140901_125754

The Great British Bake Off is in full swing yet again. I love this program (you can follow along here in Australia as the Guardian has a weekly live blog of the action) because it is so much more gentle than any of the other reality cooking programs (and yes, that includes you, Great Australian Bake Off, with your nasty Big Brother style approach of making the contestants live together and your snippy female judge). Mary Berry is the grandma everyone should want to have and both Mary and Paul take the time to offer constructive criticism. There’s very little nastiness in the show at all (let’s leave aside Bingate and the fallout from that).

A couple of weeks ago the technical challenge was Florentines. Personally I really like the idea of Florentines but find that when you buy them in a cafe they are plate like, thick, and sometimes contain both peanuts and glacé cherries. One of those is bad, both is awful!

On the show, Mary impressed upon the competitors that they should be aiming for lacy, delicate biscuits and there wasn’t a peanut in sight! The real challenge on the program was that the bakers had to temper chocolate for the decoration and that they weren’t told what that decoration should be. I was surprised by how many were really uncertain about this – eat more biscuits, people!

I originally made this as a candidate for the Sweet Swap. However, they were far too delicate to survive in the post, I didn’t do a brilliant job of tempering the chocolate (it was late, I did it in the microwave …) and I’d also neglected to note that one of my swapees was lactose intolerant and these biscuits contain butter. The following recipe (thanks BBC Food) is egg free but does contain flour. I love that Mary uses dried cranberries as a cherry substitute – definitely the way forward – they offer a necessary sour counterpoint to all the sugariness from the caramel biscuit base. Be sure to use baking paper on your trays and handle the biscuits very carefully when they come out of the oven. They are perfectly good to eat without their chocolate back (if you feel that might be a bit too much faff!)


Mary Berry’s Florentine Biscuit Recipe

Ingredients

  • 50g butter
  • 50g golden caster sugar
  • 50g golden syrup
  • 50g plain flour
  • 25g dried cranberries (you might find them labelled as 'craisin')
  • 50g dried/candied peel
  • 25g slivered almonds
  • 25g walnut pieces (you can buy these but if you are using whole/part walnuts, finely chop them)
  • 200g dark chocolate

Instructions

  1. Heat oven to 180°C and line three baking trays with baking paper.
  2. Weigh butter, sugar and golden syrup into a small pan (preferably a non stick one - it will make cleaning up easier!) and heat gently to melt the butter. Remove from the heat and add the dry ingredients.
  3. Mix well.
  4. Drop teaspoonfuls of the mixture on to the prepared baking trays. This recipe makes roughly 18 - so 6 biscuits per tray. It's important to allow plenty of space between biscuits as they spread a lot!
  5. Bake for 8-10 minutes, or until golden brown.
  6. Leave them to cool on the trays for a little before using a broad palette knife and lifting them very gently and carefully onto racks to cool. You won't be stack them so make sure you have plenty of rack space.
  7. If using the chocolate, break half the chocolate into a bain-marie and heat to 53°C. When it hits this temperature, remove from the heat and stir in the remaining chocolate (grated or chopped) and stir gently to melt until the temperature drops to 26°C. Using a sugar thermometer can be tricky for this (they're designed for high temperatures!) so if you think you'll do this more than once, a chocolate thermometer might be a worthwhile investment.
  8. Spread the melted chocolate over the base of each biscuit and leave to cool slightly before creating the signature zig-zag pattern using a fork. If your biscuits are sufficiently lacy you will end up with very chocolatey hands!
  9. Allow to set completely and then store in an airtight container.
https://eatingadelaide.com/mary-berrys-florentine-biscuit-recipe/