Apple Crumble

Apple Crumble & Custard

While Spring is technically just around the corner here in Adelaide it’s still really cold. After a pleasant couple of days early this week Thursday and Friday are still looking chilly so it’s not too late to think about making an apple crumble.

This is the easiest of desserts to make. For the two of us, and using a small pie dish, I peeled and quite coarsely sliced 2 Granny Smith apples – let’s say I cut them into eighths. I put them in a pan on low heat, with a splash of water, a scant tablespoon of caster sugar and half a cinnamon stick. I then walked away and ended up doing a pile of other things and when I remembered that I had apples on the stove they were almost at puree stage. Oops! Perhaps don’t cook yours quite so long. Really you just want to soften them a bit but have them retaining their shape.

I put my puree in the pie dish, no greasing required, and topped it with a layer of finely sliced Granny Smith (to ensure the finished product had some texture).

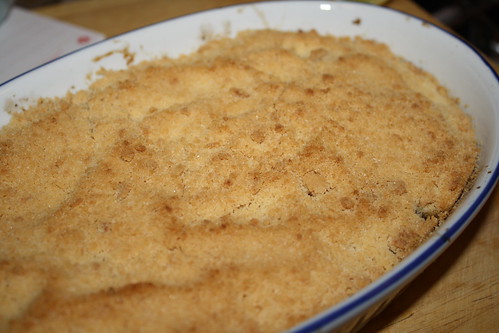
For the crumble I used 100g plain flour, 25g caster sugar and 50g of unsalted butter. You have no choice with crumble but to make it by hand as you do not want it too fine and you also don’t want it too homogenous: a few chunks here and there are a good thing. So work the crumble mixture by hand until the butter is mostly all incorporated – a few small bits here and there is fine. Overall, the mixture should resemble coarse sand.

Spread the crumble over the apples. Don’t press it down to form a hard crust (that’s called pastry and you’ve done it wrongly!). Bake in an oven preheated to 200°C (conv) for 40 minutes or until the crumble starts to turn golden.

Serve hot or warm, with cream, ice cream or custard.

Veal Schnitzel Bake Recipe

IMG_2157

Another cookbook that I won at some point, and which has also been sorely neglected, is The Complete Matthew Hayden Cookbook. Yes – you read that correctly, that Matthew Hayden. The one better known for his prowess with the willow than a wok.

This is a cookbook in which you’re more likely to find a recipe for bangers and mash than … um … something extremely complicated, fancy sounding and long winded. I chose my recipe by the tried and true method of opening the book on a random page and hit upon the veal schnitzel bake.

At first glance I thought “hmmm, probably not” (I always think the word “bake”, particularly when applied to savoury recipes, sounds particularly unappetising) but had a quick read of the recipe and it looked simple, quick and tasty.

When I actually came to make the dish, I found I had a small person attached to at least one leg, so there not much chance of checking the recipe, let alone following it too carefully!  However, this isn’t something that needs careful measurement or attendance and (even better) you can prepare it in advance and have it in the fridge ready to go.

First take some veal schnitzels (I used 5 smallish ones from our butcher – already flattened out but NOT crumbed) and pan fry them. The recipe says to crumb them before frying and I did this with a couple but then realised this was completely pointless. It’s just a good way to create extra dish washing! As the schnitzels are thin and will be cooked in the assembled dish you just want to get some good colour on them. A minute or two on either side should do the job (naturally, ensure your pan is good and hot so you don’t steam/poach them – you may need to do this in multiple batches).

Remove the veal from the pan and set aside. Now make your tomato sauce, in the same pan – to take advantage of the pan juices.

I guess really you could make any tomato sauce you fancied but I did roughly follow what was in the book. Heat some olive oil in a pan and then add some finely sliced onion and garlic. The book’s recipe also used chilli at this point but the only fresh chillis we had were fierce and I was planning on feeding this to the baby (who, incidentally, is far more chilli tolerant than I ever give him credit …). When the onions were soft, in went a tin of crushed tomatoes, a sprinkle of oregano and a few generous handfuls of pitted black olives (I actually used Kalamata olives – have you noticed how difficult it is to buy Australian olives of either colour in mainstream retailers?!). Let this all cook down to thicken – you do want to cook a fair bit of moisture out of it because you don’t want your bake to end up soggy!

To assemble the bake, layer the veal in a baking dish and top with the tomato sauce. If you want to prepare ahead, stop here! Don’t put the bread crumbs on in advance – they’ll soak up any moisture and potentially leave the bake a bit dry.

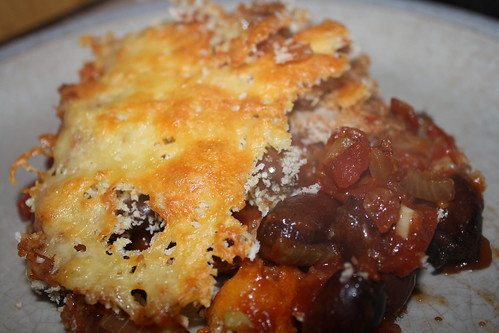
When you’re ready to cook, cover thickly with bread crumbs (I used panko) and top with grated cheddar cheese – be generous here! You want a good cover of cheese – not only will it taste good but it will also stop the breadcrumbs burning if you have your oven up a bit high.

Pop in an oven preheated to 180°C and bake for a good 20 minutes or so. If the top isn’t looking golden and bubbling, increase the heat or finish off under the grill.

Serve piping hot (with vegetables or salad – naturally – got to get those 5 a day!).

This was tasty, quick and perfect on a cold winter weeknight.

Thai Fish Curry Recipe

Thai curry paste

While living in England I was lucky (or skilled!) enough to have a recipe published in The Fairtrade Everyday Cookbook. Recipes, using Fairtrade ingredients, were submitted from across the UK and the best were published alongside those of celebrities and chefs. The launch party was also excellent.

However, aside from me showing off my recipe to anyone with the time to look, the book has been underutilised. As part of my new weekly meal planning regime (something which is making life very easy indeed), I’m choosing a random recipe from a random cookbook each week.

Last week it was the Thai fish curry which was submitted by Karen Darnton from Somerset. This recipe is a brilliant example of how easily you can make a tasty Thai style curry without resorting to jars or packets.

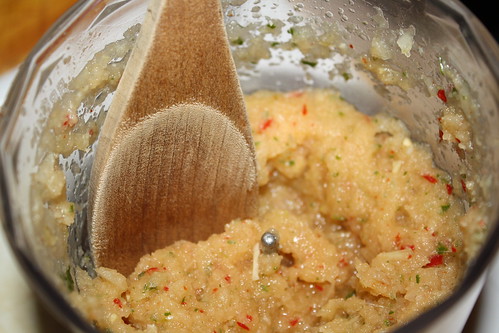
Begin by making the curry paste. Into a blender, put two red chillis, the juice and zest of one lime, 2 stalks of lemongrass* (roughly chop these first, and the younger and more tender the better), a generous teaspoon of ginger paste, 4 cloves of garlic, 1 small onion (peeled and roughly chopped), one finely sliced kaffir lime leaf (my addition because I happen to have some in the freezer – leave it out if you don’t have any to hand) and a good splash of Thai fish sauce.

Whizzy this up and you have your paste. This you can make in advance – it will keep quite happily in the fridge in a sealed container for a day or two.

When you’re ready to eat, heat a wok with a small amount of oil (peanut oil or other neutrally flavoured oil) and, when hot, add the curry paste and stir fry for a couple of minutes. You want the pan hot so that it sizzles, and you’ll need to stir to stop it from sticking.

Add a tin of coconut milk, mix well and bring to a simmer.

Next – add your fish. The original recipe used cod, I used barramundi (my barra had the skin on – and normally I would advocate this – but for this recipe, prefer skin off). You want a firm white fish that won’t collapse. You could also use prawns or even chicken thighs (although then it would be a Thai chicken curry …). If using fish, choose Australian and sustainably fished.

Simmer the curry until the fish is cooked.

The original recipe at this point starts adding things like mango or pineapple to the curry but that’s not how I roll, at all. I added a single serve of hokkien noodles to the pot and simmered away until the noodles were separated and hot. So now I had some kind of cross between curry and laksa.

Finally, taste the sauce and add fish sauce or lime juice as required.

Finish with a garnish of coriander and serve immediately.

While this was not the most complex (or, probably, authentic!) Thai curry I’ve ever eaten it certainly ticked all the mid-week meal boxes. Prep in advance, quick to assemble when you’re ready to eat, and tasty to boot. Definitely one we’ll return to.

* As an aside, lemongrass freezes. If you buy a packet from the supermarket, freeze the leftover stems in a snaplock bag. They defrost quickly. Freezing does make them a little tough so be sure to remove the outer layers before using.