Passionfruit Curd

Untitled

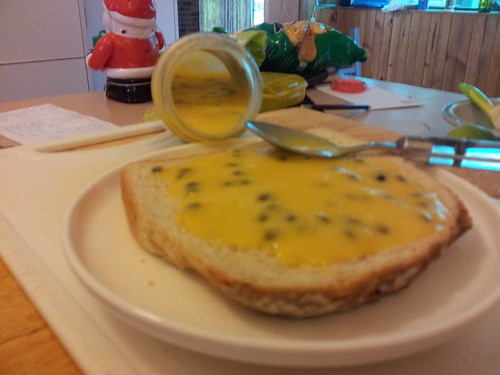
As you might have noticed, Eating Adelaide is not a blog filled with amazing pictures of food. But I think with my attempt at a photo of my passionfruit curd, I’ve sunk to a new low in photographic rubbishness!

I’d already put the curd in jars: labels still on and narrow necks. On my piece of bread the curd looked flat and kind of uniformly yellow. I tried tilting a jar over, I tried photographing it so you couldn’t tell what had been in the jar before the curd, I tried using the flash, no flash, my phone’s camera, I even got the tripod out.

And it still looks terrible.

All the while, my tummy rumbled and it didn’t take too much to give up on the photography and eat the piece of bread.

I don’t get these people who have the patience to mess around styling and photographing their food. I make it and then I want to eat it. And that’s why you get to enjoy such dodgy photos!

A friend has a mature, and huge, passionfruit vine which occupies a good chunk of his back garden. Which means I was lucky enough to have a big bag of passionfruit delivered to me.

At the time it was quite hot, so turning on the oven didn’t appeal. That – and I would have had to have made a ton of cakes, slices and biscuits in order to make a dent in the pile of passionfruit.

Fortunately, passionfruit curd requires no oven and needs lots of the little beggars.

I read a selection of recipes online and they were all vaguely similar. There was slight variation in the ratio of whole eggs to egg yolks, some used a double boiler, some didn’t, one even used the microwave.

One thing they all had in common was I thought they contained far too much sugar. So I made up my own recipe and figured that really, it would all work out in the end.

I do love being right!

Begin by beating two eggs, two egg yolks and 100g of caster sugar. Beat until reasonably light and fluffy. I didn’t this by hand and I’d describe the mixture as combined but not approaching that thick, pale ribbon stage you aim for if you’re making a proper custard.

On the stove, melt 125g of unsalted butter. When the butter is melted, whisk 160mL of passionfruit pulp (this is probably around 8-10 fruit although they vary in size so it’s a bit tough to give you a number) through the eggs and pour it into the pan with the butter. HAVE THE HEAT VERY LOW. I cannot stress that enough. LOW. REALLY LOW!

Now you have to stand and stir. You don’t have to stir vigorously, but you do have to keep stirring. Have someone make you a cup of tea or pour you a glass of wine. Whatever you do, don’t crank the heat up to hurry things along. That way certain failure lies.

So you stand there stirring, stirring, stirring. And basically you keep on doing that until the mix turns to the consistency of custard (that is, you draw a line with your finger through the curd on the back of a spoon and the curd does not close back on itself). You don’t need for it to be super thick because it will thicken further as it chills.

I think all up this took about 20 minutes for me. It was a hot evening, and even though the stove was only on low, I got very hot standing there and it felt like it was about three hours!

Sterilise a couple of jars (make sure they’re well washed and then pour boiling water into them). Pour the hot curd into the jars, pop the lids on but don’t do them up.

Once the curd has cooled in the jars, tighten the lids and refrigerate.

I ended up with 2 190mL jars of curd.

If you want, you can loosen the seeds from the pulp by giving it a very quick blast in a food processor and then sieving them out. I couldn’t be bothered.

Eat on bread or toast. Use as part of a pavlova topping. Sandwich meringues together with it. Fill macarons with it. Or just go back to eating it on bread.

Delicious and not too sweet.  Very easy to make but patience is required!

Baked Moroccan Meatballs

Baked Moroccan Meatballs

I was just about to post a recipe for rocket pesto when I discovered that I’d done that way back in 2011. No point in telling you the same thing twice – and (depressingly) my more recent photo was actually worse too!

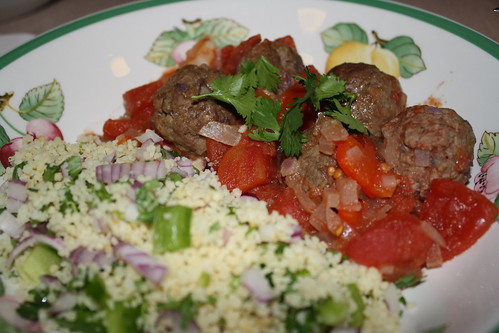
Fortunately, my back log of photos suggests that I write instead about some baked Moroccan meatballs that we had for an easy dinner before the latest lot of hot weather invaded.

If you can start this a little ahead, it’s worth it: allowing the meatballs some time to sit in the fridge, firm up and develop flavours is time well spent. But, if you’re in a rush – no matter, you can have this dinner on the table quickly.

This recipe should make enough meatballs for four for dinner.

Begin by taking 500g of lean beef mince. Mix in half a red onion, finely chopped, and a generous 2 tsp of ras el-hanout. If you don’t have that to hand, use some ground coriander and cumin. Add salt, pepper and additional chilli (use chilli powder for this, rather than flakes) to taste. Because my ras el-hanout had chilli in it, I just stuck to salt and pepper.

Ensure the seasoning and onion is mixed thoroughly through the mince, form into walnut sized meatballs, place on a plate and refrigerate until you’re ready to cook.

Heat some olive oil in a pan (a pan you can put in the oven), and brown the meatballs all over. When they’re browned, remove them from the pan and set aside.

Now use the same pan to make your sauce. Add some extra oil and heat, then add 1 brown onion, finely chopped, a clove or two of minced garlic and chilli (fresh or flakes, again, to taste and totally optional). Add a tin of chopped tomatoes (buy Australian!) and half a tin of water. Cook gently until the sauce begins to thicken and add half a chopped capsicum.

Heat your oven to 180°C. Tuck the meatballs into the sauce (I found I didn’t have space for all of them) and place in the oven to finish cooking. Depending on how thick your tomato sauce is (or becomes) you may need to cover the pan with a lid (or tin foil) to stop it thickening too much.

When the meatballs are cooked and the sauce is thickened, serve, garnished with fresh coriander, and any appropriately North African sides (yep – we had couscous!).

We had a few leftover meatballs and a bit of leftover sauce, so the next day I put the meatballs in a pie dish, poured over the sauce, topped generously with grated cheese (we had some mozzarella left over from pizzas) and reheated in the oven. A great way to use up leftovers!

Beef Rendang

Untitled
It’s true – curry is hard to photograph!

I’m sitting here sweltering: the thermometer has slid past 36°C yet again, and I’m hanging out for the cool change late this afternoon or early evening. Tomorrow’s forecast 29°C sounds almost chilly.

As I’m very much a winter person, I would like to swap with my mates in Leeds, who are currently enjoying temperatures just above 0°C. At least in that weather you can rug up, head to the pub for a cheeky pint and then tuck into a big curry. OK – you do have to dodge the icy footpaths (something I very definitely do NOT miss), but at least you feel like eating, which is the last thing on my mind right now!

Before temperatures took off, I made this beef rendang. The original recipe came from a 2003 Sainsbury magazine. As I no longer own the original I have no idea what tweaks may have taken place in 10 years. If you are familiar with rendang then you’ll notice that mine looks nowhere near authentic: I didn’t have the time to leave it cooking for long enough for the coconut milk to evaporate properly. It doesn’t matter: this still tastes fantastic!

Take 1kg of cubed beef and brown it in a large pan, in batches if necessary. Remove the beef and set aside.

In the same pan, add a little extra oil (use a flavourless oil, such as peanut) and brown a generous 2 tsp of grated ginger, 1 stalk of lemongrass, finely sliced, 1 onion, finely sliced and 6 cloves of garlic, crushed and chopped. Add 10 curry leaves (as I have these growing at home I always add even more because I love the flavour!), chilli to taste (either fresh birds eye chillis or chilli flakes), ½ stick cinnamon, 4 cloves, 5 green cardamom pods, 1 star anise, chilli powder (again, to taste – the original recipe states 1 tbsp but you really have to hold your nerve to use that much!), 1 tbsp turmeric, ½ tbsp ground coriander and ½ tbsp ground cumin.

Give this all a good stir fry and then add a 400mL tin of coconut milk and an additional 200mL of water. If you are in a hurry reduce the amount of coconut milk you use and omit the water – this will give you a thicker gravy without the long cooking time.  Bring this mix to the boil and then add an additional stem or two of lemongrass (whole, but bruised).

Reduce the heat and return the meat to the pan. Simmer (very gently – if you let it boil now you’ll end up with super tough meat) for a couple of hours.

The longer you can let it simmer for the better: flavours will develop and the coconut milk will start to evaporate, leaving behind a dense, fudgy and quite dry curry, with beautifully tender meat.

Serve with rice, and garnish with fresh coriander.

Perfect for staving off a cold winter night in the northern hemisphere … and, if you put enough chilli in, great for working up a sweat here in the sweltering south of Australia!