Another hearty dinner for you – one that’s perfect to make on the weekend and have stored up for a mid week dinner.
This recipe comes from the Hairy Bikers’ Mums Still Know Best – a book that’s choc full of very tasty looking, very British recipes.
This is a great recipe because you don’t need to worry too much about quantities. You’ll know if you love beans – and if you don’t, well then you should leave them out and, if you can be bothered, substitute with something else.
Begin by heating some oil in your favourite casserole dish. Chop the sausages into large chunks and fry until browned. Remove from the pan, and fry up some chopped bacon. When that begins to crisp up, remove that and set aside with the sausages.
In the pan (which by now should have a lovely fatty, meaty bottom), fry some finely sliced onion. As the onion softens, add garlic to taste and fry for a couple of minutes more. Now add in chilli powder (or smoked paprika) and cook for a few seconds longer to cook out the spice.
Now add in a tin of crushed tomatoes (note – try to buy Australian!), some chicken stock, tomato purée, Worcestershire sauce, brown sugar and some dried oregano or thyme. If you’re cooking for two people, let’s say you’re using 6 sausages (you want to have leftovers, trust me), so use 300mL chicken stock, 2 tbsp tomato purée, 1 tbsp of Worcestershire sauce and sugar to taste (I always use far less than specified in recipes so let’s say 1 tsp).
Bring this mix to a simmer and add the sausages and bacon back into the pan. Add enough water (or a 50-50 water/white wine mix) to cover everything.
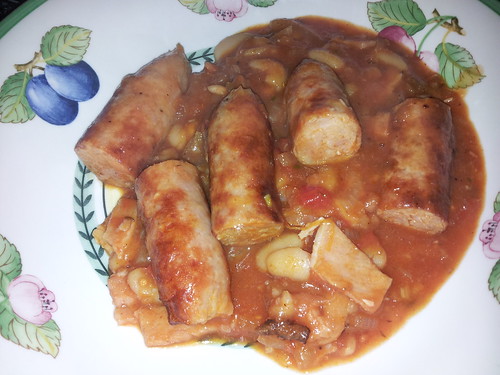
Partially cover the pan and simmer for at least 20 minutes. When you’re ready to eat, drain and rinse a can of butter beans or cannellini beans and add the beans to the stew. Cook for a further 10 minutes (minimum) and serve with plenty of piping hot, buttery mash.
The picture of this casserole in the book shows a very dry looking dish. Personally, I’m a big fan of plenty of sauce – if things are looking too dry for your tastes you can add passata or stock or more wine. However, if you want less sauce, then hold back on adding all the stock and only add as much liquid as you feel necessary.
This is one of those dishes that keeps and reheats well – there’ll be no problem making it on a Sunday and having it for Tuesday supper (not to mention left overs for lunch the next day).
As a bonus, it’s almost a one pot dish and it’s super easy. Well done, Dave and Si!