Chocolate Pudding Recipe

Jamie Oliver's Chocolate Puddings

I was looking around for a chocolate pudding recipe and when I found this one by Jamie Oliver I thought I’d give it a go, because it has the bonus of being gluten free. As you may know, despite living a very gluten filled life myself, I’m always on the look out for gluten free recipes, because I have a few relatives who are either coeliac or avoid gluten.

This recipe has also been posted relatively recently over at Just as Delish. If you’re interested in gluten free recipes, or recipes with a healthy slant, check it out.

Jamie’s recipe, originally featured in Jamie’s Kitchen, serves 6. As we were just two (this was originally going to be made for Andy’s birthday, but it took me a while to get organised) I halved things, made three puddings and fed one to my mum for morning tea.

Begin by melting 60g of dark chocolate with 25mL (5 tsp) of strong black coffee (espresso, if you’re in my household!). I did this as usual in the microwave and a burst at 30 seconds on high was long enough to cause the chocolate to seize. As this is a tiny amount of chocolate, with liquid, be very careful if you’re using the microwave. Otherwise, just chop up the chocolate and pour over the piping hot coffee. Pour the mix into small ice cube trays and freeze.

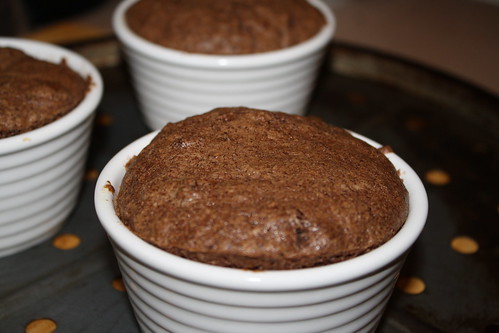
I used 4″ ramekin dishes as my moulds. Jamie tells you to use 3″ pastry rings or dariole moulds. This makes me pretty sceptical about his quantities for this recipe because even though I halved things and was using larger moulds, I still had enough mixture left over to make a generous sized ‘muffin’ of pudding (the fourth ramekin having been broken some time ago!). So, whether you’re halving or making a full batch, make sure you have a couple of extra moulds in reserve!

Butter the moulds well and refrigerate.

Preheat the oven to 190°C (conventional oven, not fan).

To make the sponge, melt 160g of chocolate with 60g of butter (unsalted). When this mixture has cooled, add to it 3 egg yolks, 50g of ground almonds and 50g of rice flour*.

Whisk the 3 egg whites until soft peaks form and then add 100g of caster sugar and beat until stiff. Note – just because you may have used the KitchenAid while the baby is asleep previously, there is a massive difference between making some brownies using the flat beater and vigorously whisking egg whites on full speed …

Fold the egg whites into the chocolate mix and ensure everything is well combined.

Spoon some mixture into a mould, top with a frozen square of chocolate and coffee, and then cover with more mixture.

Bake for 18-20 minutes (if you’re using a larger mould, like me, you may want to extend that by 5 minutes or so). The puddings will puff up a little while baking and should be reasonably firm.

When done, remove from moulds while hot and serve immediately. We served with cream, because, well, if you’re doing pudding, you may as well do it properly.

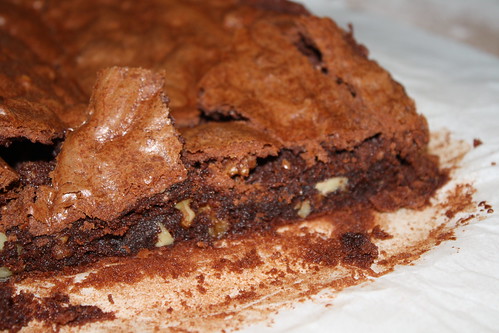
While these puddings were nice they were … just that. I thought it was a lot of effort to go to for a dish that didn’t really stand out. I disliked the ‘just in time’ nature of the dish – if you were entertaining you’d spend the pause between dinner and dessert in the kitchen making these as there’s so little you can do in advance. Of course, unmoulding anything is always fraught with danger (and, in this case – massive fail – but I think my puddings were slightly underdone) but there’s no harm in serving this dish unmoulded. It looks fine in the ramekin.

There are other Jamie Oliver recipes I return to time and time again (his spinach and feta pie, and also his brilliant cheesecake recipe, which I haven’t yet written about). But this will not be one of them.

* As mentioned once or twice in other places, rice flour is readily available in Australian supermarkets. Just make sure you buy rice flour and NOT ground rice! Also, if you are cooking for people who have a medical issue with gluten, always check that any products like this are gluten free (100% white rice). You’d be surprised at the places where gluten crops up.

Chocolate Brownie Recipe

IMG_2042

Even I’m starting to lose track of which chocolate brownie recipe I’m up to now … but here’s yet another one! I’m slowly making a dent on all those bookmarks …

I’ve also decided that at some point I need to start collating some statistics about the different ratios of ingredients and the outcome in the finished product because then I should be able to give you, the reader, some insight into what type of brownie recipe you need to follow to achieve a certain outcome.

Today’s recipe comes to us from Leite’s Culinaria, where they are grandly titled “Robert’s Absolute Best Brownies”. I am always a little sceptical of “best” or “best ever” because that’s the type of thing that’s in the eye of the beholder. But yes, these were pretty good.

The recipe provides imperial measurements for the chocolate and butter and, as my scales do both, I used imperial rather than converting to metric. I tried converting the cup measures for the dry ingredients to metric (because I think weighing ingredients is the only way to go) but the conversions I found for the sugar seemed way off, so I resorted to cup measures.

The original recipe is very enthusiastic about beating everything by hand, but that doesn’t happen in this household. If you have a stand mixer, grab the flat beater and let’s start!

Preheat the oven to 175°C (not fan) and base line a baking dish (8″x8″ – so slightly smaller than I use for many of my brownie baking adventures).

Melt 8 oz of unsalted butter with 3 oz of dark chocolate. I did this in the microwave but you can always use a bain-marie. Tip the smooth melted mixture into your stand mixer and beat in ¾ cup of caster sugar (Andy felt these brownies were a bit on the sweet side so you may like to reduce that) and 1 tsp of vanilla extract.

I’m not convinced that the vanilla extract adds anything so feel free to leave it out. Personally, I’m heading towards omitting it from chocolate brownie recipes in future – it seems unnecessary, having almost no effect on the finished product and I think it’s detrimental to the taste of the batter pre-cooking.

When the chocolate, butter and sugar mixture is smooth, add 2 eggs, one at a time, beating between each. Then add ¼ cup of plain flour and beat like crazy. The original recipe says to beat vigorously for 1 full minute. I let the KitchenAid do its thing until the mixture was quite pale, light and mousse like.

Finally, take a cup of walnuts (or other nut of choice), roughly chop them and stir them through the batter. You’re best off doing this bit by hand, irrespective of how you’ve got to this point!

Tip the batter into the prepared baking dish and you’re done – into the oven. The recipe states 30 minutes but that was nowhere near long enough for my baking dish/oven. Perhaps my dish was a little smaller so the brownie mix was deeper as I ended up baking them for about 45 minutes. You want the mixture to be cooked but you don’t want it to be dry: there still should be some moisture on the tooth pick.

Allow to cool and then cut, serve with cream and eat!

This brownie had an excellent crust – really crispy (and crumbly – what a mess it made cutting it up) with a lovely squidgy middle. Of course, with so much chocolate and so little flour it was really chocolatey too. I agree with Andy that the sugar could be reduced slightly and I see no reason why the filling would need to be restricted to nuts – I’m a big fan of chopped up chocolates in brownies!

The finished product is very reminiscent of the last lot of brownies, and you can check out the full collection here.

If you’re after something chocolate but NOT a brownie, check out Jamie Oliver’s chocolate pudding recipe.

Banana Cake Recipe

Banana cake or banana bread? Who knows what the difference is? Certainly not me. It seems to be a bit of a geographic thing … if you’re in the eastern states of Australia (particularly New South Wales) it’s banana bread, similarly if you’re in the US or Canada.

Hopefully this family recipe will be what you’re after, whether you’re searching for a banana bread recipe or a banana cake recipe!

Now – the first thing you need is the time and the patience as baking is a tedious process. If you are not willing to put in the efforts, we highly suggest you buy your cakes online in Singapore by clicking here. Lets start with three super ripe bananas. The horrible ones that have gone all black. It can be tricky to score yourself three at the right level of super ripeness all at the same time BUT I have discovered that you can freeze bananas. All you need to do is take your super ripe banana and pop it in the freezer. You don’t need to wrap it or anything. When you want to use it, remove it from the freezer a few hours in advance (they defrost quickly) and place it on a plate or in a bowl. This is quite important because defrosting bananas lose quite a lot of water.

Make sure you peel the banana when it’s only defrosted a little bit (let’s say 15-30 minutes out of the freezer). Straight out of the freezer it will be too hard, and if you wait too long it will all be too gluggy and impossible to peel. When you’re ready to use the banana, drain off the water it’s lost and ignore the fact that it looks really really ugly and unpalatable!

For the cake, preheat your oven to 180°C (convection, not fan) and grease a 1lb loaf tin.

Beat together 125g of unsalted butter and 175g of caster sugar. If you have a food processor go ahead and use this! Add 2 eggs and beat well before adding 300g of self raising flour. This mixture will be quite stiff at this point.

Add your three overripe bananas, well mashed, and ensure the mix is well combined. Finish by adding 60mL (or ¼ cup) of milk, into which you’ve dissolved 1 tsp of bicarb. This will loosen the mixture up a little and you’ll be able to pour it into your loaf tin.

This will almost fill the tin – but don’t worry – you shouldn’t end up with cake mixture all over your oven!

Bake at 180°C for about 45-50 minutes. In our oven (which is a little slow on convection) it took 50 minutes. I actually started checking the cake around the 30 minute mark but at that point it was still very very wobbly. As usual with cakes, you want a skewer or toothpick to come out clean. And naturally, you want your cake to be lovely and golden.

When done, remove from the oven, allow to cool for a few minutes and turn out onto a wire rack. When completely cool, top with chocolate ganache. You could also sprinkle a few chopped walnuts in a decorative line down the centre.

Perfect for afternoon tea … and using up bananas.