Lorraine Pascale’s Cookies & Cream Chocolate Brownies

Cookies & Cream Brownies

It’s been a long time since I made any brownies but in the last week or so the planets aligned and gave me the opportunity to try out another recipe AND a new dedicated brownie pan.

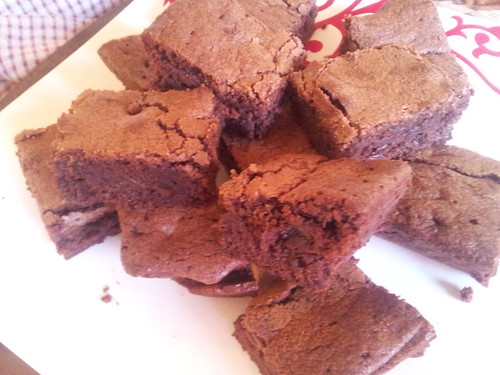
Normally my brownies are cooked in an old, battered roasting tin lined with baking paper. It’s the perfect size for most recipes and it does a fab job. However, one of my friends has been on at me for quite a while to try out one of the many specialist brownie pans available. The idea with these pans is that they create extra edges so you get more corner pieces (and they, after all, are the best bits).

The one I bought was a cheapie from a chain store and it wasn’t entirely successful (thanks to another friend who very patiently fished out the brownies!) BUT I also didn’t read the instructions and I think there are ways I could improve things. Once I’ve discovered that one way or the other I’ll let you know.

Lorraine Pascale is a British model turned pastry chef (one of the weirder job transitions, I have to say!) and she now hosts tv shows and writes books. I do find her tv programmes a little too lifestyle-like for me (soft music, shots of her working at her computer while something bakes …) but a lot of the recipes have seemed really good and I think her programme is the ONLY time I’ve seen a fougasse cooked on tv.

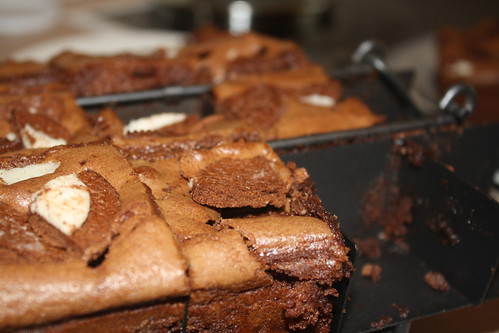
For these brownies I used Delta Creams, though you could really use any chocolate biscuit you like, or perhaps substitute one of the many biscuit based chocolate bars. Or just leave it out altogether – the brownie mix is perfectly rich and delicious without the addition of biscuits!

Download the recipe.

Lorraine Pascale’s Cookies & Cream Chocolate Brownies

Ingredients

  • 165g unsalted butter
  • 200g dark chocolate
  • 3 eggs
  • 2 egg yolks
  • 1 tsp vanilla bean paste (or vanilla extract)
  • 165g light brown sugar
  • 2 tbsp plain flour
  • 1 tbsp cocoa
  • pinch of salt
  • 154g chocolate cream biscuits (this worked out to be 10 Delta Creams) - optional

Instructions

  1. Preheat the oven to 160°C (fan, 180°C convention) and prepare your favourite brownie baking receptacle. You'll need one about 20cm x 20cm.
  2. Melt the butter and chocolate together in short bursts in the microwave.
  3. In a stand mixer, whisk the eggs, egg yolks and vanilla together until light and frothy. Still whisking, slowly add the the sugar. Note that sometimes light brown sugar goes a little hard and clumpy in the jar/bag - if yours has done this, then make sure you sieve it/break up the lumps before beating into the eggs!
  4. Once the sugar is well combined, slowly add the chocolate and butter mix, beating all the time.
  5. Finally beat in the flour, cocoa and salt.
  6. The mixture will be very light and mousse like.
  7. If using the biscuits, roughly chop them into quarters and gently stir about a third of them into the brownie mixture.
  8. Tip the mixture into your prepared pan and smooth out. Scatter the remaining biscuit pieces over the top and lightly press into the mixture.
  9. Bake in the preheated oven for about 30 minutes. The top of the brownies will be set and start to crack and the centre should be cooked through but still moist - a few crumbs will cling to a toothpick.
  10. Allow to cool and then cut and serve.
https://eatingadelaide.com/lorraine-pascales-cookies-cream-chocolate-brownies/

Mary Berry’s Chocolate Brownies

Untitled

A while back I bought a copy of Mary Berry’s 100 Sweet Treats and Puds (I bought it from Clouston and Hall but they no longer have it).

Mary Berry is a UK baking icon and co-hosts the original Great British Bake Off. I hope she’s not offended by me saying she’s a very grandmotherly type. Both my grandmas were pretty good cooks and I certainly didn’t go short of sweet and savoury treats. But if you didn’t have a grandma who baked then one episode of Bake Off and you’d probably be interested in adopting Mary Berry.

I spent quite a bit of time reading through the book deciding what to cook first. A reasonably impromptu Father’s Day lunch saw me volunteer desserts and, realising I was short of time, I decided on the brownies because they looked really easy.

It turned out that time was even more of the essence than I’d realised because, on the morning of lunch, with brownies yet to make and the other dessert to assemble, one of our neighbours popped his head over the fence and the already tight schedule was thrown out of whack!

These brownies taste great with a deep chocolate flavour, are slightly squishy and fudgy and are really easy. If you’re not confident melting chocolate, you want a store cupboard alternative or you want a quick recipe (you still need 40 minutes baking time though!) then this is the recipe for you.

A couple of notes: don’t be freaked out by what feel like unconventional quantities of ingredients. Hold your nerve! Mary Berry’s original recipe uses 375g caster sugar but I had only 300g left and topped up with dark brown sugar. This is always a result in brownies and adds extra richness.

Mary Berry’s Chocolate Brownies

Ingredients

  • 275g unsalted butter (slightly softened if you working by hand or using a stand mixer)
  • 300g caster sugar
  • 75g dark brown sugar
  • 4 eggs
  • 75g cocoa powder
  • 100g self raising flour
  • 100g dark chocolate chips

Instructions

  1. Preheat oven to 160°C fan and line a roasting tin (30cm x 23 cm) with baking paper.
  2. Combine the butter and sugars then add the eggs. Mix in the cocoa powder and self raising flour and finish by stirring in the chocolate chips.
  3. The mixture will be very thick. Spoon it into the baking dish, smooth it out and bake for 40-45 minutes. The cake should be set and a skewer should come out clean but you also don't want to over bake because otherwise the brownies won't be squidgy.
  4. Leave to cool in the tin (if appropriately squidgy it will collapse a little) before cutting into 24 squares and serving.
https://eatingadelaide.com/mary-berrys-chocolate-brownies/

Marbled Chocolate Brownies

Untitled

I can’t believe that the last lot of brownies I made was back in September last year. Those chocolate and pistachio brownies got a big tick from my brownie taste panel but did rather freak me out on account of the huge amounts of sugar.

Every now and then I catch Justine Schofield’s Everyday Gourmet and it was on that program I saw these marbled chocolate brownies.

There’s not too much different about the brownies, but they have a cream cheese topping which is used to give a very pretty marbled effect. Perfect for people like me who are far too lazy and inept to produce beautifully decorated desserts!

Preheat your oven to 180°C and line a small baking pan with baking paper.

On the stove, in a large pan, melt 125g unsalted butter with 125g dark chocolate and 1 up of brown sugar. If this was just chocolate and butter I would normally do this in the microwave, but here the idea is to get the sugar completely melted, so there’s no graininess in the mixture. You need to be patient and do this over a low heat, with plenty of stirring and monitoring. No wandering off!

Once the sugar is fully dissolved, remove the pan from the heat and mix in ⅓ cup of plain flour, ⅓ cup of cocoa (not drinking chocolate!), ½ tsp of baking powder and 3 eggs. If you are doing this by hand (which I did, for a change!) it will pay to give the eggs a light beating before mixing them in. The mixture will look very very loose – but don’t be alarmed, keep beating and it will thicken up as the chocolate cools and the eggs get incorporated.

Pour the brownie mix into the prepared baking tin.

Now, for your cream cheese topping. The original recipe calls for a branded light, spreadable, cream cheese. Normally, I eschew anything dairy that’s “light” but because cream cheese can be very stiff I did actually buy the spreadable light cream cheese*. Mix 250g of the cream cheese with 1 egg and ¼ cup of caster sugar. I actually found this made too much topping – it’s a shame it’s not possible to halve an egg!

Dollop generous spoonfuls of the cream cheese mix over the top of the brownie mix. I ended up with 6 or 7 large tablespoonful dollops. Take a knife, and use this to swirl the cream cheese topping through the brownie mix. I went the length of the tin followed by dragging the knife across the width. It’s up to you what you do though!

Finish by baking for 35-40 minutes (40 minutes in our oven), until cooked but still moist.

Allow to cool before cutting into portions. The Everyday Gourmet recipe says it makes 24 but that would be 24 tiny brownies for chocolate hating, not hungry types! I say it makes about 12!

The brown sugar makes for a lovely depth of flavour, the brownies are fudgy, they look stunning and the topping makes a slightly tart counterpoint to the sweetness of the brownies.

Excellent stuff. Even if you don’t fancy fiddling with your favourite brownie recipe, just try adding the topping!

* I was relieved, after reading the ingredients, they actually seemed to be innocuous – quite often all manner of interesting additives are used to replicate the mouth feel and weight of the fat that has been removed.