Chocolate Brownies

IMG_0686

I’m lucky that, at present, I have more time for cooking (and thinking about food) than I would do normally. This means that most of our evening meals have become more interesting and more diverse.

It also means … more time to think about cake.

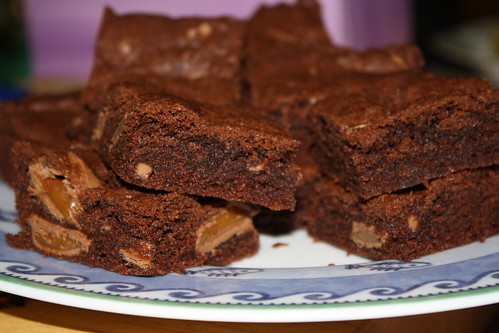
I have my favourite chocolate brownie recipe (thank you, Nigel Slater) but I’m not so loyal to it that I won’t try something else. I spotted this recipe for chocolate caramel brownies on taste.com.au in the run up to Valentine’s Day and decided it looked worth a go.

The first block of caramello chocolate was eaten so we had to have a second attempt (I bought the chocolate and made the brownies within 24 hours to prevent the same thing happening again). As you might expect, I also deviated from the recipe.

Begin by putting a 220gm block of caramel chocolate in the freezer (this is to make it easier to break/chop up). Grease and line (fully, not just base line) with baking paper a tin – I always use my smallish roasting dish for brownies and preheat oven to 160°C (fan, 180°C otherwise).

Melt 180gm of dark chocolate (broken up) with 150gm of unsalted butter (chopped). I used to be too scared to melt chocolate in the microwave but I braved it once and have never looked back. It’s a LOT quicker than standing over a double boiler, and because it takes less time I find I’m less likely to get distracted, start doing something else and end up with the chocolate seizing. Yes, you do need to keep an eye on it (I open the microwave and give the chocolate a stir every 30 seconds – 1 minute or so) but you’d be doing that in a double boiler anyway. So, give microwaving your chocolate a go!

I then tipped the chocolate and butter mix in to the KitchenAid and, using the flat beater, mixed in ½ cup of caster sugar. When that was well combined I left the mixture to cool a little (actually, at that point I went and helped bath the baby … you don’t need to leave it that long though!) before beating in 2 eggs.

Now, at this point the recipe adds in 1 ¼ cups of plain flour. That just didn’t seem right to me – plain flour and no raising agents? So I used self raising flour. Beat this in, along with 2 tbsp of cocoa.

When everything is combined (and I found the mixture to be very thick – almost dough like in the way it clumped together and came away from the edges of the mixing bowl) mix in the caramel chocolate, broken in to squares. It was because of the caramel chocolate that I used the KitchenAid rather than the trusty MagiMix.

Tip the mixture in to the prepared tin, smooth out as much as possible and bake for 20 minutes. The top of the brownie should be set.

Allow to cool before serving. The original recipe has you cool the brownies, cut in to heart shapes and decorate with extra cocoa powder. Trust me – you need none of that frippery!

These were very simple to make and, while they didn’t eclipse my current favourite recipe, I’ll definitely be making them again. Of course – you can substitute any flavoured chocolate you like for the caramel chocolate. A few ideas floated around the afternoon tea table were using Cherry Ripes, mint chocolate, orange chocolate and I reckon even adding KitKats might be interesting!

Another Chocolate Fudge Cake

chocolate cake

The last chocolate fudge cake has already had a couple of outings which is enough … time to look for another.

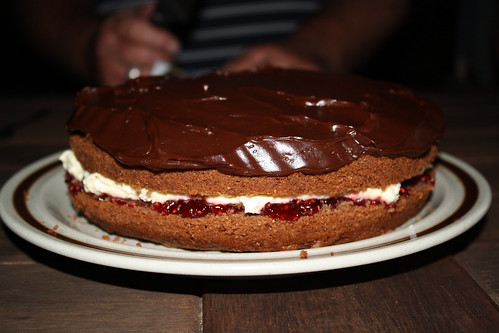
Having a couple of recipes up your sleeve is useful so you don’t bore people with the same cake all the time … and you never know, the next recipe may be better. This recipe comes from James Martin’s Desserts*. James Martin’s cake recipes rarely disappoint but my first attempt at this little number was not entirely successful – the chocolate fudge topping ended up rock hard, unspreadable and, frankly, pretty tasteless. I suspect the problem was with me and my handling of the hot sugar and evaporated milk mix. One day when I’m feeling brave I’ll have another go. In the meantime, the cake itself is still good and I came up with a clever work around for filling and topping.

The cake itself contains wholemeal flour so you can even pretend it’s healthy.

Grease and baseline a 20cm springform tin and preheat the oven to 170°C bake (not fan).

Cream 175g of unsalted butter with 175g of soft brown sugar. Measure out 175g of wholemeal self raising flour and remove one heaped tbsp of flour. Replace with 1 heaped tbsp of good quality cocoa and add 1 heaped tsp of baking powder before mixing with the butter and sugar. Add 3 large eggs.

The mixture is likely to be a little stiff so add a splash of water … Martin doesn’t give any exact quantities here but you are aiming for a mixture that plops off a spoon knocked against the edge of the bowl or mixer. Not too stiff but not a runny batter either … Of course, add extra water slowly and carefully because you can’t undo it if you add too much!

Bake the cake for 40 – 45 minutes (in my oven, 40 minutes is perfect) – until a skewer comes out clean. Allow the cake to cool in the tin for a few minutes and then tip out on to a rack.

To finish the cake, cut in half and fill with jam (raspberry, of course!) and whipped cream and top with ganache. We used the ganache from the earlier chocolate fudge cake recipe, but made in half quantity – so about 100g of dark chocolate, 50g of butter (melted together) with about 70mL of thick cream beaten through.

Ganache suffers from the heat so you may have to refrigerate the cake, but if you can avoid it it is better left at room temperature.

*Also available from Amazon UK, Amazon US and worldwide from The Book Depository.

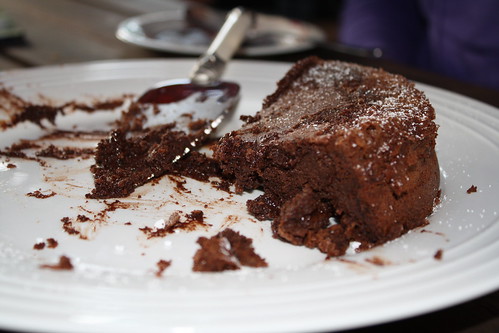
Chocolate Fudge Cake

Chocolate Fudge Cake

Well, it’s Chocolate Week in the UK so it’s a happy coincidence that, at the last minute I decided to make a cake as an additional dessert for a BBQ with friends.

As I still subscribe to (and read!) a lot of UK based food newsletters chocolate was featuring heavily and this simple fudge cake recipe from the UK’s version of Delicious magazine stood out as something I could put together in a very limited amount of time.

I have to confess that part of the reason I was attracted to it was the use of red wine vinegar. There’s something about cake recipes with unusual ingredients that always makes me want to try them out!

The cake hit all the spots … it was super quick to make and everyone liked it (I even packed up a doggy bag for a missing husband!) so it’s definitely one I’ll be making again.

I followed the recipe pretty closely and was a bit scared by the ‘chuck all the dry ingredients’ in the food processor approach but it turned out OK. However, next time I might adopted a slightly more conventional ‘cream butter and sugar’ method …

Begin by greasing and baselining a 20cm spring form tin and preheat the oven to 160°C fan (or 180°C).

In your food processor (or mixing bowl) combine 100g unsalted butter, 15g cocoa powder, 300g self raising flour, 1 tsp bicarb soda, 225g caster sugar (use golden or unrefined if you can) and 2 eggs. If you’re mixing by hand or with an electric hand whisk you might want to sift the flour and bicarb first. The add 100g of melted dark chocolate (I am a new convert to melting chocolate in the microwave – but you do need to watch it very carefully!) and finish by mixing in 250mL of milk mixed with 1 tbsp of red wine vinegar.

Pour the batter in to the cake tin and bake for 1 hour, until firm in the centre and a skewer comes out clean (with my oven I think next time I’ll check after 55 minutes). Cool in the tin for a few minutes and then turn out to cool on a rack.

When the cake is cool, it’s time to make the ganache and finish the cake.

For the ganache, melt 225g dark chocolate with 100g unsalted butter (be careful with the microwave – watch carefully and mix every minute or so to keep an eye on things – you don’t want the microwave coated in butter and chocolate!). Stir this mix until smooth and then add in about 150mL of thick (not thickened) cream. As this is an English recipe it specifies a 142mL carton of double cream so I just guessed approximately 150mL from my 200mL carton of pure cream.

Allow the ganache to cool to a good, spreadable consistency and then slice the cake in half. Use approximately a quarter of the ganache for filling and then use the remainder as icing. Make sure you resist ‘tidying up’ the ganache until you’ve finished with the cake!

The cake kept well for about 2 days … by that time it was all eaten (mostly served with cream!).