Lemon and Thyme Cake

IMG_0169

I have just ended up with a pile of lemons and a surfeit of eggs. I’m working my way through both … slowly.

I spotted this recipe for a lemon and thyme cake about a month ago and I invariably find Nigel Slater’s cake recipes flawless (his chocolate brownie recipe is fantastic). I am also a sucker for cakes using ground almonds and cakes dredged in syrup when they come out of the oven … Of course, being a lemon and thyme cake … I now have an excess of thyme hanging around the house.

As I was using my trusty Magimix I took some short cuts with Slater’s method … but if you don’t bake a lot or you’re doing the hard work by hand, I’d defer to his recipe rather than what follows …

Preheat oven to 160°C. Slater doesn’t specify if this is normal or fan forced but, as I opted for normal bake and had to cook the cake for a lot longer than suggested, I think it’s fan forced. Grease a 1lb loaf tin and line with baking paper (yes, actually do this!).

Cream 200g butter with 200g caster sugar, and then add 100g plain flour, ½ tsp baking powder and 100g ground almonds. I always mix between each addition. Then add 4 large eggs. Finish by adding the finely grated zest of one large lemon (depending on how much you like lemon) and approximately 1 tsp of finely chopped fresh thyme leaves (you really can’t go the dried route here).

This makes a really thick batter so you’re going to have to spoon it in to the tin, rather than pour. Don’t be alarmed.

Slater says to bake for 45 mins. At 160°C, no fan, this wasn’t long enough and I ended up baking for just over an hour. If you can, opt for 160°C fan forced, or try 180°C in a normal oven.

Just before the cake finishes baking, make the syrup. In a pan over a moderate heat, dissolve 4 tbsp of caster sugar in the juice of 2 large lemons, adding in ½ tsp of thyme leaves. Make sure the sugar dissolves but don’t bring the mix to the boil. This did make a generous amount of syrup (not that it worried the cake) so don’t be too fussed about sourcing huge lemons!

When the cake comes out of the oven, take a long skewer and poke holes all over the cake, all the way to the bottom and then drizzle the syrup over the cake evenly, before allowing to cool in the tin.

Because you did use the baking paper to line the tin, when the cake is cool simply pull it out of the tin and cut in generous slices. Slater suggests serving with thick yoghurt but you don’t even need that.

Absolutely delicious – and I think it took me longer to do the dishes than put the cake together!

Mocha Cupcakes

April 2010

For my birthday last year I received Dolce!, a book of Italian desserts.  For some reason, it’s taken me until now to make anything from it.

I chose the Mocha Cake purely because all the ingredients were in the cupboard and I couldn’t be bothered heading down the shop.  In many ways, this cupcake recipe may seem like a variation on my easy chocolate cake.  But sometimes simple is best.

Rather than making a whole cake I opted for cupcakes, because they seem to be far easier to take to work!

Start by preheating the oven to 180°C and, if you’re organised, put your cupcake cases in the muffin tins (this recipe will make 12).

Beat 120g of unsalted butter with 100g of caster sugar, before adding 2 eggs, 100g of self-raising flour, and 3 tbsp of cocoa.  Mix well and add a pinch of salt.

Mix 1 tsp of baking powder in 2 tbsp of milk and beat in, before finishing by mixing in an espresso cup of cooled espresso coffee.

Spoon into the cupcake cases and bake for approximately 20 minutes (or until a skewer comes out clean).

The original recipe actually has you pour the espresso over the batter once it’s in the tin, followed by a sprinkling of cocoa and sugar – this apparently creates a sort of sauce.  However, with the cupcakes I figured incorporating the coffee into the batter was a far better idea.

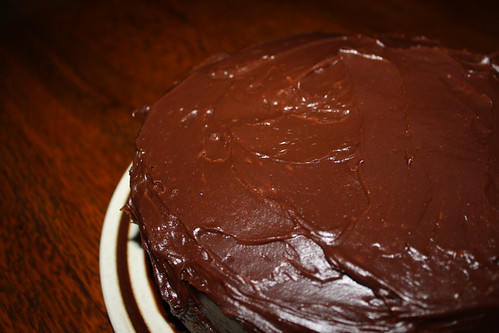
Once the cupcakes were cool I iced them with a chocolate rum icing – just melt some unsalted butter and mix in icing sugar, cocoa and a generous splash of rum.

All that’s left to do is eat them … chocolate and coffee cupcakes?  Too easy!

Mocha Cupcakes

Pecan Pie

A long weekend BBQ, some uncharacteristic (for Adelaide) rain and a request for pecan pie …

090320101172

BBQs I like.  They are an excuse to eat a lot of bread, meat and maybe dessert, and the whole salad thing is just an annoyance.  Having a BBQ at home is even better because I can make as much dessert as I want and know that there’s a good chance it will be eaten.

I had already spotted a pecan pie recipe in James Martin’s The Collection* so I knew exactly where to head.

This recipe is ridiculously easy … even more so if you choose to cheat and use ready shortcrust pastry or a pre-made pastry case.

I used James’s recipe for sweet shortcrust pastry – although I had to omit the ground almonds as I had none.

To make the pastry, take 225g plain flour, a pinch of salt, 2 tbsp of caster sugar and 115g of unsalted butter. Whizzy up in the food processor until it looks like small breadcrumbs. This won’t take very long. Then add one egg and just enough water to bring the pastry together. Allow to rest for at least 20 minutes in the fridge (wrapped in cling film). If you have a food processor this takes just seconds.

While the pastry is resting, make the filling. In a bowl, mix 350g of pecans, 55g of dark chocolate, grated (or chopped up, if you’re a bit lazy), 1 tsp of vanilla extract, a pinch or two of salt, 350mL of maple syrup (BEWARE! buy real maple syrup and not ‘maple flavoured syrup’) and 300g of caster sugar.

Beat 4 eggs in a separate bowl and then add to the nut mix. Finish everything off by adding 115g of melted unsalted butter.

If you have made your own pastry, bake it blind (10 minutes or so at 160°C with baking beans and another 10 minutes or so without, finish by brushing with beaten egg and sealing for 2 minutes – this stops the base going soggy), before adding the filling.

If you are using a ready made pastry case, all you now have to do is fill the case with the nut mix.

Whichever route you’re taking, bake at 160°C for about an hour. James Martin makes the point that it’s quite difficult to tell if the pie is cooked, so if you want to err on the side of caution, turn the oven down 20° and bake for an extra 10 minutes.

Allow to cool before serving.

If you use a shallow tart dish you could well have a lot of filling left over. I made a pile of little pies – very cute, perfect for afternoon tea at work!

The pies are gorgeous – the chocolate adds a really subtle depth of flavour that works well with the vanilla and maple syrup.

This is such a simple but delicious pie I will definitely be making it again.

* The Collection is also available from Amazon US and Amazon UK.