Vanilla Jam Cake Recipe

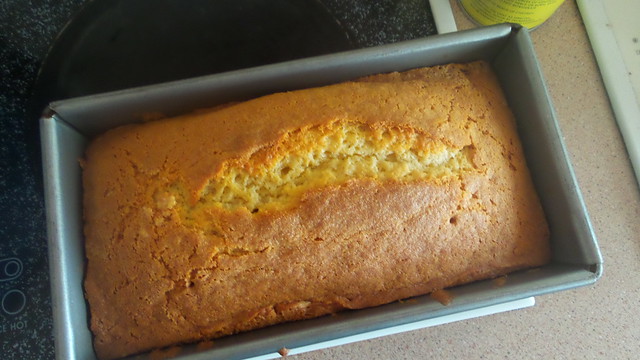
20140919_124735

Every now and then I have a good trawl through all the recipes I have tagged in delicious but have not yet cooked. In some ways it’s a depressing exercise as I tag faster than I’ll ever cook and I have a feeling that in 20 years time I’ll still be finding recipes I tagged in 2006 and haven’t made yet …

The ‘cake’ and ‘baking’ tags offer a particularly happy hunting ground and so I came across the basis for the following recipe. The blog is now defunct (or, as it describes itself, “in a coma”) but thanks to blogger it’s still a resource for all and hungry.

Of course, the first thing I had to get my head around was the fact that the recipe was all in American measurements. ¼ cup of butter – really? Am I supposed to melt the butter and measure it that way? What is wrong with saying 2 oz or 200 grams or whatever it is that you actually mean? In desperation, I whinged to my American friends on Facebook. The responses were generally along the lines that no, they had no idea why sticks and cups are considered sane units of measurement. One said that in America sticks of butter have the cup markings on the package (in much the same way that our packaging has marks at 50g intervals) but that didn’t, to my mind, resolve the issue of accuracy. I know that when I cut the butter at the 50g mark it is invariably anywhere between 45g and 55g once I get it on the scales. And in the age of cheap, digital scales why not use a unit of measurement that makes sense for non-liquid ingredients?

Goodness – I feel quite stressed now!

So I printed the recipe out, sat down with the internet and worked out conversions as best I could. Keeping in mind that I personally often find American recipes a little sweet, I did some massaging and came up with MY vanilla jam cake recipe. It looks like the original, but the recipe is for those of you who don’t have access to sticks of butter readily marked out into cup measurements!

A couple of pro tips. Grease your pan well – if any jam escapes it will be sticky, sticky, sticky! Ensure you have at least a third of the batter in the tin before you add the jam. The jam runs the risk of sinking and escaping and causing more sticky, sticky, sticky. And finally – if jam does escape and your cake comes out looking a little butchered (er, yes, that would be me!) don’t start shovelling warm cake into your mouth. The jam will be fearsomely hot and you’ll end up regretting it.

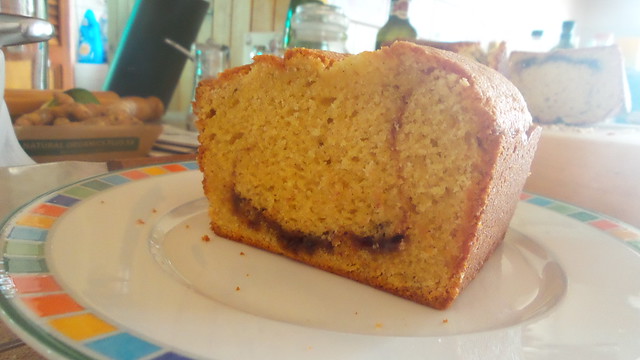
You don’t need to ice the cake and it keeps quite well for a day or two (that’s as long as it lasted …).  The jam acts as internal icing and helps to keep the cake moist.  It has a lovely vanilla flavour and gets plenty of plus points for being so easy to cook.

20140919_135045

Vanilla Jam Cake Recipe

Ingredients

  • ~ ⅓ cup of jam (your choice, I used strawberry as that's what we had open in the fridge)
  • 200g self raising flour
  • 150g golden caster sugar
  • 50g unsalted butter
  • 1 tsp vanilla paste
  • 1 egg
  • 180mL sour cream

Instructions

  1. Preheat oven to 180°C (160°C fan) and grease well a 1lb loaf tin (8" x 4").
  2. In the food processor, cream the butter and sugar and then add the flour, vanilla and egg. Finish with the sour cream.
  3. This makes a very thick batter.
  4. Spoon approximately ⅓ - ½ the batter into the loaf tin. Spoon the jam over the batter, but avoid the edges. If the jam is quite lumpy (or cold) it is a good idea to spoon it into a bowl and give it a bit of a beating before adding to the batter.
  5. Top with the remaining batter and place in the preheated oven.
  6. Cook for 40-45 minutes or until golden and cooked.
  7. Allow to cool in the tin briefly and then tip out onto a rack and allow to cool (remember, the jam will be very hot).
  8. Ice if desired.
https://eatingadelaide.com/vanilla-jam-cake-recipe/

Carrot Cake with Cream Cheese Icing

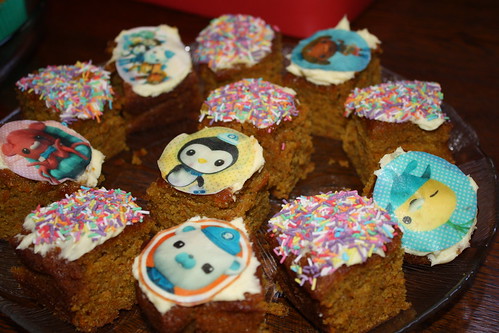
IMG_3877 the Octonauts cake toppers were sourced from an ebay shop based in Canada!

I’m still working my way through the toddler party recipes but I’m trying to intersperse them with things savoury so you don’t get a sugar overload.

This recipe comes from the BBC’s Good Food site. It is actually labelled as a frosted carrot squares, but what is the difference between a ‘square’, a ‘traybake’ and a ‘cake’? I also take issue with the use of the word ‘frosted’ because surely that is an Americanism both UK and Australian readers can do without … (and on this point, it would seem Google agrees with me!).

There are small tweaks and changes in my version – most noticeably the addition of ginger which I would definitely do again. I loved the subtle spice kick. This cake freezes (un-iced) beautifully and has a lovely moist, almost sticky, crumb.

Unlike many carrot cake recipes, this one contains no nuts so is ideal if you need to avoid them, for whatever reason.

Andy, the resident carrot cake expert, did complain that it wasn’t quite coarse enough in texture. I suspect that’s the lack of nuts, but, really, who cares when there’s a tasty cake on offer?!

Carrot Cake with Cream Cheese Icing

Ingredients

    Cake
  • 200g carrots, peeled and grated - I used my food processor's grating disc
  • 175g soft brown sugar
  • 200g self raising flour
  • 1 tsp bicarb
  • 1 tsp ground cinnamon
  • 1 tsp ground ginger
  • zest of one orange
  • 2 eggs
  • 150mL neutral flavoured vegetable oil (I used canola)
  • Icing
  • 50g softened unsalted butter
  • 75g icing sugar, sieved
  • 200g cream cheese, at room temperature

Instructions

  1. Preheat oven to 160°C fan (180°C conventional).
  2. Grease and line with baking paper an 18cm square baking tin/dish.
  3. Having grated the carrots (either by hand, or with the help of a food processor!), tip them into the bowl of a stand mixer.
  4. For this recipe, you don't want to cut up the carrots too finely - it will make the cake too wet and with too smooth a texture. If you don't have a stand mixer, either work by hand or use a cake beater. Don't work in a food processor for this one!
  5. Add the sugar, flour, bicarb, spices and orange zest and mix slowly.
  6. Add the eggs one at a time.
  7. Finally, add the oil and mix well. Ensure everything is combined but don't over beat.
  8. Spoon the cake mix into the prepared tin and bake for around 30 minutes or until cooked. In my case (cooking in my oven at 160°C fan) I checked at 30 minutes and ended up cooking for 40 minutes in total.
  9. Remove from oven and allow to cool in tin for about 10 minutes and then turn onto rack.
  10. If freezing, freeze, well wrapped, when completely cool.
  11. To make the icing, mix the butter and icing sugar together, and then add the cream cheese. You are best off if you can do this with some kind of mechanical beater (stand mixer, in my case) because cream cheese, even at room temperature, is stiff and difficult to work with. Using a beater/mixer will result in a much smoother and more manageable icing.
  12. I cut the cake then iced, but you could ice first and then cut. Coloured sprinkles are a fun addition too.
https://eatingadelaide.com/carrot-cake-cream-cheese-icing/

Dan Lepard’s Sour Cream Chocolate Cake

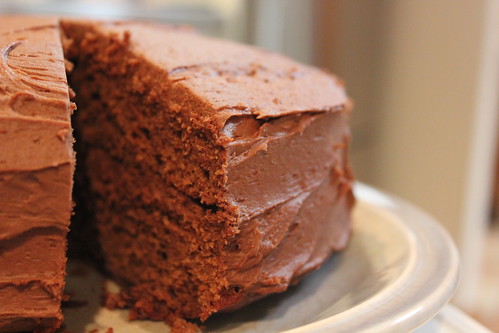
Sour Cream Chocolate Cake

Big lunch with the family at Easter and, as usual, I got to cook dessert. One day I will have to volunteer to cook something else!

My dad is quite partial to a bit of chocolate cake and I’ve had my eye on this sour cream chocolate cake for ages. I have plenty of chocolate cake recipes that are tried, tested and, indeed, popular, but there’s no harm in trying something new. And in the past I’ve found Dan Lepard’s recipes very reliable (see his tollhouse yoyos).

I received instructions from dad to make sure I used chilli chocolate. I ignored this and just followed the recipe.

The cake itself has a degree of novelty as it uses oil and sour cream rather than butter. And the icing is also based around sour cream. The cake also has less chocolate than I expected in the cake itself and, I thought, there was far too much vanilla in the whole thing.

Begin by making the cake. Prepare 2 18cm (or in my case I think they were 19cm) sponge tins: I used new silicon ones so I just gave them a slick of canola oil and base lined them with baking paper. Preheat the oven to 180°C (160°C fan).

Melt 75g dark chocolate. Beat together 75mL of sunflower oil, 75g of sour cream (I actually used light sour cream because if you shop at 4pm on Maundy Thursday you use what is on the shelf!), 125g caster sugar, 75g of runny honey, 2 tsp vanilla extract, and 3 eggs. Then add the slightly cooled melted chocolate.

Mix together 175g plain flour, 25g of chocolate and 2 tsp of baking powder and sift it into your cake mix.

Divide the mix between the two pans and bake until done – which in my case was just on 20 minutes. Lepard’s original recipe suggests 25 minutes but I knew my pans were potentially slightly larger than they should have been and I also know my oven is quick. You want the cake to be done but you also want a few crumbs sticking to the skewer.

Remove the cakes from the oven, stab all over with a skewer and dress with a simple syrup of 25g sifted icing sugar adn 25 mL boiling water. The original recipe suggests adding 2 tsp of vanilla extract, which I did, but the finished product was so overhelmingly vanilla-y that I’d definitely omit that at this step.

Cover the cakes (I used cling film) and allow to cool. In my case, this was overnight.

When ready to assemble I made the sour cream icing. Take 300g of dark chocolate and melt with 50g of unsalted butter. Add 50g of runny honey, a splash of rum (Bundaberg, of course!), 100g of sifted icing sugar and 125 g of the light sour cream. Mix until smooth.

Despite sieving the icing sugar, mixing until smooth involved putting it all in the KitchenAid and giving it a good beating with the paddle beater. It made quite a pale fluffy icing.

Sandwich the cakes together (pro tip – sandwich together the two flat sides – the bases) with the icing and cover the top and sides.

Serve at room temperature with plenty of cream.

The verdict?

Personally, I was massively underwhelmed by this. There was waaaay too much vanilla – I’d definitely drop the vanilla from the syrup, and probably also halve it in the cake (although I suspect the vanilla in the syrup was the main offender, not being cooked out). I’d probably also go for a straight chocolate ganache: I found the icing too sweet and would have to rework it to reuse it.

I was ho-hum about the cake. I’d prefer something darker and more chocolately and fudgy.

Andy liked the total package and loyally said he’d be happy to eat it all day.

Mum rated the cake highly but wasn’t sure about the icing. In fact, the icing seemed the most contentious part of the cake.

Dad? Well, he complained because I didn’t use chilli chocolate!