Chocolate Bourbon Biscuit Recipe

20140728_103029

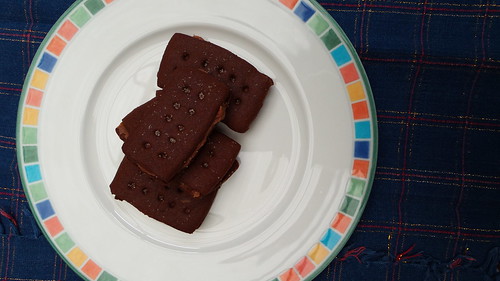
Something of an ongoing discussion in our household is whether the king of biscuits is the chocolate bourbon or the chocolate digestive. Now, obviously, all right thinking people know and understand that it is indeed the chocolate digestive. A quick vox pop on my personal Facebook page (I have plenty of English friends) even confirmed this fact.

But Andy maintains that the bourbon is king and when I saw this recipe I figured it would be worth giving them a crack. Especially as I am yet to spot the ‘real’ deal in shops here in Australia.

This is another recipe that I would definitely call store cupboard. If you’re a regular baker you’ll have everything to hand and even those who make more intermittent efforts will probably find that the only thing that it’s necessary to source is the golden syrup.

The biscuit dough is quick to make (especially if, like me, you throw everything in a food processor!) but actually cutting out the biscuits, cooking them, allowing them to cool and then sandwiching them together takes a little while. This is even more so the case if you have a three and a half year old assistant …

The dough does need to be kept cool. Even on a cold day in our cold kitchen, I found that by the time was on the last lot of biscuits the dough was becoming difficult to handle. If you’re operating in warmer conditions, definitely keep the dough you’re not using wrapped in cling film in the fridge.

Rolling out the biscuit dough between two sheets of cling film is a great idea – it makes turning the dough very easy to do and you don’t have to worry about the mess (either on the bench or on the biscuits) created by flour.

The biscuits keep well but do start to soften a bit once you fill them. If you’re making them ahead, don’t fill them until you need them. The buttercream filling can be made ahead too – you just need to remember to take it out of the fridge to soften a bit. I had quite a bit of filling left over, so obviously I was far too stingy … but it is absolutely delicious on toast!

Chocolate Bourbon Biscuit Recipe

Ingredients

  • 110g unsalted butter
  • 110g light brown sugar
  • 200g plain flour
  • 1 tsp bicarb
  • 40g cocoa
  • pinch of salt
  • ~ 3 tbsp golden syrup
  • 150g icing sugar
  • 5 tsp cocoa
  • 75g unsalted butter
  • ½ tsp vanilla extract
  • 3 tsp boiling water

Instructions

  1. Preheat the oven to 170°C (convention) and line a couple of baking sheets with baking paper.
  2. To make the biscuits, cream the butter and light brown sugar. Add the flour, cocoa, bicarb and salt. Then add 2 tbsp of the golden syrup. If the dough does not come together then add another teaspoon or so. Process well between any extra additions as you don't want to add too much. The exact amount you need will depend on weather conditions and your flour so it is likely to change every time you make the biscuits.
  3. Tip the dough out onto the bench and bring it together in a ball. Divide the ball into four and, if it's warm, refrigerate 3 pieces, wrapped in cling film.
  4. Roll each ball into a long sausage and place between two sheets of cling film and roll out until 2-3 mm thick. Cut into biscuits (apparently a bourbon is 6 cm x 3 cm so that's the size you're aiming for) and transfer onto the baking sheets. You'll probably need the help of a palette knife (or other broad bladed knife). Allow space between the biscuits.
  5. A bourbon has 10 indents in it - use the blunt end of a bamboo skewer to create two rows of five impressions and then bake for 10-12 minutes. The biscuits will still be soft on top but will move on the baking paper.
  6. Sprinkle a little caster sugar on each biscuit while hot and gently press in with the back of a spoon.
  7. Allow the biscuits 10-15 minutes cooling on the tray before transferring to a wire rack.
  8. To make the buttercream filling, sieve the icing sugar and cocoa (or process well in a food processor). This is important: failure to do this will result in gritty buttercream. Even if you're using a food processor you need to process the icing sugar and cocoa really well BEFORE you add the butter.
  9. Add the butter, vanilla extract and water and process until you have a smooth, fluffy cream.
  10. Sandwich the biscuits with the cream and serve.
  11. They keep perfectly well filled for a couple of days. After that they do go a little soft but still taste spot on!
https://eatingadelaide.com/chocolate-bourbon-biscuit-recipe/

Lorraine Pascale’s Cookies & Cream Chocolate Brownies

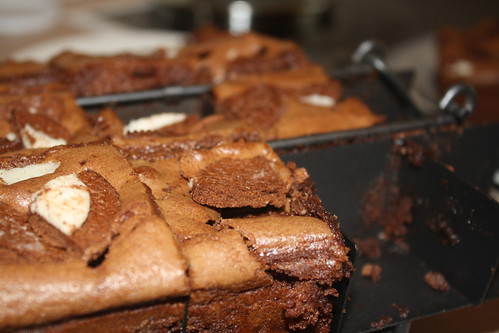
Cookies & Cream Brownies

It’s been a long time since I made any brownies but in the last week or so the planets aligned and gave me the opportunity to try out another recipe AND a new dedicated brownie pan.

Normally my brownies are cooked in an old, battered roasting tin lined with baking paper. It’s the perfect size for most recipes and it does a fab job. However, one of my friends has been on at me for quite a while to try out one of the many specialist brownie pans available. The idea with these pans is that they create extra edges so you get more corner pieces (and they, after all, are the best bits).

The one I bought was a cheapie from a chain store and it wasn’t entirely successful (thanks to another friend who very patiently fished out the brownies!) BUT I also didn’t read the instructions and I think there are ways I could improve things. Once I’ve discovered that one way or the other I’ll let you know.

Lorraine Pascale is a British model turned pastry chef (one of the weirder job transitions, I have to say!) and she now hosts tv shows and writes books. I do find her tv programmes a little too lifestyle-like for me (soft music, shots of her working at her computer while something bakes …) but a lot of the recipes have seemed really good and I think her programme is the ONLY time I’ve seen a fougasse cooked on tv.

For these brownies I used Delta Creams, though you could really use any chocolate biscuit you like, or perhaps substitute one of the many biscuit based chocolate bars. Or just leave it out altogether – the brownie mix is perfectly rich and delicious without the addition of biscuits!

Download the recipe.

Lorraine Pascale’s Cookies & Cream Chocolate Brownies

Ingredients

  • 165g unsalted butter
  • 200g dark chocolate
  • 3 eggs
  • 2 egg yolks
  • 1 tsp vanilla bean paste (or vanilla extract)
  • 165g light brown sugar
  • 2 tbsp plain flour
  • 1 tbsp cocoa
  • pinch of salt
  • 154g chocolate cream biscuits (this worked out to be 10 Delta Creams) - optional

Instructions

  1. Preheat the oven to 160°C (fan, 180°C convention) and prepare your favourite brownie baking receptacle. You'll need one about 20cm x 20cm.
  2. Melt the butter and chocolate together in short bursts in the microwave.
  3. In a stand mixer, whisk the eggs, egg yolks and vanilla together until light and frothy. Still whisking, slowly add the the sugar. Note that sometimes light brown sugar goes a little hard and clumpy in the jar/bag - if yours has done this, then make sure you sieve it/break up the lumps before beating into the eggs!
  4. Once the sugar is well combined, slowly add the chocolate and butter mix, beating all the time.
  5. Finally beat in the flour, cocoa and salt.
  6. The mixture will be very light and mousse like.
  7. If using the biscuits, roughly chop them into quarters and gently stir about a third of them into the brownie mixture.
  8. Tip the mixture into your prepared pan and smooth out. Scatter the remaining biscuit pieces over the top and lightly press into the mixture.
  9. Bake in the preheated oven for about 30 minutes. The top of the brownies will be set and start to crack and the centre should be cooked through but still moist - a few crumbs will cling to a toothpick.
  10. Allow to cool and then cut and serve.
https://eatingadelaide.com/lorraine-pascales-cookies-cream-chocolate-brownies/

Mary Berry’s Chocolate Brownies

Untitled

A while back I bought a copy of Mary Berry’s 100 Sweet Treats and Puds (I bought it from Clouston and Hall but they no longer have it).

Mary Berry is a UK baking icon and co-hosts the original Great British Bake Off. I hope she’s not offended by me saying she’s a very grandmotherly type. Both my grandmas were pretty good cooks and I certainly didn’t go short of sweet and savoury treats. But if you didn’t have a grandma who baked then one episode of Bake Off and you’d probably be interested in adopting Mary Berry.

I spent quite a bit of time reading through the book deciding what to cook first. A reasonably impromptu Father’s Day lunch saw me volunteer desserts and, realising I was short of time, I decided on the brownies because they looked really easy.

It turned out that time was even more of the essence than I’d realised because, on the morning of lunch, with brownies yet to make and the other dessert to assemble, one of our neighbours popped his head over the fence and the already tight schedule was thrown out of whack!

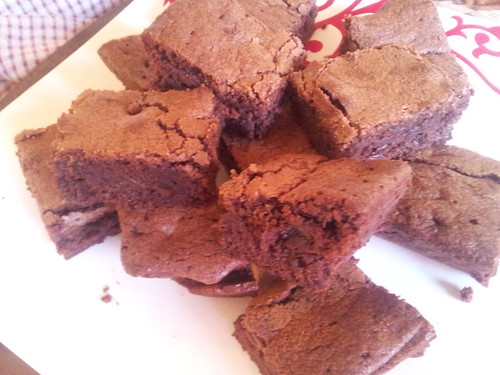
These brownies taste great with a deep chocolate flavour, are slightly squishy and fudgy and are really easy. If you’re not confident melting chocolate, you want a store cupboard alternative or you want a quick recipe (you still need 40 minutes baking time though!) then this is the recipe for you.

A couple of notes: don’t be freaked out by what feel like unconventional quantities of ingredients. Hold your nerve! Mary Berry’s original recipe uses 375g caster sugar but I had only 300g left and topped up with dark brown sugar. This is always a result in brownies and adds extra richness.

Mary Berry’s Chocolate Brownies

Ingredients

  • 275g unsalted butter (slightly softened if you working by hand or using a stand mixer)
  • 300g caster sugar
  • 75g dark brown sugar
  • 4 eggs
  • 75g cocoa powder
  • 100g self raising flour
  • 100g dark chocolate chips

Instructions

  1. Preheat oven to 160°C fan and line a roasting tin (30cm x 23 cm) with baking paper.
  2. Combine the butter and sugars then add the eggs. Mix in the cocoa powder and self raising flour and finish by stirring in the chocolate chips.
  3. The mixture will be very thick. Spoon it into the baking dish, smooth it out and bake for 40-45 minutes. The cake should be set and a skewer should come out clean but you also don't want to over bake because otherwise the brownies won't be squidgy.
  4. Leave to cool in the tin (if appropriately squidgy it will collapse a little) before cutting into 24 squares and serving.
https://eatingadelaide.com/mary-berrys-chocolate-brownies/