Incaberry Flapjack Recipe

IMG_3097

disclaimer: I was sent the Incaberries to try.

I am not someone who seeks out so-called ‘superfoods’. I am a great believer in all things in moderation (except bananas, which are truly awful and I would say that they should be banished from the planet, except my toddler loves them). So many food trends pass me by … yes, I’ve heard all about goji berries, acai (I still don’t know how to pronounce that) and quinoa (OK – I do actually want to try that one) but I’m not rushing out to try the latest and greatest antioxidant packed goodie that comes along.

However, I am very much into trying new things so when the internet offered me Incaberries*, who was I to say no?

The Incaberries (actually a type of physalis) come from Ecuador and are organic, high in fibre and antioxidants. They are billed as “a great tasting superfood that you will actually enjoy eating”.
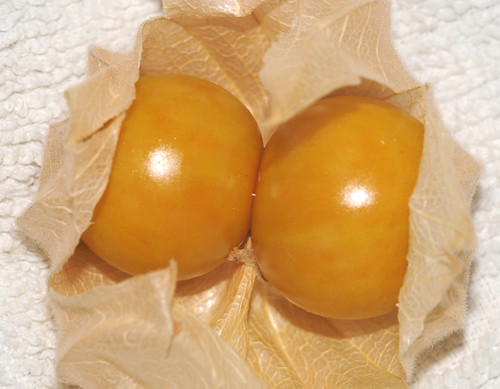
Physalis sp.physalis by Thomas Bresson

Physalis is often used as decoration and is known as being quite tart and the Incaberries live up to this reputation. You should have seen the palpable disappointment on my toddler’s face when he first tried them, clearly expecting the berry to be a particularly large sultana …

Andy and I have had quite a lot of discussion about what they actually taste like. Texture wise, they are a dried fruit so they are very similar to a raisin (not quite as juicy as a sultana). The flavour is citrussy and sherberty. Somewhere between a tart raspberry, mixed with some rhubarb, some tangelo and a hint of sour lollies.

If you’re not into tart flavours, it won’t be your thing at all. However, I personally loved them and even Mr Toddler has come around and likes them!

When it came to cooking with them I was originally thinking of making the chocolate brownie recipe that’s on the Incaberry website. However, after tasting them and thinking about both their texture and flavour, I decided that flapjacks would be the way to go.

Now, lots of people seem to think that because flapjacks contain oats they are healthy. This is not true. Yes, oats are another superfood but flapjacks are really just butter, sugar and golden syrup and the oats are there as a vehicle for that. But if you want to pretend they’re a health food – just add incaberries and they’re even healthier!

Flapjacks are a brilliant thing to make with small children. They have few ingredients and it’s a very quick return on your effort. In our household we always seem to have everything we need in the cupboard, too!

Begin by melting 60g unsalted butter with 60g of sugar (I used light brown, but would have used dark brown had I known where it was hiding!) and 2 tbsp of golden syrup. With the golden syrup, lightly coat your spoon (both sides) in a neutral oil before dipping it into the jar: this will ensure the syrup slides off into the pan. For 2 tbsp you only need to do this the once.

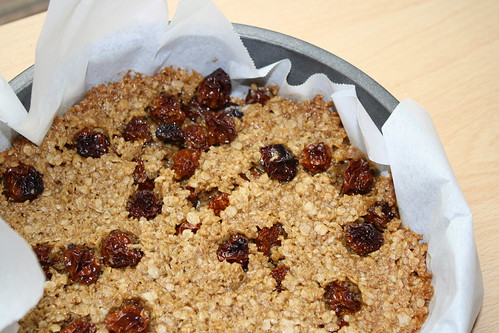
When the butter is melted and the sugar has dissolved, pour this mix into 100g of oats and mix well. The mixture will be quite crumbly – almost like you’re making the base for a cheesecake. Finishing by mixing through 40g of incaberries.

Grease a 20cm diameter round baking pan and press the mixture into it (it will be just under 1cm thick). Ensure the incaberries are spread through evenly and bake at 180°C (convention) for about 15 minutes.

I was a bit alarmed by the incaberries all puffing up during cooking but they collapse back down as the flapjacks cooled. The tartness of the berries worked really well to counterpoint the sweetness of the flapjacks.  After all the sugar you get a lip smacking finish.

A word of warning: don’t use baking paper like me! You actually end up having to wait until the flapjacks are stone cold (and at least half a day old) before you can peel it off easily …

* You can find out where to buy incaberries near you using the store locator.

Falafel Recipe

IMG_3089

A while back I made a lovely roast eggplant salad along with some pretty dismal baked falafels*. If I’m honest, this kind of put us off making own falafels.

However, it was the Sunday of the long weekend. It was about 3:30 in the afternoon. And the supermarket had none of the packet falafel mix we’re known to use. Thankfully, the supermarket ALWAYS has tins of chickpeas.

I read through three or four recipes on the mighty internet and decided that winging it was definitely the way to go.

And I was right. Making your own falafels from scratch is easy and they taste a lot better than a packet mix (no surprise there, I guess). The other great thing about making them yourself is that you can make them as coarsely or as finely textured as you please.

Our batch was very finely textured, thanks in no small part to the fact that our toddler LOVES the MagiMix (“oooooh, this one!” he squeals) and has some mad skills when it comes to pressing the ‘pulse’ button! For a coarser finished product, either remove the toddler or add the chickpeas last.

For two people, or to make 12 good size falafels, proceed as follows.

Drain and rinse one tin of chickpeas.

In a food processor, whizzy up the chickpeas with 2 cloves of garlic (or to taste), 1 tbsp of ground coriander, a generous teaspoon of cumin seeds, chilli powder and cayenne to taste, a generous pinch of salt, ½ tbsp of tahini, 1 tbsp each of chopped parsley and chopped (fresh) coriander. Process until you reach your desired texture.

Finish by stirring 3 tbsp of plain flour through the mixture.

THIS IS VERY IMPORTANT! VERY VERY IMPORTANT!

Without the flour, the mixture will be too wet (even if it doesn’t look it) and when you go to fry your falafel they will magically shrink from a sensible falafel size down to that of a little tiny pea … Trust me, I know this from experience!

If you are aiming for a gluten free falafel, substitute chickpea (or besan or gram) flour for the plain but you will probably need to use less.

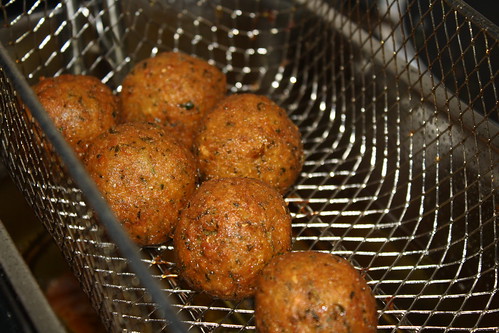
You can allow the mixture some time to rest (perfect for prepping ahead) or you can cook straight away. With damp hands, roll generous tablespoons of the mixture into balls and deep fry at about 190°C. We use a deep fat fryer for this – it’s much better than a wok and even though ours is a very small, cheap fryer we can still fit 4-6 falafels in in one go.

IMG_3086

Having said that, it’s always a good idea to fry one falafel on its lonesome first. That way you can check seasoning and ensure that you have put enough flour in. If the falafel shrinks massively, stir through more flour! It also will give you a good idea of how long you need to cook them for.

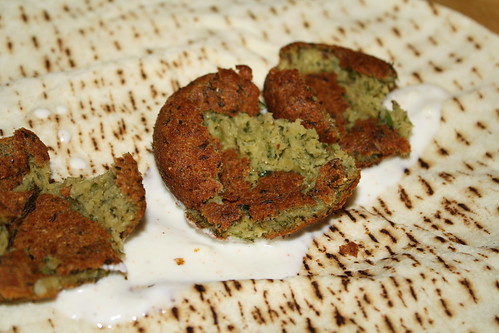
We served our falafels on giant pitas (khoubz), with garlicky yoghurt and salad. While the falafel themselves are fried, if you drain them on kitchen towel and you have the oil good and hot this is actually a very healthy, fresh, and delicious dinner.

There are two people in our family who won’t be bothering with packet mix again. On the other hand, the toddler was massively disappointed to discover that the falafels weren’t actually sausages …

*I would tend to spell this ‘felafel’ but Google tells me I’m in lonely company on that point.

Passionfruit Curd

Untitled

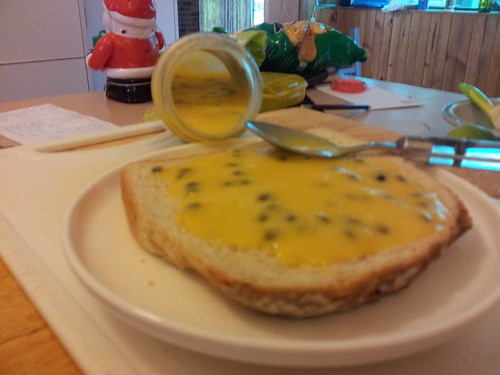
As you might have noticed, Eating Adelaide is not a blog filled with amazing pictures of food. But I think with my attempt at a photo of my passionfruit curd, I’ve sunk to a new low in photographic rubbishness!

I’d already put the curd in jars: labels still on and narrow necks. On my piece of bread the curd looked flat and kind of uniformly yellow. I tried tilting a jar over, I tried photographing it so you couldn’t tell what had been in the jar before the curd, I tried using the flash, no flash, my phone’s camera, I even got the tripod out.

And it still looks terrible.

All the while, my tummy rumbled and it didn’t take too much to give up on the photography and eat the piece of bread.

I don’t get these people who have the patience to mess around styling and photographing their food. I make it and then I want to eat it. And that’s why you get to enjoy such dodgy photos!

A friend has a mature, and huge, passionfruit vine which occupies a good chunk of his back garden. Which means I was lucky enough to have a big bag of passionfruit delivered to me.

At the time it was quite hot, so turning on the oven didn’t appeal. That – and I would have had to have made a ton of cakes, slices and biscuits in order to make a dent in the pile of passionfruit.

Fortunately, passionfruit curd requires no oven and needs lots of the little beggars.

I read a selection of recipes online and they were all vaguely similar. There was slight variation in the ratio of whole eggs to egg yolks, some used a double boiler, some didn’t, one even used the microwave.

One thing they all had in common was I thought they contained far too much sugar. So I made up my own recipe and figured that really, it would all work out in the end.

I do love being right!

Begin by beating two eggs, two egg yolks and 100g of caster sugar. Beat until reasonably light and fluffy. I didn’t this by hand and I’d describe the mixture as combined but not approaching that thick, pale ribbon stage you aim for if you’re making a proper custard.

On the stove, melt 125g of unsalted butter. When the butter is melted, whisk 160mL of passionfruit pulp (this is probably around 8-10 fruit although they vary in size so it’s a bit tough to give you a number) through the eggs and pour it into the pan with the butter. HAVE THE HEAT VERY LOW. I cannot stress that enough. LOW. REALLY LOW!

Now you have to stand and stir. You don’t have to stir vigorously, but you do have to keep stirring. Have someone make you a cup of tea or pour you a glass of wine. Whatever you do, don’t crank the heat up to hurry things along. That way certain failure lies.

So you stand there stirring, stirring, stirring. And basically you keep on doing that until the mix turns to the consistency of custard (that is, you draw a line with your finger through the curd on the back of a spoon and the curd does not close back on itself). You don’t need for it to be super thick because it will thicken further as it chills.

I think all up this took about 20 minutes for me. It was a hot evening, and even though the stove was only on low, I got very hot standing there and it felt like it was about three hours!

Sterilise a couple of jars (make sure they’re well washed and then pour boiling water into them). Pour the hot curd into the jars, pop the lids on but don’t do them up.

Once the curd has cooled in the jars, tighten the lids and refrigerate.

I ended up with 2 190mL jars of curd.

If you want, you can loosen the seeds from the pulp by giving it a very quick blast in a food processor and then sieving them out. I couldn’t be bothered.

Eat on bread or toast. Use as part of a pavlova topping. Sandwich meringues together with it. Fill macarons with it. Or just go back to eating it on bread.

Delicious and not too sweet.  Very easy to make but patience is required!