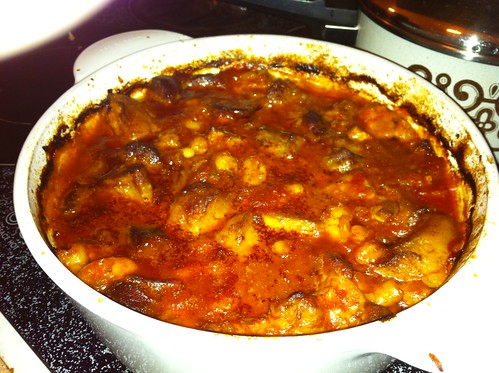
Chorizo and Pork Belly

pork belly 2
Let’s face it – that just sounds unbelievably good, no? I’d only just spotted this recipe on BBC’s Good Food site when one of my UK based friends mentioned having had a similar sounding dish at Chez Bruce. Not being a position to nip over to London to try it out for myself, I suspect the dish my friend had was the “thinly sliced pork with warm summer bean salad, salsa verde, chorizo and crackling” – so a summery version of the following very wintery dish.

Although there’s a bit of shopping to be done and some long slow cooking, this is really very easy. You just can’t be in a hurry. I also recommend that you ask your butcher to remove the skin from the pork belly but to score it and hand it over. We left the skin in the fridge to dry out and then rubbed it with olive oil and plenty of salt before crisping it up in a hot oven. Absolute bliss – and perfect crackling because of the drying out time!

Preheat oven to 140°C fan.

You need a 750g piece of boneless (and skinless!) pork belly, cut into large cubes. Heat some olive oil in a large casserole (you need something both stove and oven proof) and brown the pork belly in batches, setting aside on a plate or in a bowl as you go.

Once the pork belly is all browned, fry off 3 rashers of bacon, roughly chopped. If you can get hold of pancetta easily, use that. Reduce the heat and add a chopped onion and chopped garlic to taste (let’s say 2 large cloves). Cook until the onion starts to soften and then add two roughly chopped chorizos and stir through a teaspoon of paprika (I used sweet because that’s what I had, use hot if that is to hand).

When the chorizos start to give off a bit of fat, return the pork (and any juices that have collected) to the pan and stir through one tin of crushed tomatoes and 150mL of red wine. If you need to add a little water to ensure the pork is covered, do so.

Cover the pan and cook in the oven for about 2 hours. You needn’t be too fussy about the timing here – the important thing is that it’s a long slow cook. Over two hours is absolutely fine.

About half an hour before serving, remove from the oven, stir through a tin of cannellini beans (rinse the beans first) and return to the oven uncovered for about half an hour. This will not only heat up the beans but it will also help thicken the sauce. For this reason you don’t want to go too mad adding water for the final cook … something like this needs a thick, rich gravy.

We served with mashed potato and a few steamed vegetables.

This was a big hit – if it hadn’t all been eaten for snacks and lunches the remainder would have been frozen for an emergency dinner. If you use the quantities above you’ll have enough for 6 for an easy dinner – or plenty of leftovers!

To drink: you need something reasonably big to stand up to all the rich flavours. I think a Zinfandel (or Primitivo) would work well. Or a softer style Shiraz. You want some gentle acidity but not too many tannins.


Mexican Baked Fish

mexican baked fish 1

Earlier in the week I bought a few too many Coorong mullet fillets and we weren’t able to eat them all in one go (er, strictly speaking, we weren’t able to fit them in the pan all in one go – I’m sure if we tried we’d have been able to eat them all up!).

Rather than just pan fry them again I wanted to do something a bit more warming and filling.  I’m not going to complain about Adelaide’s weather again (especially not as it was 22°C yesterday) but we did need something more substantial than just a bit of pan fried fish!

This Mexican baked fish recipe sounded perfect. It verges on being a store cupboard recipe and, when made with a thinner fish fillet, such as the mullet, is super speedy.

Quantities below are for two people – assuming one fillet of fish each.

Take your fish fillets and rub in some salt and lime juice. Set aside while you get yourself sorted.

If you are using thinner fillets, you can get away with doing this all in the one pan, on the stove top. If you’re using thicker fillets, preheat your oven to 200°C.

Heat some oil in the pan and fry the fish. Thinner fillets, you really want to cook the fish, thicker ones, just sear the fish’s skin side. Remove the fish from the pan.

In the now empty pan, cook a single sliced onion until translucent. Add a crushed clove of garlic (or more, if you fancy) and cook for another minute or two before adding 200g (half a tin) of crushed tomatoes. Stir and then add half a red capsicum, finely sliced, a generous splash of water, and the juice of at least half a lime. Add roughly chopped green olives, capers and chilli flakes to taste (I used about 10 olives, about 1 tbsp of capers and a generous sprinkling of chilli). Allow this to cook for 10 minutes or so and adjust seasoning. You want the sauce to thicken up a fair bit, so you may need to cook for a little longer to evaporate off any extra liquid and to intensify flavours.

When you’re happy with the sauce, return the fish to the pan and cover it with the sauce. Thin fillets – you are just heating through, but if you’re using thicker fillets, pop the pan in the oven to finish cooking the fish.

We served this with coriander and lime rice (yes, that’s plain rice with lime juice and chopped coriander stirred through it – as I was using left over rice, I also gave it a quick fry up … delicious!) and an extra wedge of lime.

The really important thing here is to not omit the lime juice. Really and truly. You can forget about the capers or the olives if they’re not your thing, or they’re not in the cupboard but you really CANNOT do without the lime. It lifts the dish and, I think, makes it feel Mexican.

To drink: a cold beer would work, as would a lime-like Clare Valley Riesling.

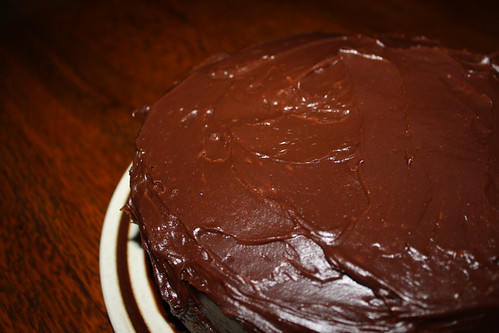
Chocolate Fudge Cake

Chocolate Fudge Cake

Well, it’s Chocolate Week in the UK so it’s a happy coincidence that, at the last minute I decided to make a cake as an additional dessert for a BBQ with friends.

As I still subscribe to (and read!) a lot of UK based food newsletters chocolate was featuring heavily and this simple fudge cake recipe from the UK’s version of Delicious magazine stood out as something I could put together in a very limited amount of time.

I have to confess that part of the reason I was attracted to it was the use of red wine vinegar. There’s something about cake recipes with unusual ingredients that always makes me want to try them out!

The cake hit all the spots … it was super quick to make and everyone liked it (I even packed up a doggy bag for a missing husband!) so it’s definitely one I’ll be making again.

I followed the recipe pretty closely and was a bit scared by the ‘chuck all the dry ingredients’ in the food processor approach but it turned out OK. However, next time I might adopted a slightly more conventional ‘cream butter and sugar’ method …

Begin by greasing and baselining a 20cm spring form tin and preheat the oven to 160°C fan (or 180°C).

In your food processor (or mixing bowl) combine 100g unsalted butter, 15g cocoa powder, 300g self raising flour, 1 tsp bicarb soda, 225g caster sugar (use golden or unrefined if you can) and 2 eggs. If you’re mixing by hand or with an electric hand whisk you might want to sift the flour and bicarb first. The add 100g of melted dark chocolate (I am a new convert to melting chocolate in the microwave – but you do need to watch it very carefully!) and finish by mixing in 250mL of milk mixed with 1 tbsp of red wine vinegar.

Pour the batter in to the cake tin and bake for 1 hour, until firm in the centre and a skewer comes out clean (with my oven I think next time I’ll check after 55 minutes). Cool in the tin for a few minutes and then turn out to cool on a rack.

When the cake is cool, it’s time to make the ganache and finish the cake.

For the ganache, melt 225g dark chocolate with 100g unsalted butter (be careful with the microwave – watch carefully and mix every minute or so to keep an eye on things – you don’t want the microwave coated in butter and chocolate!). Stir this mix until smooth and then add in about 150mL of thick (not thickened) cream. As this is an English recipe it specifies a 142mL carton of double cream so I just guessed approximately 150mL from my 200mL carton of pure cream.

Allow the ganache to cool to a good, spreadable consistency and then slice the cake in half. Use approximately a quarter of the ganache for filling and then use the remainder as icing. Make sure you resist ‘tidying up’ the ganache until you’ve finished with the cake!

The cake kept well for about 2 days … by that time it was all eaten (mostly served with cream!).