Tom Rim Prawns – With Tomato, Fish Sauce and Black pepper

Untitled
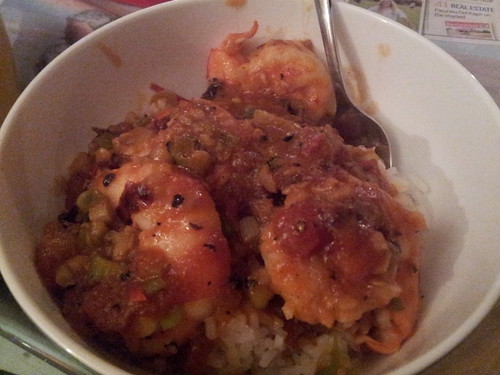
Yet again I was too hungry to care about photography!

April has been a crazy month. Highs, lows, and flat out the whole way through. While we’ve actually done a fair bit of cooking, I’ve just not got around to writing any of it up. But, May is around the corner, and my calendar is starting to look slightly less scary, so hopefully this means it’s catch up time.

In addition to what seems like a billion recipes, there are also a few product reviews in the pipeline, so buckle your seat belts and bear with me while we try to catch up.

Let’s start with this easy prawn dish. As the mania of April subsides I find myself now enjoying a hefty head cold. I have lost my voice, but the majority of my complaints can be cured with cold and flu tablets. However, being a little poorly is always an excuse to eat as much spicy food as possible (well, it is in our house – in theory all the garlic, ginger and chilli will nuke whatever rogue bug it is).

Around Christmas time we are usually able to get hold of some snap frozen prawns, straight off the boat, at a good price. Last year, they arrived on Christmas Eve – provoking a little last minute menu stress. Andy and I are still working our way through our allocation of green prawns. We both love a good prawn curry and now the weather is cooling down, these seem to be making a very regular appearance on our meal plans.

I can’t recall the train of thought that led us to stumble upon this recipe for tom rim prawns. Quite a few tom rim recipes seem to be laced in sugar and almost all have the word “caramelised” in their English names. I’m not so hot on sugar in my savoury foods so when I found this variant, on Australian food blog The Toshes, with less emphasis on sugar and more on pepper and tomato, this was the one we rolled with.

Anyone who has any experience of what a genuine Tom Rim prawn dish looks and tastes like – please leave a comment!

This time round I got the glamour job (peeling the prawns) – complete with assistance from a curious cat. Andy actually did the cooking, and, just like me, made plenty of amendments. The finished product was served simply: on rice. There was enough sauce to go through the rice, the prawns were juicy and the whole thing was deliciously spicy.

As a bonus, it was also very quick to put together – if you forget about the 20 minutes or so peeling the prawns.

Absolutely recommended!

Tom Rim Prawns – With Tomato, Fish Sauce and Black Pepper

Serving Size: 2

Ingredients

  • vegetable oil
  • 10 green prawns, peeled and de-veined (as much as humanly possible)
  • 4 cloves garlic, peeled and crushed
  • 4 tbsp fish sauce
  • chilli flakes to taste
  • approx 200 mL water
  • 1 tsp tomato paste
  • 1 fresh tomato
  • 1 spring onion, sliced
  • 3 tsp palm sugar
  • freshly ground black pepper, to taste
  • soy sauce (optional)
  • lemon juice (optional)
  • fresh coriander, for garnish

Instructions

  1. Heat oil in wok and fry off garlic and chilli. Don't allow the garlic to take on much colour.
  2. Add tomato paste, sugar and prawn. Toss to coat the prawns.
  3. Then add fish sauce, black pepper, water and diced tomato.
  4. Increase the heat and cook the prawns. When the prawns are cooked, remove them from the sauce. Check the sauce for seasoning and chilli/pepper heat and adjust before reducing to the desired consistency. We opted for a splash of soy sauce and lemon juice at this point.
  5. To serve, place rice in bowls, top with prawns and sauce and finish with a garnish of fresh coriander.
https://eatingadelaide.com/tom-rim-prawns/

ANZAC Biscuits

ANZAC Biscuits

Today (25 April) is ANZAC Day. Alongside Australia Day it is easily the most important national holiday here. It commemorates the first military action fought by Australian (and New Zealand troops). Australia was only federated in 1901 so when the First World War broke out the nation was a baby. In 1915, Australian and New Zealand troops were deployed to Turkey and they landed at Gallipoli on this day.

In theory, it was going to be a quick strike, but that single campaign was to last eight months and by the end of the year the allied troops had to be evacuated. Over 8000 Australians had been killed.

Today, ANZAC Day commemorates all Australian servicemen and women, and the national holiday and dawn services give everyone an opportunity to reflect on the commitment that those who serve give to their fellow countrymen.

Anyway, history lesson over. Let’s get to the biscuits (note, biscuits, NOT cookies). The story goes that these egg free biscuits were sent to troops by loved ones back in Australia. Food historians may wish to argue this point, and while I am normally a really tedious stickler for facts, in this instance I think we should let accuracy slide and just go with the collective wisdom.

This is my recipe for ANZAC biscuits. It’s not a tried and tested family recipe but one I created back in 2006. It is egg free but not dairy or gluten free. Apologies in advance for the imperial measurements and the mix of volume and weight measurements!

It’s a really simple recipe – so simple in fact that I made these biscuits this afternoon with my toddler.

Just remember – these are ALWAYS biscuits!

ANZAC Biscuits

Ingredients

    Dry Ingredients
  • ¾ cup dessicated coconut
  • ½ cup caster sugar
  • 1 cup oats
  • 1 cup plain flour
  • pinch of salt
  • Wet Ingredients
  • 4 oz unsalted butter
  • 2 tbsp golden syrup
  • 1 tsp bicarb
  • 2 tbsp boiling water

Instructions

  1. Preheat oven to 180°C (convention).
  2. Mix the dry ingredients together in a bowl.
  3. On the stove, melt the butter and the golden syrup. Then add the bicarb and boiling water. The mixture will froth a little.
  4. Add the wet ingredients to the dry and mix well. You may need to add a little extra boiling water.
  5. Make large walnut sized balls of mixture and flatten on baking trays (lined with baking paper). The biscuits will spread as they cook, so ensure you leave ample space between them.
  6. Cook for 10-15 minutes. Less cooking leads to chewy biscuits, more cooking: crunchier biscuits.
  7. Makes approximately 18 biscuits.
https://eatingadelaide.com/anzac-biscuits/


Dan Lepard’s Sour Cream Chocolate Cake

Sour Cream Chocolate Cake

Big lunch with the family at Easter and, as usual, I got to cook dessert. One day I will have to volunteer to cook something else!

My dad is quite partial to a bit of chocolate cake and I’ve had my eye on this sour cream chocolate cake for ages. I have plenty of chocolate cake recipes that are tried, tested and, indeed, popular, but there’s no harm in trying something new. And in the past I’ve found Dan Lepard’s recipes very reliable (see his tollhouse yoyos).

I received instructions from dad to make sure I used chilli chocolate. I ignored this and just followed the recipe.

The cake itself has a degree of novelty as it uses oil and sour cream rather than butter. And the icing is also based around sour cream. The cake also has less chocolate than I expected in the cake itself and, I thought, there was far too much vanilla in the whole thing.

Begin by making the cake. Prepare 2 18cm (or in my case I think they were 19cm) sponge tins: I used new silicon ones so I just gave them a slick of canola oil and base lined them with baking paper. Preheat the oven to 180°C (160°C fan).

Melt 75g dark chocolate. Beat together 75mL of sunflower oil, 75g of sour cream (I actually used light sour cream because if you shop at 4pm on Maundy Thursday you use what is on the shelf!), 125g caster sugar, 75g of runny honey, 2 tsp vanilla extract, and 3 eggs. Then add the slightly cooled melted chocolate.

Mix together 175g plain flour, 25g of chocolate and 2 tsp of baking powder and sift it into your cake mix.

Divide the mix between the two pans and bake until done – which in my case was just on 20 minutes. Lepard’s original recipe suggests 25 minutes but I knew my pans were potentially slightly larger than they should have been and I also know my oven is quick. You want the cake to be done but you also want a few crumbs sticking to the skewer.

Remove the cakes from the oven, stab all over with a skewer and dress with a simple syrup of 25g sifted icing sugar adn 25 mL boiling water. The original recipe suggests adding 2 tsp of vanilla extract, which I did, but the finished product was so overhelmingly vanilla-y that I’d definitely omit that at this step.

Cover the cakes (I used cling film) and allow to cool. In my case, this was overnight.

When ready to assemble I made the sour cream icing. Take 300g of dark chocolate and melt with 50g of unsalted butter. Add 50g of runny honey, a splash of rum (Bundaberg, of course!), 100g of sifted icing sugar and 125 g of the light sour cream. Mix until smooth.

Despite sieving the icing sugar, mixing until smooth involved putting it all in the KitchenAid and giving it a good beating with the paddle beater. It made quite a pale fluffy icing.

Sandwich the cakes together (pro tip – sandwich together the two flat sides – the bases) with the icing and cover the top and sides.

Serve at room temperature with plenty of cream.

The verdict?

Personally, I was massively underwhelmed by this. There was waaaay too much vanilla – I’d definitely drop the vanilla from the syrup, and probably also halve it in the cake (although I suspect the vanilla in the syrup was the main offender, not being cooked out). I’d probably also go for a straight chocolate ganache: I found the icing too sweet and would have to rework it to reuse it.

I was ho-hum about the cake. I’d prefer something darker and more chocolately and fudgy.

Andy liked the total package and loyally said he’d be happy to eat it all day.

Mum rated the cake highly but wasn’t sure about the icing. In fact, the icing seemed the most contentious part of the cake.

Dad? Well, he complained because I didn’t use chilli chocolate!