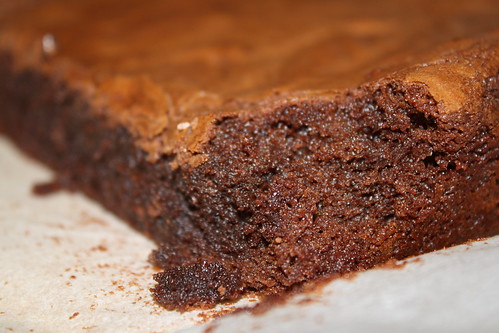
More Chocolate Brownies

chocolate brownies - gluten free

Here we’re gearing up for the baby’s first birthday which means thinking a LOT about the catering for his afternoon tea party. As the baby will be unaware of the significance of the event, and most likely a bit annoyed that strange people have turned up in numbers to interrupt his afternoon play, the party is all about what I like to eat. That’s why it’s afternoon tea.

One of my relatives is a coeliac (or celiac, if you’re American) and I actually find it rather fun to try out recipes that she’ll be able to eat. It’s actually surprising how easy gluten is to work around. However, one thing I haven’t investigated too much is gluten free baking – dessert wise there’s loads of things you can do without gluten so I’ve just never bothered.

I have hundreds of baking recipes tagged in delicious and I thought it was time I made a departure from what has become my standard caramel chocolate brownie. I had a recipe from the Gluten Free Goddess tagged, but realised it wouldn’t do on several counts (the coconut oil, the measurements in cups, the huge amount of vanilla). Karina had based her version on a reader’s version and, after some sums, some substitution and some tasting during production I came up with this very easy, but also very tasty, recipe. The finished brownie is super squidgy in the middle and has a crisp crust which manages at the same time to be chewy.

The best compliment came from Andy who commented “well, you wouldn’t even know they’re gluten free”.

Preheat your oven to 180°C (or 160°C fan).

Melt 150g dark chocolate with 100g of unsalted butter. If you are aiming for dairy free as well as gluten free, I suppose you substitute a dairy free spread here. And, as always, I did this in the microwave.

Into the trusty KitchenAid went:

150g dark brown sugar
2 tbsp cocoa
50g ground almonds (almond meal)
50g rice flour*
1 tsp baking powder

Beat all of this with 2 eggs before adding the melted butter and chocolate.

Pour the mixture into a baking dish lined with baking paper. I used a dish that is approximately 18cm x 27cm and I ended up with nice thick dense brownies.

Bake for about half an hour. On non fan my oven is a little slow, so I needed 40 minutes. The top will be firm and cracked and a toothpick should come out cleanly (or mostly cleanly – with brownies you don’t want to overcook them!).

Allow to cool before cutting (and eating).

If you’re particularly greedy, serve with cream. That’s what we did!

* In Australia this is widely available – you’ll find it in the baking aisle of most supermarkets. Just note that you want rice FLOUR and not GROUND rice – otherwise you’ll end up with gritty brownies!

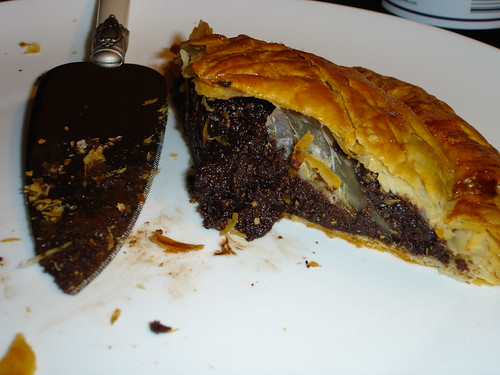
Chocolate and Hazelnut Pithivier

Chocolate pithivier

This is definitely a dish for the health conscious. Or perhaps not, becaused this is really like eating a giant pile of chocolate spread with a giant pile of puff pastry. And this means it’s absolutely delicious – but small servings are required!

As a dessert, this chocolate and hazelnut pithivier, from the April issue of UK Delicious is a bit of a winner. It’s quick to make, it doesn’t need to be served hot so you can make it in advance and (better yet) you can freeze it and have it as a standby dessert. And it’s so rich it will go a long way and you don’t need any special accompaniments (although good fresh cream won’t go astray).

If you’re keen – make your own puff pastry. Otherwise, have to hand 2 sheets of ready made. You’ll need to cut 24 and 26 cm diameter circles from these respectively. Put the smaller circle of pastry on a non stick baking sheet and preheat your oven to 180°C fan.

Making the filling does rather require a food processor – or a lot of patience. The original recipe specifies 150g of blanched hazelnuts. I don’t know if blanched hazelnuts are more readily accessible in the UK than Australia, but when I make this again I’ll be using 150g of ground hazelnuts. Otherwise you’re left with the task of roasting and then peeling the hazelnuts and peeling hazelnuts is a task best left to someone else, as far as I’m concerned!

So – take your 150g of hazelnuts and, if they’re not already ground, whizzy them up with 150g of good quality dark chocolate, 125g of golden caster sugar and 20g of cocoa powder until you get a fine crumbly mix. To this add 25g of unsalted butter, 2 egg yolks and 2 tbsp of dark rum (there’s no reason why a liqueur such as Frangelico wouldn’t work well here). The alcohol is, of course, optional and it’s best not to go mad with it – stick to the 2 tbsp!

Whizzy this up again and you will end up with a firm (and extremely tasty) paste.

Put this paste in the centre of your pastry base, spreading it out evenly and leaving about 1cm around the edge. Take one of your left over egg whites, lightly whisk it and brush this margin with it, before topping the pithivier with the second disk of pastry. Press down carefully at the edge, ensuring there is no air left in the middle (you want to push the pastry down around the filling).

If you can chill the pithivier at this point – that’s a good thing. Leave it in the fridge for about 30 minutes.

When you’re ready to cook, score the top of the pithivier with a swirled spoke pattern and then brush with egg white. Bake for 40 minutes. Keep an eye on it while it’s cooking – if the pastry starts to brown too quickly, lower the temperature a little.

Best served at room temperature – if you can wait that long!

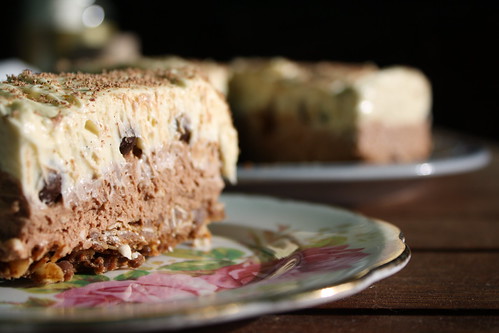
Two Tone Cheesecake

two tone cheesecake

I recently entered the Bikko’s Bake Off competition that was being run by Robern Menz.  I was very disappointed not to be one of the two lucky winners who will enjoying a day out with Robern Menz.  Congratulations to the choc mint cheesecake brownie and the dark chocolate salted caramel slice!

But everything has a silver lining and, in this case, it means I have a recipe all typed up and ready to go!  I was really happy with my photograph, too – quite a departure from my normal woeful efforts.

My creation was a two tone cheesecake:  chocolate and vanilla.  This was a bit of a departure from my usual cheesecake recipe, because I didn’t buy quite enough cream cheese.  However, I think this mix is better and it retains its two massive plus points:   no gelatine, so suitable for vegetarians and no eggs so suitable for those who don’t eat eggs.*

As it was a Bikko’s competition, my creation had to include Bikko’s, so I used milk chocolate ones in the base, and a layer of dark chocolate ones through the centre of the cake.

This is a set cheesecake so you do need to start it a little ahead of when you want to eat it!

Start with the base.

Grease and baseline a 23cm springform tin.

Coarsely crush 125g of milk chocolate Bikko’s and 50g of your favourite cheesecake base biscuits (I used gingernuts).

In a heavy bottomed frying pan, gently dry toast 80g of rolled oats.  Watch them carefully and as they start to brown, add 100g of unsalted butter (cubed, rather than in one big lump).  When the butter has melted, add the crushed Bikko’s and biscuits and stir for a little so the chocolate on the Bikko’s starts to melt too.

Gently press the mixture into the base of the tin.  The more firmly you compact down the biscuit base the harder it’s going to be and, while you want it to hold together, you don’t want people to be breaking their teeth.  I find that the quantities given above provide exactly the right amount for the base.

Place the tin in the fridge and start work on your filling.

I put the chocolate filling on the bottom, so that’s next.  Beat 300g cream cheese with 50g of sour cream until smooth (if you have a stand mixer, use this – the colder the cream cheese is the longer it will take to get it smooth but it’s worth it).  Mix in 75g of caster sugar.

Melt 100g of best quality dark chocolate (either in a bain-marie or in the microwave), allow it to cool slightly and stir into the cream cheese mix.

Whisk 150mL of cream (reasonably firm peaks, but not butter!) and fold this into the cream cheese mix.

Spread this mix over the cooled and set biscuit base.  Level it off and cover with 125g of dark chocolate Bikko’s, lightly pressing them into the mix.  Return to the fridge to set (at least an hour).

Now make the vanilla mix.  This is essentially the same as the chocolate mix but use 1tsp of vanilla bean paste instead of the 100g of chocolate.  Spread this mix evenly over the Bikko’s layer and return the cake to the fridge to set (again, another hour at least).

When ready to serve, grate over dark chocolate and job’s a good’un.

*Note that if you want to make the whole cheesecake egg free you need to choose your biscuits carefully.  Anzac biscuits (homemade) are an excellent egg free base material.