Vietnamese Shaking Beef

Even though I am ‘at home’ most of the week I don’t have nearly as much time as I’d like for cooking exciting and elaborate dinners. So I am always on the lookout for tasty things that I can get out of the kitchen in reasonable time.

Trawling through my delicious bookmarks I spotted this recipe for Vietnamese Shaking Beef. A quick google indicates that this is an actual Vietnamese dish but I can’t comment on how authentic this recipe is. All I know is that it’s pretty quick, doesn’t require a raft of ingredients and is really tasty.

The recipe comes in three parts: marinade, dipping sauce and the actual stir fry.

The marinade is really simple: for about 500g of rump steak use 1 generous tbsp of oil (use a neutral oil such as peanut), one large clove of garlic, minced, a splash of fish sauce, 1 tsp of sugar and freshly ground black pepper to taste. Fresh black pepper is a big part of this recipe, so grab the peppercorns and the grinder now!

Chop your 500g of steak into chunky bite size cubes and marinate for at least half an hour.

The dipping sauce is equal parts water and lime juice (I used ⅓ of a cup of each), with (again) minced garlic and fresh black pepper and balanced with a touch of salt and sugar.

When you’re ready to cook the steak, heat some oil in a wok, fry off some more minced garlic and add the steak, along with some more black pepper. The ‘shaking’ part of the dish’s name comes in now – as you’re supposed to keep the meat moving in the wok. You want to brown the meat and cook it but ideally you’ll leave it at least medium rare.

Finish the stir frying with a splash of soy sauce and a sprinkling of sugar.

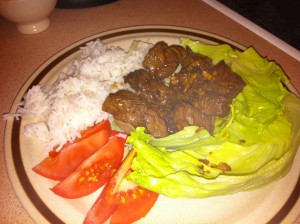
Serve the cubes of beef on lettuce, with sliced tomato and steamed rice on the side. Pour a little of the dipping sauce over the meat and serve the remainder on the side. Whatever you do, don’t skimp on the dipping sauce – the lime juice really makes this dish!

We all rated this dish highly – definitely one we’ll be making again.

Chocolate Brownies

IMG_2039

It’s been a while since I’ve had an opportunity to try out another brownie recipe, but a family lunch at Easter provided the perfect excuse to tick a recipe off the list. This one comes from Chocablog, which, not surprisingly, is a blog all about chocolate. Although based in the UK, Chocablog has contributors around the world – and the Australian correspondent is based in Adelaide!

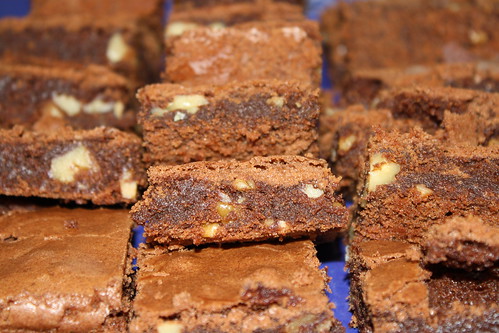
This recipe was excellent. The brownie comes out all fudgy and dense (and chocolatey, of course), but the crust is a proper crust – crisp when you bite into it but deliciously chewy. I rate this as a contender for best brownie recipe yet. Note that I say contender only, as I am yet to try it out on the Brownie Approval Panel.

Preheat oven to 160°C (I used it on the fan setting) and line your baking dish (something roughly 18cm square – I found my trusty roasting pan did the trick) with baking paper.

Begin by melting together 140g unsalted butter and 200g good quality dark chocolate. As always, I did this in the microwave, but on the stove in a double boiler will work too (it will just take you longer).

The chocolate and butter goes into the KitchenAid (flat beater attached) and beat in 200g of light brown sugar. Beat this in really well – the mixture should be smooth and glossy, not at all grainy. Add 2tsp of vanilla extract and a generous pinch of salt and then beat in three eggs, one at a time. Finish with 85g of plain flour (not self raising, plain). Beat really well – the mixture eventually will turn into a sort of cross between a butter cream and a chocolate mousse. It’s quite light in colour but don’t let that worry you – the finished product will be appropriately chocolatey.

Resist the temptation to gobble it all down. Although it tastes really good, it’ll probably make you feel a bit ill if you eat it all!

Finish by folding in 75g of roughly chopped walnuts (or other nut of choice … and I’m even tempted to try caramel chocolate), then spoon it into your baking dish and bake for 40 minutes. A toothpick should come out a bit moist and crumbly, but not covered in batter.

When cool, slice and enjoy. Ensure you nab one of the pieces with edges on it because they’re definitely the best bit!

You can find a collection of our chocolate brownie recipes here.

Chettinad Fried Chicken

IMG_1975

There is a restaurant review in the works but today I’m running short of time so here is an excellent chicken recipe that you might find useful over the long break. This is an Indian recipe (Chettinad is a region in Tamil Nadu, in southern India) but it’s a really welcome change to a big saucy curry. It stands on its own perfectly well, but if you are putting together a curry extravaganza, then this is a pleasant contrast to sauce rich dishes. It’s also fab because it doesn’t require 3000 different spices, carefully roasted and ground.

I got this recipe from my mum and I’m pretty sure it did originally come out of a cookbook – I’m sure she’ll let us all know which one!

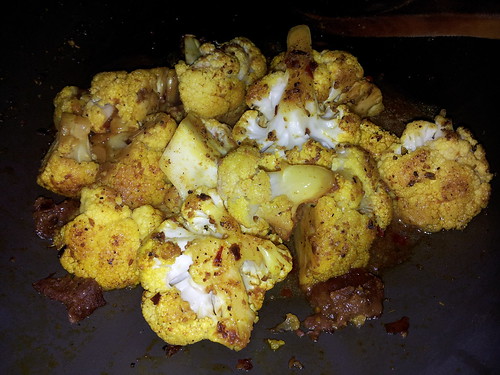
Begin by taking about 1kg of chicken (I use skinned thigh fillets cut into large cubes) and rub it with about 1 tsp of salt and a generous sprinkle of turmeric. Set aside.

Prepare some salted water – 3 tbsp of water with ¼ tsp of salt. Ensure the salt dissolves in the water.

Heat some peanut (or other flavourless oil) in a wok and ½ tsp of mustard seeds, ½ tsp of fennel seeds, and 5 whole dried hot red chillis. Keep the chillis whole – this does keep the heat of the dish under control. If you have it, also add 1-2 tablespoons of skinned urad dahl. If you don’t have it – don’t bother seeking it out. You could also add some curry leaves.

When the spices are crackling and starting to darken add a finely chopped onion and cook until brown (that’s brown – not burnt – don’t get impatient and whack the heat up!).

Add the chicken to the onion and stir fry, sprinkling on some salted water as you go. Keep adding the water. You want to have used up all the water by the time you finish cooking BUT you must sprinkle the water in, so you don’t end up stewing your meat.

It’s best if you can cook the chicken all in one batch but realistically that might not happen. Just be aware that the longer you have the heat on the chillis the more likely they are to start breaking down and the hotter the finished product will become. If you do want to keep some of this dish mild then reserve some cooked chicken from the first batch.

When the chicken is cooked and the salted water is used up, remove the chicken (and onion and spices, of course) from the wok and serve. You don’t need to serve straight away – this dish is perfect to prepare in advance. Once cooked, put everything into an oven proof dish, cover with tin foil and reheat (with the tin foil on) when you are ready to serve.

Best eaten with pappadums, raita, naan … and don’t worry about having too much – there’s very rarely any left over!