Disclaimer: Sunbeam sent me the cake pop maker to trial.
Sunbeam has recently rereleased the Snack Heroes range. For not very much money at all (they’re all under the $40 mark) you can choose from an icecream maker, an egg cooker, a chocolate fountain, a popcorn maker or a cake pop maker.
It’s an interesting mix of products because some are definitely ‘novelty’ whereas others are pieces of kitchen kit serious cooks are likely to pick up – particularly the ice cream maker. The cake pop maker, which I tried out, falls somewhere between the two.
As you may have noticed, I’m a reasonably keen baker but one thing I’ve never tried to make is a cake pop. I daresay you need to buy some special tin for them or something. And, of course, you need to decorate them and I think we all know how lacking my decorating skills are …
Luckily for me, the cake pop maker comes with some pretty detailed instructions and helpful tips. For example, dipping the stick into a little melted chocolate before pushing into the cake pop to make it more secure, and chilling the cake pops for 15-20 minutes before decorating to make them more stable. Really obvious things, but ones I wouldn’t have thought of.
There’s also a selection of recipes which is incredibly useful because they’re all in cake pop friendly quantities and they give you a good idea about the different types of cooking times you need. I tried the plain vanilla recipe. As a trusty helper, I had one very interested toddler.
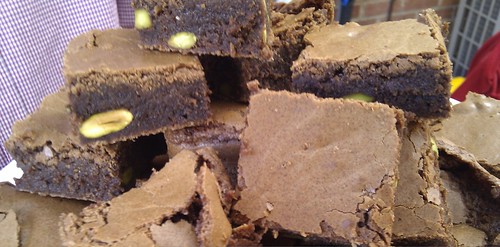
I melted 75g of unsalted butter in the microwave and mixed in ½ cup caster sugar, 1 egg, ¾ cup of self raising flour, ¼ cup of plain flour, 1 tsp vanilla essence and ⅓ cup of milk. For a change, I did all of this by hand! Give the mixture a good beating – and depending on your enthusiasm for beating it may be worth your time to sift the flours.
With the cake pop maker preheated, I gave it a quick spray with a neutrally flavoured oil. I then spooned 2 tsp (yes, that’s right!) of batter into each hole (there are 6) and cooked for 4 minutes.
The timing given in the recipe is spot on and the cake itself was nice (always a good start). I found myself to be pretty incompetent when it came to those 2 teaspoons of batter … I think this is one of those things where practice makes perfect. Some of my cake pops were perfect and others kind of did a bit of exploring and came out looking like odd shaped flying saucers. Tidying them up is easily done: I just trimmed off excess cake when they were cool and you’d have never known how wonky they were initially!
One thing I did notice was that the external surfaces of the maker got very hot. You do end up having it on for quite a while (most of the recipes make ~ 30 cake pops, so you’re doing to be doing 4 or 5 batches) and it started to get uncomfortable to open it. To be fair, the very first page of the manual notes “The temperature of surfaces may be high when the appliance is operating”. That is very accurate! It’s also a bit of a shame because this is very much the type of thing people are going to want to use with their kids (in fact, the first thing that Andy said was “oooh, that will be a great thing to do with the toddler”) and older children are going to want to be involved in the opening and shutting. So just make sure you read the instructions and exercise some commonsense!
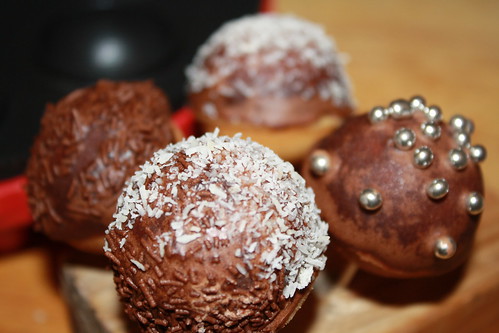
Cake pops tidied up, cooled and refrigerated, I set about decorating. This wasn’t actually as painful as I expected. I used toothpicks (NOT recommended if you’re going to be serving these to children!), balanced my cake pops in a strawberry container that had holes in the lid (! I think egg cartons would do well here too) and made a very simple chocolate icing (butter, icing sugar, cocoa and hot water).
You need to make your icing pretty thick and I experimented with dipping the cake pops into the icing, but I found that spooning it around them worked a lot better. I wasn’t going for full coverage – just enough to top them and cover up the seams (and any less than awesome trimming).
For decoration, again I found that dipping wasn’t ideal. I put the iced cake pops back into the strawberry container and sprinkled on the decoration. Chocolate sprinkles, dessicated coconut and some silver cachous. Of course, if you’re less lazy than me, you could do fancy things like pipe over a different coloured icing or do faces on them … For me, sprinkling was good enough and also meant that decorating them was a lot quicker than I expected!
So overall, the Sunbeam cake pop maker gets a thumbs up. It is easy to use, does the job and the recipes (or at least the one I tried!) work. It’s also quick. The only drawback I see is how hot it gets.
However, I think the best recommendation is that when I posted on my personal Facebook page that it had arrived one of my relatives immediately posted: “I have one and it is very good. All even in size and no hot spots like one may have in an oven.”
I guess now I just need to learn to decorate!