Apple Crumble

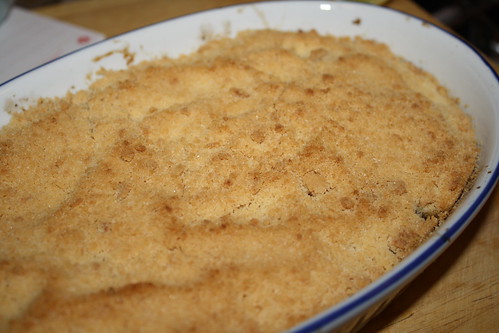
Apple Crumble & Custard

While Spring is technically just around the corner here in Adelaide it’s still really cold. After a pleasant couple of days early this week Thursday and Friday are still looking chilly so it’s not too late to think about making an apple crumble.

This is the easiest of desserts to make. For the two of us, and using a small pie dish, I peeled and quite coarsely sliced 2 Granny Smith apples – let’s say I cut them into eighths. I put them in a pan on low heat, with a splash of water, a scant tablespoon of caster sugar and half a cinnamon stick. I then walked away and ended up doing a pile of other things and when I remembered that I had apples on the stove they were almost at puree stage. Oops! Perhaps don’t cook yours quite so long. Really you just want to soften them a bit but have them retaining their shape.

I put my puree in the pie dish, no greasing required, and topped it with a layer of finely sliced Granny Smith (to ensure the finished product had some texture).

For the crumble I used 100g plain flour, 25g caster sugar and 50g of unsalted butter. You have no choice with crumble but to make it by hand as you do not want it too fine and you also don’t want it too homogenous: a few chunks here and there are a good thing. So work the crumble mixture by hand until the butter is mostly all incorporated – a few small bits here and there is fine. Overall, the mixture should resemble coarse sand.

Spread the crumble over the apples. Don’t press it down to form a hard crust (that’s called pastry and you’ve done it wrongly!). Bake in an oven preheated to 200°C (conv) for 40 minutes or until the crumble starts to turn golden.

Serve hot or warm, with cream, ice cream or custard.

Chocolate Pudding Recipe

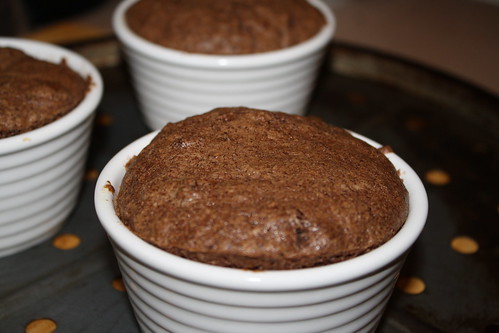
Jamie Oliver's Chocolate Puddings

I was looking around for a chocolate pudding recipe and when I found this one by Jamie Oliver I thought I’d give it a go, because it has the bonus of being gluten free. As you may know, despite living a very gluten filled life myself, I’m always on the look out for gluten free recipes, because I have a few relatives who are either coeliac or avoid gluten.

This recipe has also been posted relatively recently over at Just as Delish. If you’re interested in gluten free recipes, or recipes with a healthy slant, check it out.

Jamie’s recipe, originally featured in Jamie’s Kitchen, serves 6. As we were just two (this was originally going to be made for Andy’s birthday, but it took me a while to get organised) I halved things, made three puddings and fed one to my mum for morning tea.

Begin by melting 60g of dark chocolate with 25mL (5 tsp) of strong black coffee (espresso, if you’re in my household!). I did this as usual in the microwave and a burst at 30 seconds on high was long enough to cause the chocolate to seize. As this is a tiny amount of chocolate, with liquid, be very careful if you’re using the microwave. Otherwise, just chop up the chocolate and pour over the piping hot coffee. Pour the mix into small ice cube trays and freeze.

I used 4″ ramekin dishes as my moulds. Jamie tells you to use 3″ pastry rings or dariole moulds. This makes me pretty sceptical about his quantities for this recipe because even though I halved things and was using larger moulds, I still had enough mixture left over to make a generous sized ‘muffin’ of pudding (the fourth ramekin having been broken some time ago!). So, whether you’re halving or making a full batch, make sure you have a couple of extra moulds in reserve!

Butter the moulds well and refrigerate.

Preheat the oven to 190°C (conventional oven, not fan).

To make the sponge, melt 160g of chocolate with 60g of butter (unsalted). When this mixture has cooled, add to it 3 egg yolks, 50g of ground almonds and 50g of rice flour*.

Whisk the 3 egg whites until soft peaks form and then add 100g of caster sugar and beat until stiff. Note – just because you may have used the KitchenAid while the baby is asleep previously, there is a massive difference between making some brownies using the flat beater and vigorously whisking egg whites on full speed …

Fold the egg whites into the chocolate mix and ensure everything is well combined.

Spoon some mixture into a mould, top with a frozen square of chocolate and coffee, and then cover with more mixture.

Bake for 18-20 minutes (if you’re using a larger mould, like me, you may want to extend that by 5 minutes or so). The puddings will puff up a little while baking and should be reasonably firm.

When done, remove from moulds while hot and serve immediately. We served with cream, because, well, if you’re doing pudding, you may as well do it properly.

While these puddings were nice they were … just that. I thought it was a lot of effort to go to for a dish that didn’t really stand out. I disliked the ‘just in time’ nature of the dish – if you were entertaining you’d spend the pause between dinner and dessert in the kitchen making these as there’s so little you can do in advance. Of course, unmoulding anything is always fraught with danger (and, in this case – massive fail – but I think my puddings were slightly underdone) but there’s no harm in serving this dish unmoulded. It looks fine in the ramekin.

There are other Jamie Oliver recipes I return to time and time again (his spinach and feta pie, and also his brilliant cheesecake recipe, which I haven’t yet written about). But this will not be one of them.

* As mentioned once or twice in other places, rice flour is readily available in Australian supermarkets. Just make sure you buy rice flour and NOT ground rice! Also, if you are cooking for people who have a medical issue with gluten, always check that any products like this are gluten free (100% white rice). You’d be surprised at the places where gluten crops up.

Chocolate and Hazelnut Pithivier

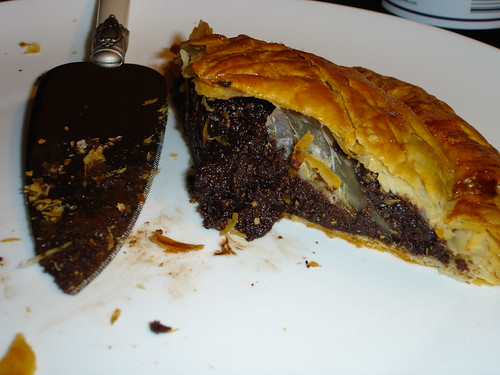
Chocolate pithivier

This is definitely a dish for the health conscious. Or perhaps not, becaused this is really like eating a giant pile of chocolate spread with a giant pile of puff pastry. And this means it’s absolutely delicious – but small servings are required!

As a dessert, this chocolate and hazelnut pithivier, from the April issue of UK Delicious is a bit of a winner. It’s quick to make, it doesn’t need to be served hot so you can make it in advance and (better yet) you can freeze it and have it as a standby dessert. And it’s so rich it will go a long way and you don’t need any special accompaniments (although good fresh cream won’t go astray).

If you’re keen – make your own puff pastry. Otherwise, have to hand 2 sheets of ready made. You’ll need to cut 24 and 26 cm diameter circles from these respectively. Put the smaller circle of pastry on a non stick baking sheet and preheat your oven to 180°C fan.

Making the filling does rather require a food processor – or a lot of patience. The original recipe specifies 150g of blanched hazelnuts. I don’t know if blanched hazelnuts are more readily accessible in the UK than Australia, but when I make this again I’ll be using 150g of ground hazelnuts. Otherwise you’re left with the task of roasting and then peeling the hazelnuts and peeling hazelnuts is a task best left to someone else, as far as I’m concerned!

So – take your 150g of hazelnuts and, if they’re not already ground, whizzy them up with 150g of good quality dark chocolate, 125g of golden caster sugar and 20g of cocoa powder until you get a fine crumbly mix. To this add 25g of unsalted butter, 2 egg yolks and 2 tbsp of dark rum (there’s no reason why a liqueur such as Frangelico wouldn’t work well here). The alcohol is, of course, optional and it’s best not to go mad with it – stick to the 2 tbsp!

Whizzy this up again and you will end up with a firm (and extremely tasty) paste.

Put this paste in the centre of your pastry base, spreading it out evenly and leaving about 1cm around the edge. Take one of your left over egg whites, lightly whisk it and brush this margin with it, before topping the pithivier with the second disk of pastry. Press down carefully at the edge, ensuring there is no air left in the middle (you want to push the pastry down around the filling).

If you can chill the pithivier at this point – that’s a good thing. Leave it in the fridge for about 30 minutes.

When you’re ready to cook, score the top of the pithivier with a swirled spoke pattern and then brush with egg white. Bake for 40 minutes. Keep an eye on it while it’s cooking – if the pastry starts to brown too quickly, lower the temperature a little.

Best served at room temperature – if you can wait that long!